Introduction
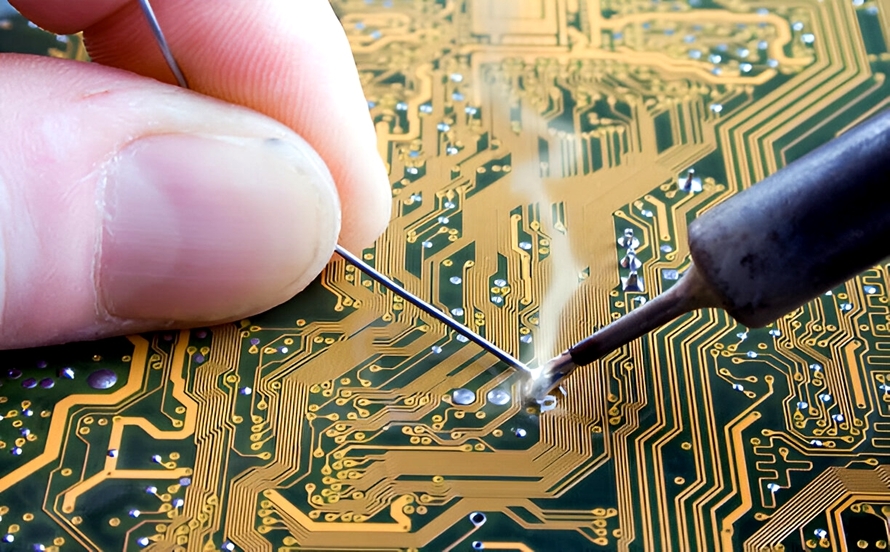
For electronics hobbyists, PCB prototyping is a critical step in bringing ideas to life. Crafting a functional circuit board often involves manual soldering, a skill that can make or break the quality of your prototype. Selecting a reliable soldering station and mastering soldering techniques tailored for PCB prototyping soldering are essential for achieving durable and efficient results. This article explores the importance of a dependable manual soldering station for prototypes, key considerations for soldering in circuit board design, and practical tips for DIY PCB assembly. Whether you are a beginner or an experienced hobbyist, understanding the tools and methods for soldering for circuit board design can elevate your projects to a professional level. Let us dive into the essentials of manual soldering for electronics hobbyists.
What Is Manual Soldering and Why It Matters for PCB Prototyping
Manual soldering is the process of joining electronic components to a printed circuit board using a handheld soldering iron and solder material. This technique is fundamental in PCB prototyping soldering, especially for hobbyists working on small scale projects or custom designs. Unlike automated assembly methods, manual soldering allows precise control over each connection, making it ideal for DIY PCB assembly where adjustments and experimentation are common.
The significance of manual soldering for prototypes lies in its flexibility and accessibility. Hobbyists can test different component placements, troubleshoot issues on the spot, and refine their designs without needing complex machinery. A reliable soldering station for electronics hobbyists ensures consistent heat delivery and safety, preventing damage to sensitive components. Poor soldering can lead to weak joints or circuit failures, emphasizing the need for proper tools and techniques in soldering for circuit board design.
Technical Principles of Manual Soldering for PCB Prototyping
Manual soldering relies on fundamental principles of heat transfer and material bonding. A soldering iron heats the solder, a metal alloy with a low melting point, to create a strong electrical and mechanical connection between components and the PCB. The process involves cleaning the surfaces with flux to remove oxidation, applying heat to both the component lead and the PCB pad, and then introducing solder to form a joint.
Temperature control is a critical aspect of PCB prototyping soldering. Excessive heat can damage components or lift PCB traces, while insufficient heat results in cold solder joints that are unreliable. Most soldering tasks for electronics hobbyists require temperatures between certain ranges as per industry guidelines, and a soldering station with adjustable settings is vital for adapting to different materials and components. Additionally, the use of flux ensures proper wetting of the solder, enhancing the bond quality as outlined in standards like IPC J-STD-004B, which addresses soldering flux requirements.
The choice of solder material also impacts the outcome. Lead free solders, often composed of tin, silver, and copper, are widely used due to environmental regulations. These materials demand precise heat management, underscoring the importance of a reliable soldering station for electronics hobbyists. Understanding these principles ensures that manual soldering for prototypes yields consistent and functional results.
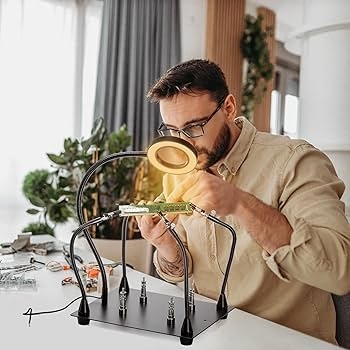
Key Features to Look for in a Soldering Station for Electronics Hobbyists
Selecting the right soldering station is a game changer for DIY PCB assembly. Electronics hobbyists need tools that balance functionality, safety, and ease of use. Here are essential features to consider when choosing a soldering station for electronics hobbyists:
- Temperature Control: Adjustable settings allow you to match the heat to the task, protecting delicate components during PCB prototyping soldering.
- Power Output: A station with sufficient wattage ensures quick heat up and recovery, maintaining stability during continuous use.
- Ergonomic Design: A comfortable grip and lightweight iron reduce fatigue during long soldering sessions for circuit board design.
- Tip Variety: Interchangeable tips cater to different soldering needs, from fine point for small components to broader tips for larger joints.
- Safety Features: Built in stands, heat resistant materials, and auto shut off functions prevent accidents in a hobbyist workspace.
A well equipped soldering station for electronics hobbyists enhances precision and reliability in manual soldering for prototypes. Prioritizing these features ensures your tool supports the demands of varied prototyping tasks without compromising on quality or safety.

Best Practices for Soldering in PCB Prototyping
Mastering soldering for circuit board design requires adherence to best practices that ensure strong, reliable connections. These guidelines are tailored for electronics hobbyists engaging in DIY PCB assembly and manual soldering for prototypes.
Prepare Your Workspace
A clean, organized workspace is essential for PCB prototyping soldering. Ensure proper lighting to see small components clearly. Use a non conductive mat to protect your work surface and prevent static discharge that could harm sensitive parts. Keep tools like tweezers, flux, and desoldering braid within reach for efficient workflow.
Clean Components and PCB Surfaces
Before soldering, clean the PCB pads and component leads to remove dirt or oxidation. Applying flux as per guidelines in IPC J-STD-004B helps improve solder flow and bonding. This step is crucial in manual soldering for prototypes to avoid weak joints that could fail under stress.
Use the Right Technique
Apply heat to both the PCB pad and component lead simultaneously for a few seconds before introducing solder. This ensures even heat distribution, preventing cold joints. Remove the solder first, then the iron, to avoid disturbing the joint. For DIY PCB assembly, practice on scrap boards to refine your technique.
Related Reading: How to Hand Solder Tiny PCB Components (Like 0402 SMDs)
Inspect and Test Connections
After soldering, visually inspect each joint for a shiny, smooth appearance, indicating a good bond. Use a multimeter to check for continuity, confirming the electrical connection. Standards like IPC-A-600K provide criteria for acceptable solder joints, guiding hobbyists in quality assessment.
Avoid Overheating
Limit heat exposure to prevent damage to components or PCB traces. If a joint takes too long, stop and let it cool before retrying. A reliable soldering station for electronics hobbyists with precise control helps maintain optimal temperatures during soldering for circuit board design.
Common Challenges in Manual Soldering and How to Overcome Them
Even with a reliable soldering station, hobbyists may encounter issues during PCB prototyping soldering. Addressing these challenges ensures high quality results in DIY PCB assembly.
Cold Solder Joints
Cold joints occur when solder does not fully melt or bond, resulting in a dull, grainy appearance. They are unreliable and can cause circuit failures. To fix this, reheat the joint with adequate temperature and apply fresh solder with flux to ensure proper wetting, following practices in IPC J-STD-001H for soldered electrical assemblies.
Component Damage
Excessive heat can damage sensitive components like integrated circuits. Use a heat sink or clip to dissipate heat away from the component body. Limit soldering time and choose a soldering station for electronics hobbyists with accurate temperature settings to prevent overheating during manual soldering for prototypes.
Lifted Pads
Applying too much force or heat can lift PCB pads, breaking the circuit path. Work gently and avoid dragging the soldering iron across the board. If a pad lifts, use jumper wires to bridge the connection, though prevention through careful technique is ideal for soldering for circuit board design.
Related Reading: The Do's and Don'ts of Hand Soldering: Avoiding Common Pitfalls for Optimal Results
Troubleshooting Tips for Consistent Results
Troubleshooting is an integral part of mastering PCB prototyping soldering. Electronics hobbyists can use these tips to address issues during manual soldering for prototypes.
- Test Equipment Regularly: Ensure your soldering station maintains consistent heat output by checking with a temperature probe if available. Inconsistent heat leads to poor joints in DIY PCB assembly.
- Replace Worn Tips: A degraded soldering tip can hinder heat transfer. Keep tips clean with a wet sponge or brass wire cleaner and replace them when worn to maintain precision in soldering for circuit board design.
- Practice Desoldering: Removing components without damage is a valuable skill. Use desoldering braid or a suction tool to clear old solder, following safe practices to protect the PCB during rework.
Conclusion
A reliable manual soldering station is a cornerstone for electronics hobbyists engaged in PCB prototyping soldering. By understanding the technical principles, selecting a suitable soldering station for electronics hobbyists, and applying best practices, you can achieve professional quality results in DIY PCB assembly. Overcoming common challenges and troubleshooting effectively further enhances your skills in soldering for circuit board design. Investing time in mastering manual soldering for prototypes not only boosts the success of your projects but also builds confidence in tackling complex designs. Equip yourself with the right tools and knowledge to transform your ideas into functional circuits with precision and care.
FAQs
Q1: What is the best soldering station for electronics hobbyists starting with PCB prototyping?
A1: For beginners in PCB prototyping soldering, a soldering station with adjustable temperature control and a power range suitable for small components is ideal. Look for ergonomic design and safety features to ease the learning curve. Ensure it supports various tip sizes for versatility in DIY PCB assembly projects, allowing adaptation to different tasks without compromising quality.
Q2: How can I avoid damaging components during manual soldering for prototypes?
A2: To prevent damage during manual soldering for prototypes, use a heat sink to absorb excess heat from sensitive components. Limit soldering time to a few seconds per joint and select a soldering station for electronics hobbyists with precise temperature settings. Following guidelines like those in IPC standards ensures safe heat application for delicate parts.
Q3: What techniques improve soldering for circuit board design as a hobbyist?
A3: Improving soldering for circuit board design involves cleaning surfaces with flux before soldering, applying heat evenly to both pad and lead, and using the right amount of solder. Practice on scrap boards to build consistency. Adhering to visual inspection criteria from standards like IPC-A-600K helps ensure strong, reliable joints in your projects.
Q4: Why is flux important in DIY PCB assembly and soldering processes?
A4: Flux is crucial in DIY PCB assembly as it cleans surfaces by removing oxidation, ensuring better solder wetting and bonding. It prevents weak joints and enhances connection reliability during PCB prototyping soldering. Using flux as per IPC J-STD-004B guidelines helps hobbyists achieve professional results with minimal defects in their circuit designs.
References
IPC J-STD-004B — Requirements for Soldering Fluxes. IPC, 2011.
IPC J-STD-001H — Requirements for Soldered Electrical and Electronic Assemblies. IPC, 2021.
IPC-A-600K — Acceptability of Printed Boards. IPC, 2020.