Introduction
For electronic hobbyists, assembling printed circuit boards with surface mount technology components can be a daunting task. Manually placing tiny parts on a PCB requires precision and patience, often leading to errors or fatigue. A pick and place machine offers a solution by automating this process, making it faster and more accurate. This tutorial guides you through building a basic DIY SMT machine using Arduino, an accessible and versatile platform for electronics projects. Whether you are prototyping a home automation PCB assembly or exploring Arduino project electronics, this open source pick and place setup can elevate your hobby to a new level. With step-by-step instructions, we aim to demystify the process, helping you create a functional tool tailored to small-scale assembly needs.
What Is a Pick and Place Machine and Why It Matters
A pick and place machine is a device used to automate the placement of electronic components onto a printed circuit board. In industrial settings, these machines handle high volumes with extreme precision, adhering to strict standards like IPC-A-600K for PCB acceptability. For hobbyists, a DIY SMT machine serves a similar purpose on a smaller scale, reducing manual effort and improving consistency when working on Arduino project electronics.
The importance of such a tool lies in its ability to streamline home automation PCB assembly. Surface mount components, often smaller than a grain of rice, are challenging to place by hand. A basic Arduino pick and place setup ensures better alignment and reduces the risk of misplaced parts, which can cause circuit failures. For hobbyists experimenting with open source pick and place designs, this project also offers a hands-on way to learn about robotics, programming, and mechanical systems.
Related Reading: Pick and Place Programming: A Step by Step Guide for PCB Assembly
Technical Principles Behind a Pick and Place Machine
Understanding the core principles of a pick and place machine helps in designing an effective DIY version. The system relies on three main elements: mechanical movement, component handling, and control logic.
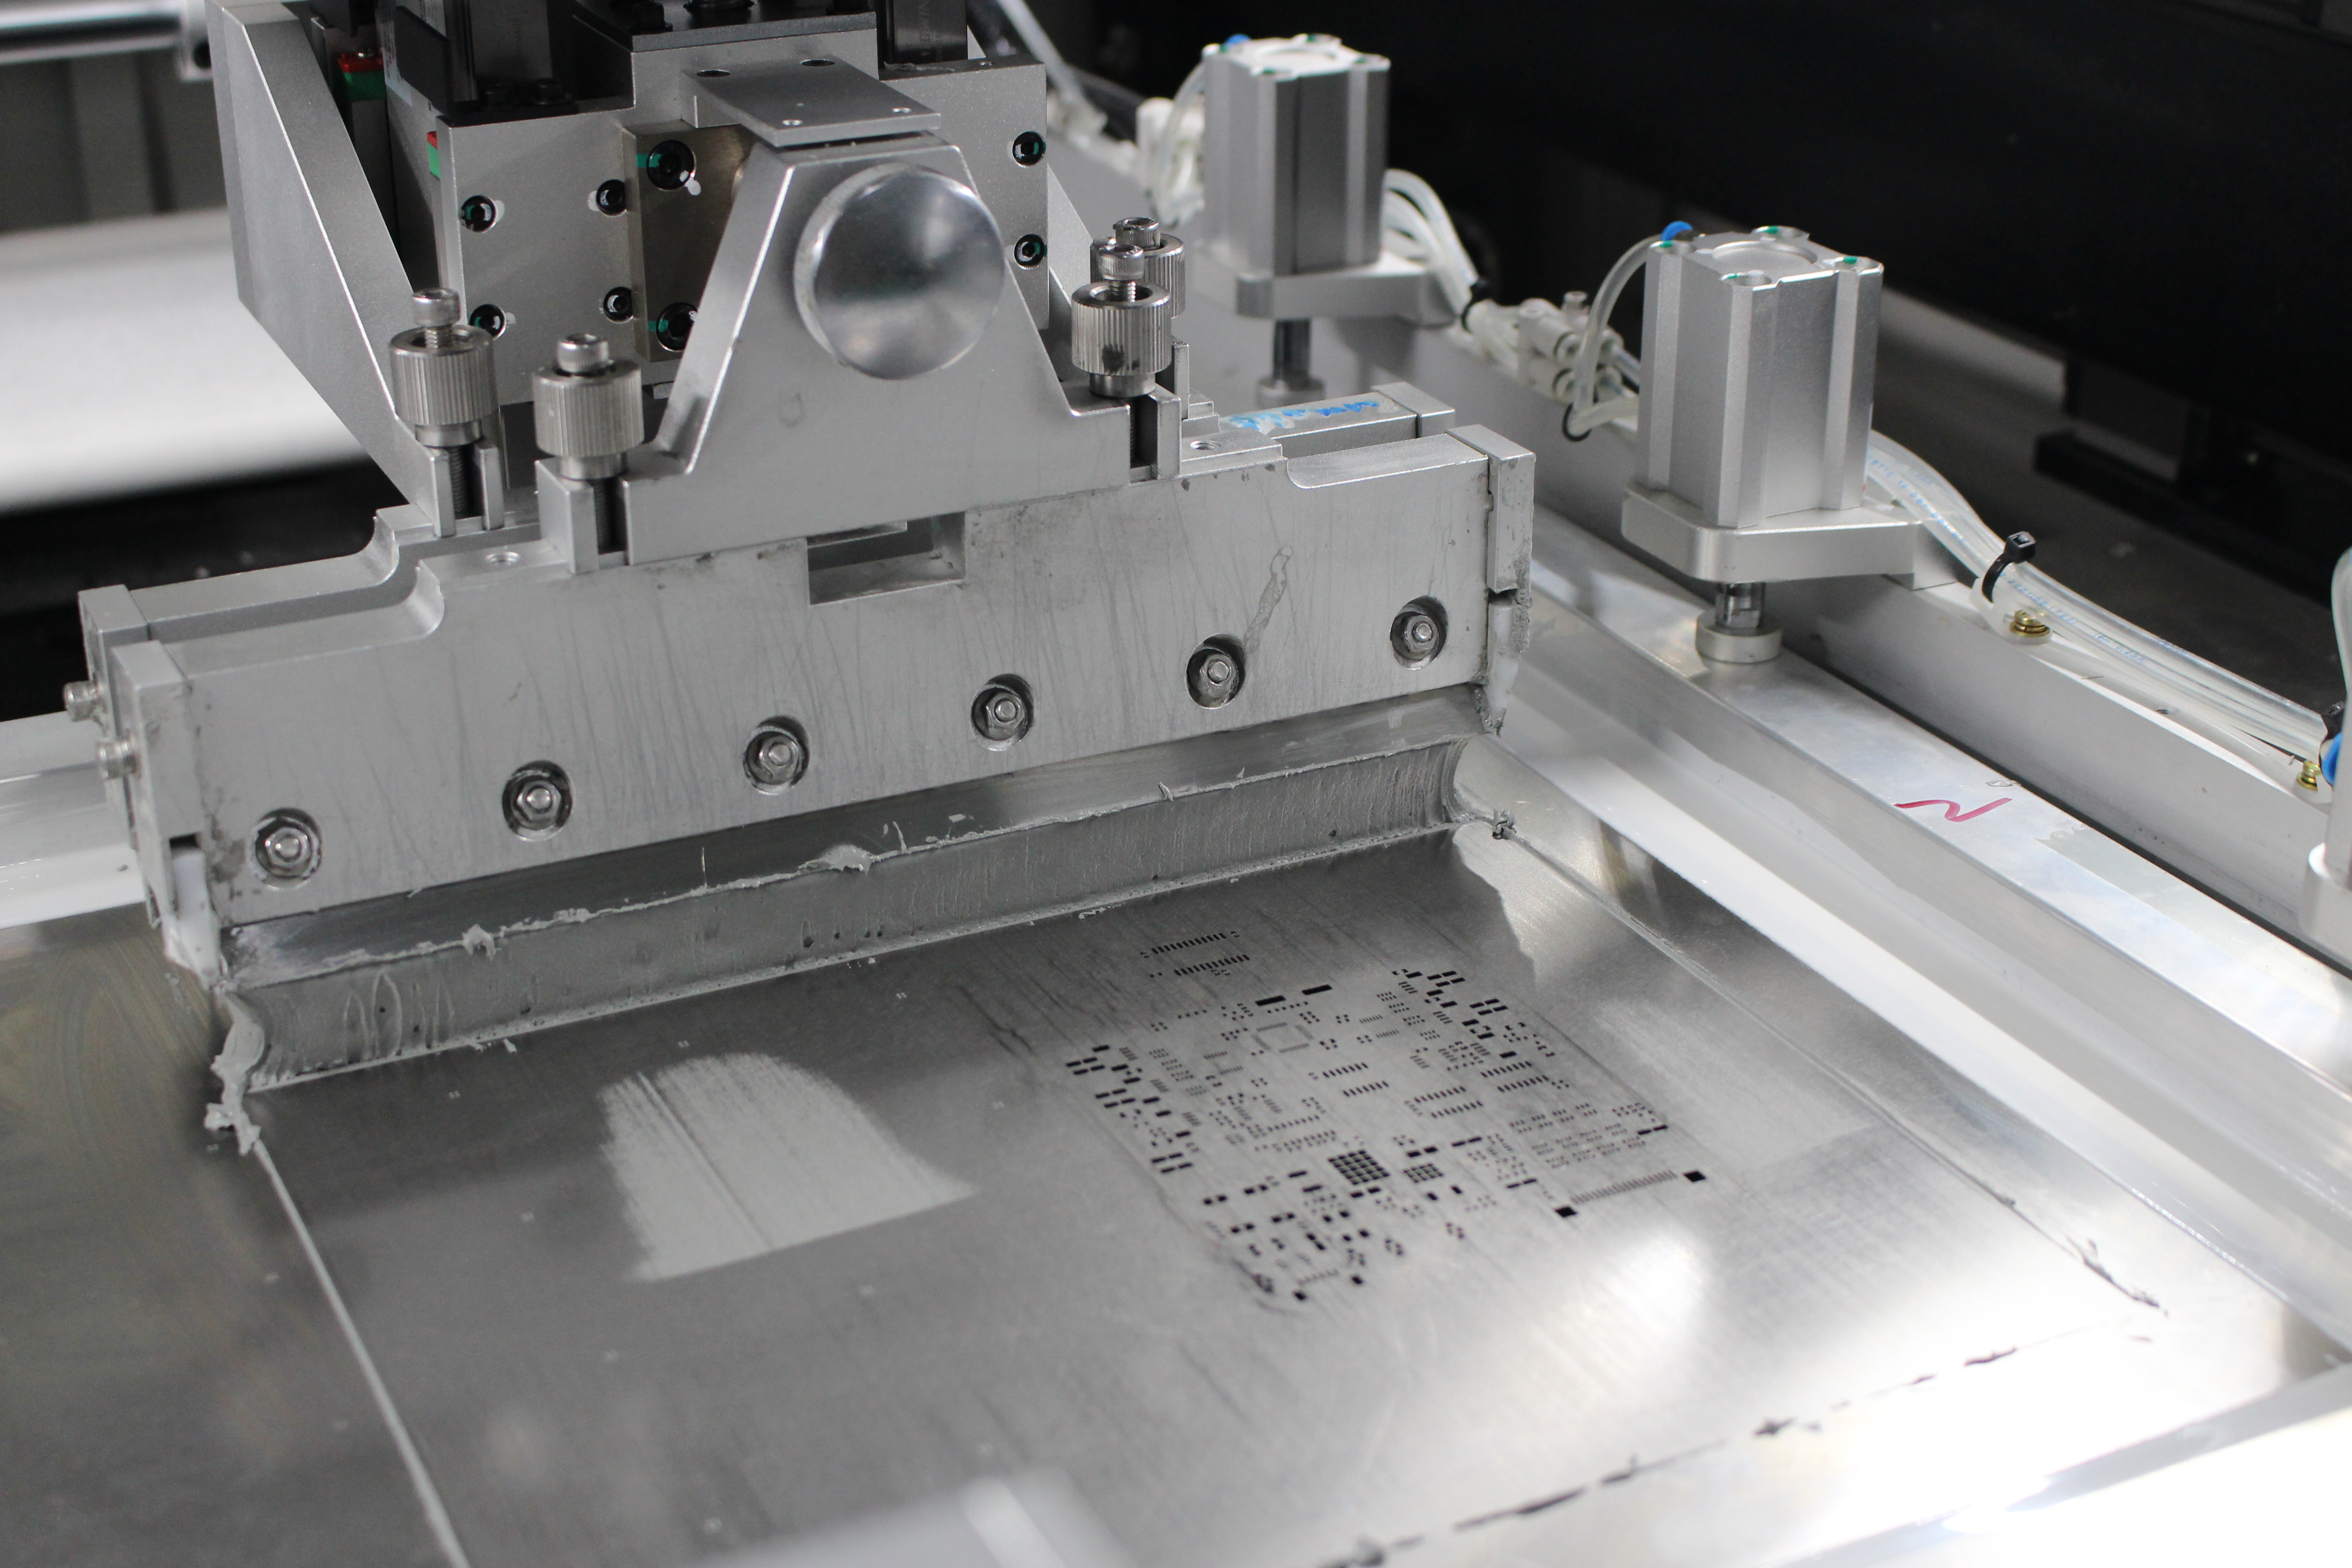
The mechanical structure typically involves a gantry or Cartesian robot design, where motors move a head assembly along X, Y, and Z axes. Stepper motors are common due to their precision in positioning. For component handling, a vacuum nozzle or gripper picks up parts from a feeder and places them on the PCB. The control logic, managed by an Arduino microcontroller in this case, coordinates motor movements and triggers the pickup or release actions based on programmed instructions.
Accuracy in movement is critical, as even a slight offset can misplace components. Standards like IPC-6012E, which governs rigid PCB performance, emphasize precise component placement to ensure electrical connectivity. In a DIY SMT machine, calibration of motors and sensors plays a vital role in achieving this precision, even if it does not match industrial levels.
Components Needed for Your Arduino Pick and Place Machine
Before starting the build, gather the necessary materials. Below is a list of essential components for a basic setup. Quantities and specifications can vary based on your design, but this provides a starting point for hobbyists.
- Arduino microcontroller board for control logic
- Stepper motors for X, Y, and Z axis movement
- Motor drivers to interface motors with Arduino
- Linear rails or rods for smooth axis motion
- Vacuum pump and nozzle for component pickup
- Frame materials like aluminum extrusions or 3D-printed parts
- Power supply suited for motors and electronics
- USB camera or vision system for manual alignment
- Miscellaneous hardware like belts, pulleys, and screws
Additionally, software tools are required. An integrated development environment for Arduino programming will be used to write and upload code. For advanced users, open source pick and place frameworks can enhance functionality, though this tutorial focuses on a basic manual control setup.
Step-by-Step Guide to Building Your DIY SMT Machine
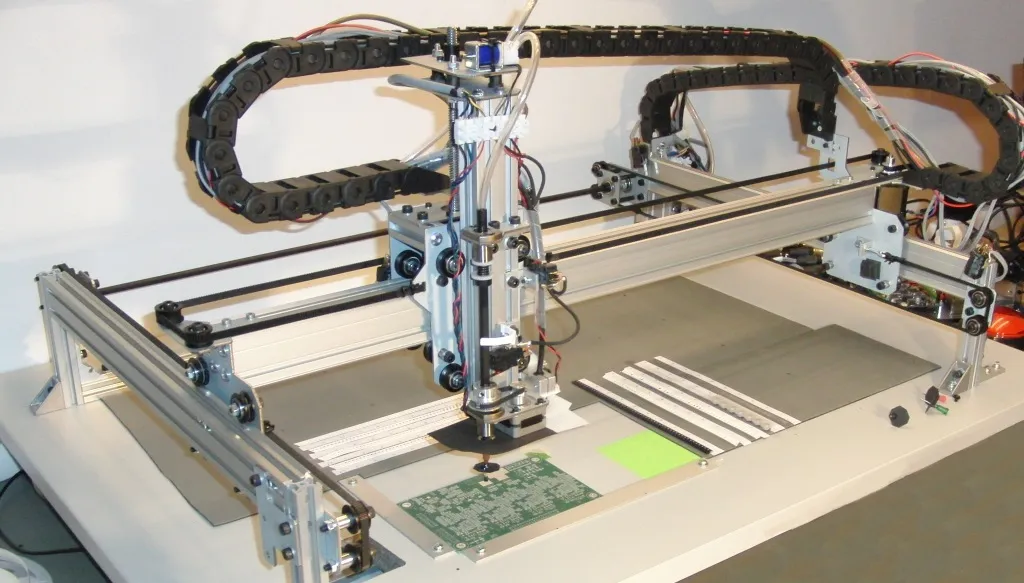
Step 1: Designing the Mechanical Structure
Begin by constructing a stable frame to support the moving parts. A Cartesian design with three axes works well for simplicity. Use linear rails or rods to guide movement along each axis. Ensure the frame is rigid to avoid vibrations that could affect precision. Hobbyists can use 3D-printed brackets or aluminum extrusions based on available tools and budget.
Mount stepper motors to control each axis. Connect them to the moving head using belts or lead screws for accurate positioning. Test the motion manually to confirm smooth operation before adding electronics.
Step 2: Setting Up the Vacuum Pickup System
The pickup mechanism is crucial for handling components. A small vacuum pump connected to a nozzle can lift surface mount parts. Attach the nozzle to the Z-axis head, ensuring it can move up and down to pick and place components. Test the suction strength to confirm it can hold small parts without damaging them.
Step 3: Wiring the Electronics
Connect the stepper motors to their respective drivers, then link the drivers to the Arduino board. Follow standard wiring practices to avoid short circuits. Add a power supply that matches the voltage and current needs of your motors and board. If using a camera for alignment, integrate it into the system for visual feedback during operation.
Step 4: Programming the Arduino
Write a basic program to control motor movements and vacuum operation. Start with simple commands to move the head to specific coordinates and activate the pickup mechanism. Use a serial monitor to send manual instructions for testing. Below is a conceptual outline of the logic:
- Initialize motor positions to a home point.
- Accept input for target X, Y, Z coordinates.
- Move head to pick up a component from a feeder.
- Move to PCB location and release the component.
Refine the code by adding error checking or calibration routines as needed. For hobbyists new to programming, numerous open source Arduino libraries simplify motor control.
Step 5: Calibration and Testing
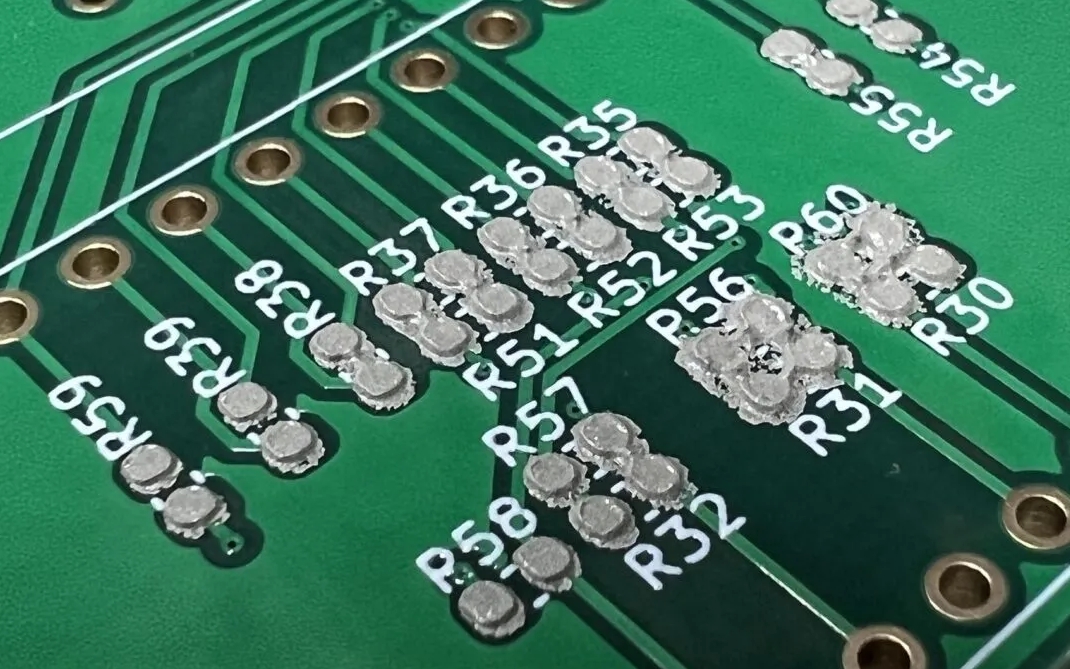
Calibrate the system to ensure accurate placement. Move the head to known positions and measure any offset. Adjust the code or mechanical setup to correct discrepancies. Test with dummy components to simulate real assembly. Check if the vacuum holds parts securely and places them within acceptable tolerances, referencing guidelines like IPC-A-600K for visual acceptability of placement.
Step 6: Enhancing with Open Source Frameworks
For those seeking automation beyond manual control, integrating an open source pick and place software can be beneficial. These tools allow importing PCB design files to automate component placement. While setup is more complex, they transform your DIY SMT machine into a semi-automated tool for home automation PCB assembly.
Troubleshooting Common Issues
Even with careful planning, issues may arise during the build or operation. Below are common problems and practical solutions for hobbyists.
- Motor Movement Inaccuracy: Check for loose belts or misaligned rails. Verify step counts in the code match physical movement.
- Vacuum Pickup Failure: Ensure the nozzle is clean and the pump provides sufficient suction. Test with different component sizes.
- Software Glitches: Debug the Arduino code line by line. Use serial output to monitor variable values during operation.
- Component Misplacement: Recalibrate the system. Use a camera or visual aid to confirm head position before placement.
Patience is key. Iterative testing and adjustment will improve the performance of your Arduino pick and place setup over time.
Benefits of a DIY Pick and Place for Hobbyists
Building an Arduino pick and place machine offers multiple advantages for electronic hobbyists. It reduces the tedium of manual assembly, allowing focus on design and innovation. The project also serves as a learning platform for understanding robotics and control systems. Cost wise, a DIY SMT machine is far more affordable than commercial alternatives, making it accessible for small-scale home automation PCB assembly.
Moreover, using open source pick and place resources fosters collaboration within the hobbyist community. Sharing designs and improvements can lead to better solutions for everyone. This hands-on approach aligns with the ethos of Arduino project electronics, encouraging creativity and experimentation.
Related Reading: The Essential Guide to Manual Pick and Place for Beginners
Conclusion
Constructing a basic pick and place machine with Arduino empowers electronic hobbyists to tackle surface mount technology assembly with confidence. From designing a sturdy frame to programming precise movements, each step builds valuable skills in electronics and mechanics. While not as advanced as industrial systems, this DIY SMT machine meets the needs of small projects like home automation PCB assembly. By following this tutorial, you can create a functional tool that enhances your workflow. Embrace the challenge, refine your setup, and explore the potential of open source pick and place designs for future innovations.
FAQs
Q1: How can an Arduino pick and place machine improve my hobby projects?
A1: An Arduino pick and place machine automates the placement of surface mount components, saving time and reducing errors in PCB assembly. It is ideal for small-scale projects, offering precision that manual methods lack. Hobbyists can focus on design rather than repetitive tasks, making complex builds more manageable.
Q2: What challenges might I face with a DIY SMT machine build?
A2: Building a DIY SMT machine can involve issues like motor inaccuracy or vacuum pickup failures. Calibration is often tricky, requiring patience to adjust mechanical and software elements. Start with simple designs and test frequently to identify problems early in the process.
Q3: Are open source pick and place frameworks suitable for beginners?
A3: Open source pick and place frameworks can be complex for beginners due to setup and programming requirements. Start with basic manual control using Arduino before exploring these tools. They are powerful for automation but demand a solid understanding of the underlying system.
Q4: How precise is a home automation PCB assembly with an Arduino setup?
A4: Precision in home automation PCB assembly with an Arduino setup depends on calibration and component quality. While not matching industrial standards, careful tuning can achieve acceptable results for hobbyist needs. Regular testing ensures placement aligns with visual acceptability guidelines.
References
IPC-A-600K — Acceptability of Printed Boards. IPC, 2020.
IPC-6012E — Qualification and Performance Specification for Rigid Printed Boards. IPC, 2017.