Why Choose DIY PCB Etching at Home?
Creating your own printed circuit boards (PCBs) in a home setting offers several distinct advantages. It presents a cost-effective solution for electronic prototyping, enables rapid design iterations, and grants you complete oversight of the fabrication process. While industrial fast turn circuit board manufacturing guarantees precision and scalability for large-volume production, DIY techniques are perfectly suited for small-scale projects, educational purposes, or simply for hobbyists looking to experiment. By utilizing readily available household ingredients, you can sidestep the complexities and safety concerns associated with industrial chemicals such as ferric chloride, making PCB etching with vinegar and hydrogen peroxide a much safer and more accessible option.
Essential Materials and Tools for Homemade PCB Etching
Before commencing the etching process, it’s important to gather all necessary materials and tools. A key benefit of this straightforward PCB etching method is that most items can either be found around your home or procured affordably from a local store.
Core Materials for Your Etchant Recipe
You will need a copper-clad board, which serves as the foundation for your PCB; these are available as single-sided or double-sided options from electronics suppliers. For design transfer, prepare a laser printer, glossy paper (like magazine pages), and a standard clothes iron for the toner transfer method. The etchant solution ingredients include white vinegar (typically 5% acetic acid), hydrogen peroxide (a 3% solution), and common table salt. Ensure you have appropriate safety gear, such as rubber gloves and safety goggles, and work in a well-ventilated area for protection. Lastly, a non-metallic container, such as a plastic tray, is required for the etchant solution.
Tools for Preparation and Finishing
For preparing the board, gather fine sandpaper, a permanent marker (optional for touch-ups), a drill or rotary tool for creating holes, and acetone or rubbing alcohol for cleaning.
The Fundamentals of PCB Etching Without Ferric Chloride
PCB etching is essentially the process of selectively removing unwanted copper from a copper-clad board to form the conductive pathways for your electronic circuit, and the same fundamental principles apply when fabricating specialized boards such as copper metal core PCB used for enhanced thermal management. Unlike traditional methods that rely on strong industrial chemicals, our homemade PCB etchant recipe employs vinegar and hydrogen peroxide to achieve similar results in a much safer manner. In this solution, vinegar functions as a mild acid, while hydrogen peroxide acts as an oxidant to accelerate the chemical reaction. Table salt is incorporated as a catalyst, further boosting the efficiency of the etching process.
It’s worth noting that this particular method typically takes longer than industrial etchants, often requiring 30-60 minutes compared to 10-15 minutes with ferric chloride. However, for beginners who prioritize safety and convenience, this trade-off in speed is often well worth it.
Step-by-Step Guide to DIY PCB Etching at Home
Let’s meticulously break down the process into clear, executable steps. Adhering closely to these instructions will help you achieve optimal results with this accessible PCB etching technique.
Phase 1: Design and Board Preparation
Begin by designing your PCB layout using a suitable software tool (many free, open-source options are available). It’s crucial to ensure your design features traces with a minimum width of 0.25 mm to guarantee reliable etching, as finer lines may not transfer effectively with DIY methods. Once satisfied with your design, print it onto glossy paper using a laser printer. The toner on the paper will act as a protective resist during the etching process, safeguarding the copper traces you wish to retain. Next, prepare the copper-clad board by thoroughly cleaning it to eliminate any dirt or oxidation. Lightly sand the surface with fine-grit sandpaper (400-600 grit) until it appears shiny. Follow this by wiping the board down with rubbing alcohol or acetone to remove any residual grime; a pristine surface is essential for proper toner transfer and subsequent etching.
Phase 2: Design Transfer and Etchant Preparation
Proceed to transfer the design to the board. Position the printed design, toner side down, onto the copper board. Using an iron set to a high temperature (without steam), heat the paper for approximately 5-10 minutes, applying firm, even pressure to ensure the toner firmly adheres to the copper. After the board cools, immerse it in water for a few minutes to soften the paper, then gently peel or rub away the paper. The black toner pattern should now be visible on the copper. If any areas of the transfer are incomplete, carefully touch them up with a permanent marker. Now, it's time to prepare the homemade PCB etchant recipe. In a non-metallic container, combine equal parts white vinegar (around 200 ml) and 3% hydrogen peroxide (about 200 ml), then add one teaspoon of table salt. Stir gently until the salt is fully dissolved. While significantly safer than traditional etchants, this solution still requires careful handling. Always wear gloves and safety goggles, and work in a well-ventilated area to avoid inhaling any fumes.
Phase 3: Etching, Cleaning, and Finishing
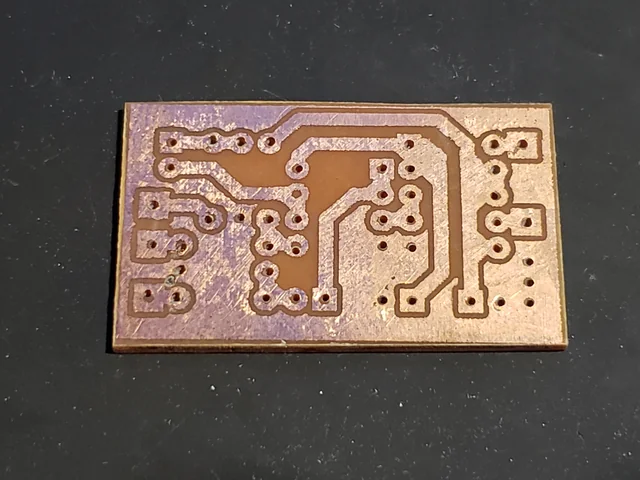
Carefully etch the PCB by placing the prepared board into the etchant solution, ensuring the copper side is fully submerged. Gently agitate the container every 5-10 minutes to keep the solution circulating over the board, which helps to accelerate the etching process. Depending on the solution’s strength and the copper thickness (typically 1 oz/ft² or 35 micrometers), etching can take anywhere from 30 to 60 minutes. You will observe the exposed copper dissolving, leaving behind only the toner-protected traces. Periodically check the board; once all unwanted copper is gone, promptly remove the board and rinse it thoroughly with water to halt the etching reaction. Finally, clean and finish the board. After rinsing, use acetone or rubbing alcohol to remove the toner, revealing the shiny copper traces beneath. Inspect the traces for any breaks or imperfections. If everything looks good, drill holes for your components using a small drill bit (0.8-1.2 mm is common for most through-hole components). If desired, lightly sand the board's edges for a polished appearance.
Tips for Achieving Excellent Results and Safe Practices
Even with a beginner-friendly method, a few expert tips can significantly improve your results and ensure a safe working environment.
Maximizing Etching Success
To expedite the etching process, work in a warm environment; temperatures around 25-30°C (77-86°F) are ideal. You can gently warm the solution by placing its container in a larger tray of warm water, but never heat the etchant directly. Monitor the solution's condition carefully: if the etchant turns dark blue or green, it indicates saturation with dissolved copper and its effectiveness will diminish. If this occurs, prepare a fresh batch. It's also wise to test on a small board first if you are new to DIY PCB etching at home. Practicing on a scrap piece of copper-clad board will help you gauge the process and optimize your technique.
Responsible Disposal and Safety Guidelines
Dispose of waste responsibly: The used etchant solution contains dissolved copper ions, which are environmentally harmful. Never pour it down the drain. Instead, store it in a clearly labeled container and transport it to a local hazardous waste disposal facility. Although PCB etching with vinegar and hydrogen peroxide is considerably safer than using harsh chemicals, always wear protective gear, including gloves and safety goggles, to prevent any contact with the solution. Work in a well-ventilated area to avoid inhaling fumes from the chemical reaction. Crucially, keep the etchant solution away from children and pets, and ensure all containers are clearly labeled to prevent accidental misuse.
Conclusion: Your Gateway to DIY PCB Creation
DIY PCB etching at home offers an accessible and gratifying path to bringing your electronics projects to fruition. This comprehensive guide has equipped you with an easy PCB etching method, utilizing common household materials like vinegar and hydrogen peroxide. Our homemade PCB etchant recipe provides a safer alternative to traditional chemicals, enabling even beginners to achieve excellent results without the need for ferric chloride.
By meticulously following the outlined steps—from design and transfer to etching and finishing—you can produce functional PCBs for your prototypes or small-scale ventures. Always prioritize safety, exercise patience throughout the etching process, and dispose of waste responsibly. With consistent practice, you will steadily build confidence in crafting custom circuit boards tailored precisely to your needs.
Ready to immerse yourself in PCB etching with vinegar and hydrogen peroxide? Gather your materials, establish a safe workspace, and begin experimenting with this beginner-friendly technique. Your next innovative project is simply an etch away!