Introduction
Creating a homemade PCB is a rewarding endeavor for electronic hobbyists. It allows you to design and build custom circuits for personal projects. However, one critical step often overlooked by beginners in PCB fabrication at home is applying a solder mask. A solder mask is a protective layer that shields copper traces from oxidation, prevents solder bridges during assembly, and enhances the durability of your board. For hobbyists venturing into DIY solder mask techniques, this guide offers a comprehensive look at methods like toner transfer solder mask and UV solder mask. Whether you're etching PCBs in your garage or applying solder mask at home, these beginner-friendly approaches will help elevate the quality of your homebrew boards. Let's explore the essentials of protecting your creations effectively.
What Is a Solder Mask and Why It Matters
A solder mask is a thin polymer layer applied over the copper traces of a printed circuit board. It serves multiple purposes in both professional and homemade PCB production. Primarily, it insulates the conductive paths, preventing accidental short circuits during soldering. It also protects the copper from environmental factors like humidity and dust, which can lead to corrosion over time. Additionally, it provides a clean, professional appearance by covering unnecessary areas and leaving only the soldering pads exposed.
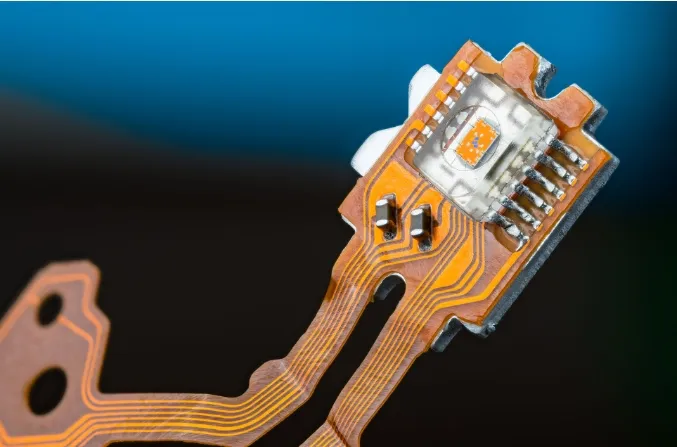
For hobbyists working on DIY projects, a solder mask is crucial for reliability. Without it, bare copper traces are prone to damage during handling or soldering, leading to potential failures in your circuit. Applying solder mask at home not only extends the lifespan of your board but also simplifies the assembly process by guiding solder placement. Understanding its importance is the first step toward creating robust and functional homebrew boards during fast turn PCB fabrication at home.
Technical Principles of Solder Masking
The principle behind a solder mask lies in its ability to act as a barrier. Typically made from epoxy or other durable polymers, it is applied to the PCB surface after the copper traces are etched. The mask covers all areas except for the pads and vias where components will be soldered. This selective application ensures that solder adheres only to designated spots, avoiding unwanted connections.
In professional settings, solder masks are often applied using liquid photoimageable materials or dry film techniques, followed by precise exposure and development processes. For hobbyists etching PCBs, simpler methods like toner transfer solder mask or UV solder mask are more accessible. These DIY approaches mimic the industrial process by using heat, light, or chemical reactions to bond the mask material to the board. The key is to achieve uniform coverage without gaps, ensuring full protection of the copper beneath. Standards like IPC-A-600K provide guidelines on acceptable solder mask application, emphasizing defect-free coverage and adhesion.
DIY Solder Mask Methods for Beginners
Toner Transfer Solder Mask
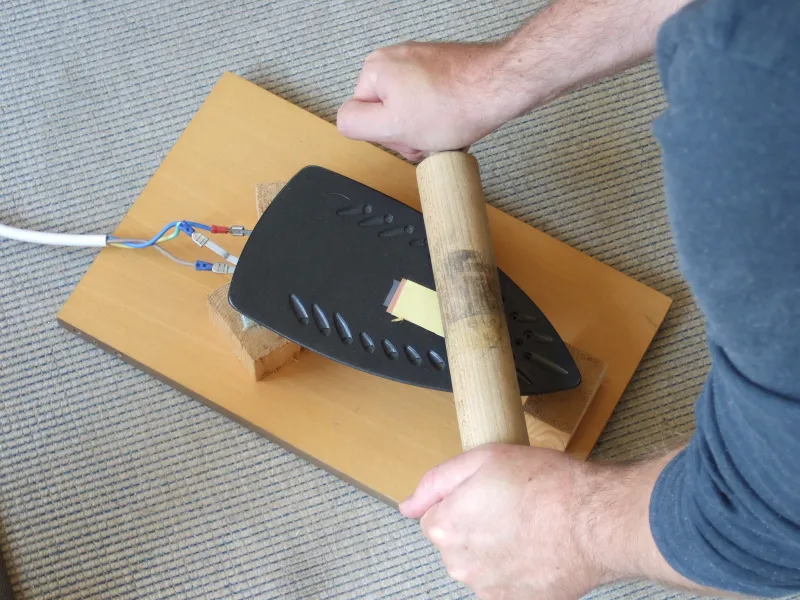
One of the most accessible techniques for hobbyists is the toner transfer solder mask method. This approach uses a laser printer to transfer a mask pattern onto the PCB surface, similar to how traces are transferred during etching. Start by designing your solder mask layout in a PCB design software, ensuring it covers all areas except the pads and vias. Print this design onto a glossy paper or transparency film using a laser printer.
Next, clean your etched PCB thoroughly to remove any residue. Align the printed design over the board and use a household iron to transfer the toner by applying heat and pressure. The toner will adhere to the copper surface, acting as a temporary mask. After cooling, soak the board in water to remove the paper, leaving the toner pattern behind. To make this a permanent solder mask, apply a thin layer of protective paint or epoxy over the toner. This method is cost-effective for PCB fabrication at home but requires practice to avoid smudges or incomplete transfers.
UV Solder Mask Application
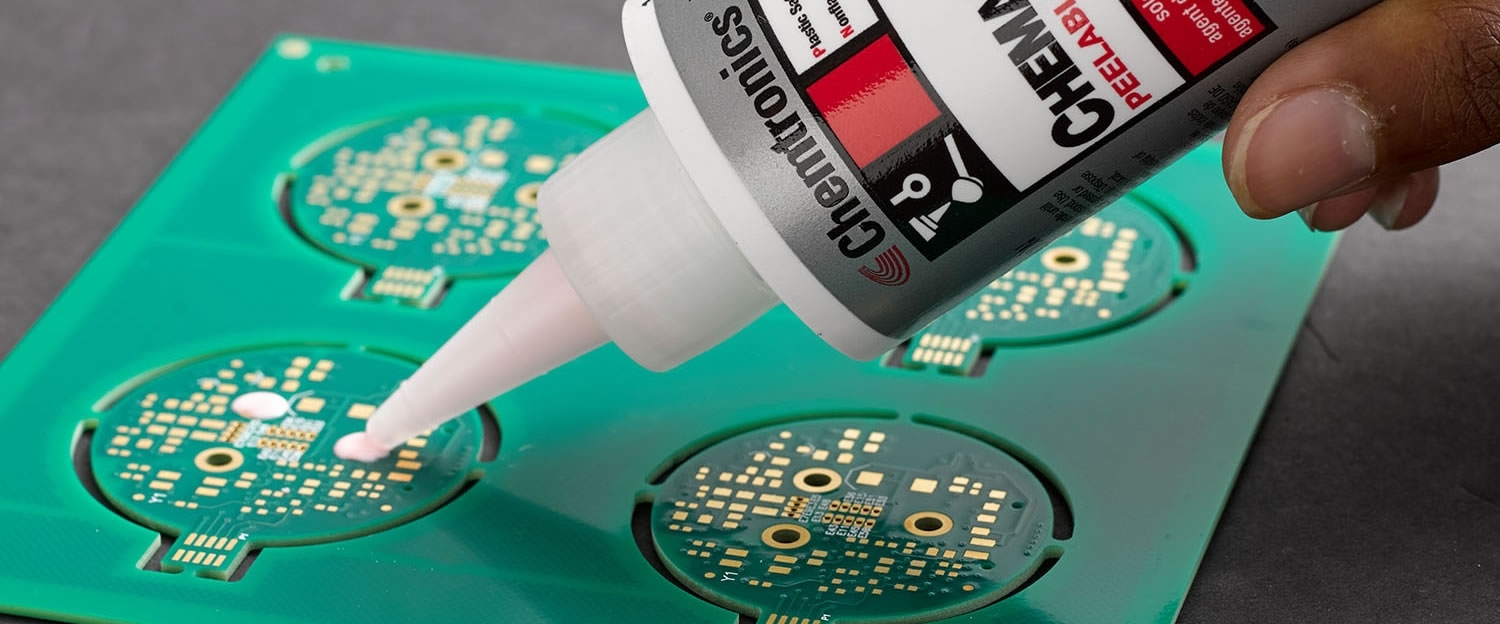
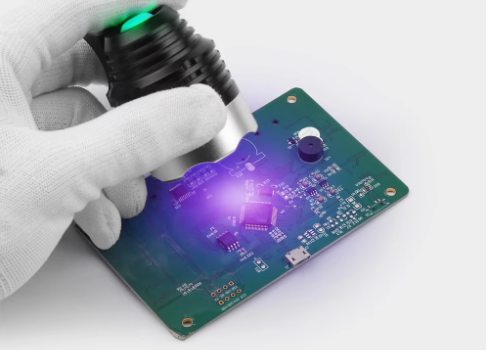
For a more professional finish, UV solder mask is a popular choice among hobbyists. This method involves using UV-curable paint, which hardens when exposed to ultraviolet light. First, purchase a UV-curable solder mask paint from a reliable source. Clean your PCB to ensure no dust or grease remains on the surface. Apply the paint evenly across the board using a brush or a squeegee, covering all areas except the soldering pads. You can use a stencil or transparency film with your mask design to block UV light from curing certain areas.
Once applied, expose the board to a UV light source, such as a UV lamp or even sunlight, for the recommended duration, usually a few minutes. The exposed areas will harden, while the unexposed paint can be washed away with a developer solution or solvent. This leaves a precise solder mask layer. UV solder mask offers better durability compared to toner transfer and aligns with guidelines in standards like IPC-6012E for protective coatings.
Suggested Reading: A Step by Step Guide to Solder Mask Application Techniques
Manual Painting for Simple Projects
If you are working on a small or one-off homemade PCB, manually painting a solder mask can be a quick solution. Use a high-temperature resistant paint or epoxy designed for electronics. Clean the board and apply the paint with a fine brush, carefully avoiding the pads and vias. This method lacks precision but works for basic projects where aesthetics are not a priority. Ensure the paint dries completely before soldering to avoid fumes or melting. While not as refined as other methods, it still provides basic protection during PCB fabrication at home.
Best Practices for Applying Solder Mask at Home
Achieving a reliable solder mask on a homemade PCB requires attention to detail. Below are practical tips to ensure success with DIY solder mask techniques:
- Surface Preparation: Always clean the PCB thoroughly before applying any mask. Use isopropyl alcohol and a brush to remove oxidation, dust, or oils. A clean surface ensures better adhesion.
- Test First: Practice your chosen method on a scrap board. Whether using toner transfer solder mask or UV solder mask, testing helps refine your technique and avoid mistakes on the final board.
- Work in a Ventilated Area: Some solder mask materials release fumes during application or curing. Ensure your workspace has proper ventilation to avoid health risks.
- Use Protective Gear: Wear gloves and safety glasses when handling chemicals or UV light sources to protect yourself during the process.
- Inspect for Defects: After applying the mask, check for pinholes or uneven coverage. Standards like IPC-A-600K highlight the importance of defect-free solder masks for reliability.
Following these practices will help you avoid common pitfalls and produce a functional protective layer while etching PCBs or applying solder mask at home.
Troubleshooting Common Issues in DIY Solder Masking
Even with careful preparation, issues can arise during DIY solder mask application. One frequent problem is poor adhesion, where the mask peels off or fails to stick to the copper. This often results from inadequate cleaning or insufficient heat during toner transfer. Ensure the board is spotless and experiment with iron temperature settings for better results.
Another issue is incomplete curing in UV solder mask applications. If the mask remains tacky or soft, it may not have been exposed to UV light long enough. Check the manufacturer’s recommendations for exposure time and ensure your light source is adequate. Additionally, solder mask bleeding onto pads can occur if the application is too thick or if stencils are misaligned. Use thin layers and double-check alignment to prevent this.
For hobbyists etching PCBs, air bubbles or pinholes in the mask can expose copper, leading to corrosion. Apply the mask in thin, even coats and inspect under good lighting to catch defects early. Addressing these challenges will improve the quality of your homebrew boards.
Conclusion
Solder masking is a vital step in creating durable and reliable homemade PCBs for electronic hobbyists. By exploring DIY solder mask techniques like toner transfer solder mask and UV solder mask, you can protect your copper traces and achieve a more professional finish during PCB fabrication at home. Each method, whether manual painting or advanced UV curing, offers unique benefits tailored to different skill levels and project needs. With proper preparation, practice, and adherence to best practices, applying solder mask at home becomes an achievable task. Equip yourself with the right tools and knowledge to safeguard your homebrew boards and enhance your skills in etching PCBs.
FAQs
Q1: What is the easiest way to apply a DIY solder mask on a homemade PCB?
A1: For beginners, the toner transfer solder mask method is the easiest. Print your mask design with a laser printer, transfer it to the cleaned PCB using an iron, and seal it with protective paint. This requires minimal equipment and is cost-effective for hobbyists starting with PCB fabrication at home. Practice on scrap boards to perfect the heat and pressure application.
Q2: Can I use UV solder mask at home without professional tools?
A2: Yes, UV solder mask can be applied at home with basic supplies. Use UV-curable paint, a brush, and a UV light source like a lamp or sunlight. Apply the paint, expose it to UV light to cure, and wash off uncured areas. It’s a reliable method for durable protection during etching PCBs, even without advanced equipment.
Q3: Why does my toner transfer solder mask peel off after application?
A3: Peeling often occurs due to poor surface preparation or insufficient heat during transfer. Ensure the PCB is cleaned with isopropyl alcohol to remove grease. Adjust the iron temperature and apply even pressure for better adhesion. Following guidelines like those in IPC-A-600K for surface quality can help improve results in homemade PCB projects.
Q4: How important is a solder mask when etching PCBs at home?
A4: A solder mask is crucial when etching PCBs at home. It protects copper traces from oxidation, prevents solder bridges during assembly, and extends board life. Without it, your homemade PCB is vulnerable to damage and shorts. Applying solder mask at home, even with simple methods, significantly boosts reliability and functionality of your projects.
References
IPC-A-600K — Acceptability of Printed Boards. IPC, 2020.
IPC-6012E — Qualification and Performance Specification for Rigid Printed Boards. IPC, 2017.