Why DIY PCB Stencils are Essential for Surface Mount Technology
For electronics hobbyists aiming to produce high-quality Printed Circuit Boards (PCBs) using Surface Mount Technology (SMT), a key tool for precision is a solder paste stencil. This template ensures that solder paste is applied accurately to the correct pads on the board. Without a stencil, attempting to apply solder paste by hand often results in uneven deposits, misaligned components, or undesirable short circuits during the reflow soldering process.
For those working on small production runs or prototypes, the cost of professionally manufactured metal stencils can be prohibitive, often exceeding $50 for a custom design. This is where do-it-yourself (DIY) SMT stencil solutions become invaluable. By crafting stencils from homemade materials, hobbyists can significantly reduce costs while still achieving excellent results for their low-volume projects.
Best Materials for DIY PCB Stencils
The foundational step in fabricating a custom stencil is choosing an appropriate material. This material must exhibit a balance of thinness, durability, and ease of cutting or etching with commonly available tools. Several options stand out for their suitability in hobbyist applications.
Mylar Sheets for Easy DIY PCB Stencils
Mylar sheets are a popular choice among many hobbyists for creating PCB stencils due to their affordability and ready availability. This polyester film is typically thin (ranging from 0.003 to 0.007 inches, or 3-7 mil), flexible, and offers good heat resistance, making it ideal for short-run SMT projects. Mylar can be easily sourced from craft stores or online, often at a cost of just $1-2 per sheet.
Mylar performs exceptionally well with laser cutters, which can precisely define the stencil openings for solder paste application. While not as robust as stainless steel (typically offering 10-20 uses before showing signs of wear), it is perfectly adequate for prototyping or single-use projects where longevity isn't the primary concern.
Transparency Film for Budget PCB Stencil DIY
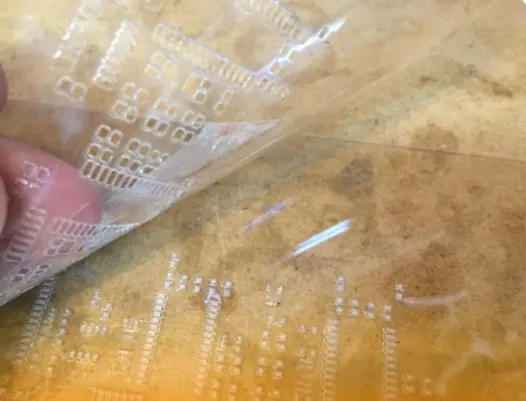
Another cost-effective option involves utilizing transparency sheets designed for laser printers. These clear plastic films, commonly used for overhead projectors, are widely available at office supply stores for approximately 0.5-1 per sheet. They usually have a thickness of about 0.004 inches (4 mil) and can be cut effectively with a laser cutter, or even a craft knife for less intricate patterns.
Transparency sheets are generally less durable than Mylar, often lasting only 5-10 uses. However, their widespread accessibility and ease of use make them an excellent starting point for those new to hobbyist SMT PCB assembly.
Polyimide (Kapton) Film for Durable Surface Mount Stencils
For hobbyists seeking a slightly more robust stencil solution, polyimide film—often recognized by brand names like Kapton—is a strong contender. This material boasts superior heat resistance and is typically a bit thicker (around 0.005 inches or 5 mil), positioning it as an excellent intermediate option between Mylar and professional metal stencils. It can endure higher temperatures during the reflow soldering process and may last for 20-30 uses. While polyimide film is a more premium choice, costing $5-10 per sheet, its increased durability can make it a worthwhile investment for projects requiring more frequent use.
Essential Tools for DIY PCB Stencil Making
Once you've selected the optimal material, the next step involves gathering the necessary tools for cutting and preparing your stencil. A well-equipped workspace will ensure precision and ease in your DIY SMT stencil projects.
Key Equipment for Stencil Creation
● Laser Cutter: This is the preferred tool for achieving highly precise cuts in Mylar, transparency sheets, or polyimide film. Accessing a laser cutter might be possible through a local makerspace or hackerspace if personal ownership isn't feasible. Typical settings for these materials range from 10-20 watts of power with a speed of 50-100 mm/s, depending on the material's thickness.
● Craft Knife or Vinyl Cutter: For those without access to a laser cutter, a craft knife offers a more economical alternative for hand-cutting simpler designs. Alternatively, a desktop vinyl cutting machine can automate this process for less intricate PCBs and larger pads.
● Design Software: Utilize readily available free design tools like Inkscape, or export the solder paste layer directly from your PCB design software. This layer provides the precise pattern for stencil openings.
● Solder Paste and Squeegee: After successfully creating your stencil, you'll need solder paste (lead-free options typically cost $10-15 for a small syringe) and a squeegee or an old credit card to spread it evenly across the stencil.
Step-by-Step Guide to Making a DIY PCB Stencil
With your chosen materials and tools at hand, let's walk through the detailed process of creating an effective homemade stencil for your hobbyist PCB assembly needs. This guide will focus on using a laser cutter with Mylar or transparency sheets, as it's a common and highly precise method for hobbyists.
Preparing Your Stencil Design
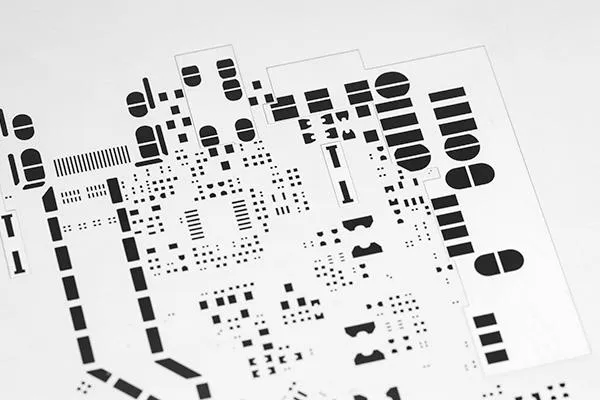
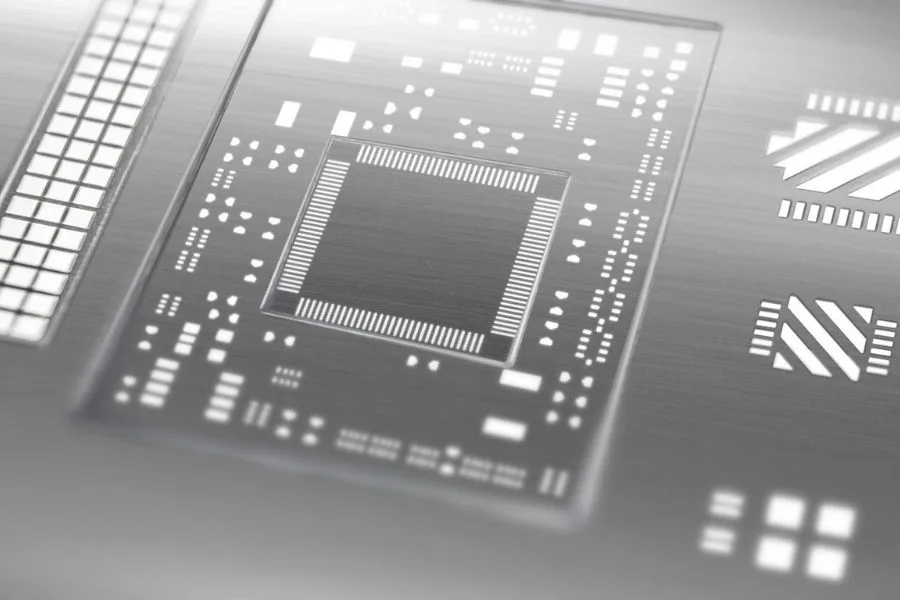
1. Export Your Stencil Design: Begin by opening your PCB design file in your preferred software. Most PCB design applications enable you to export the solder paste layer as a separate file, often in Gerber format. This layer precisely indicates where solder paste should be applied. If necessary, convert this file to a vector format, such as SVG or DXF, to be compatible with your laser cutter's software.
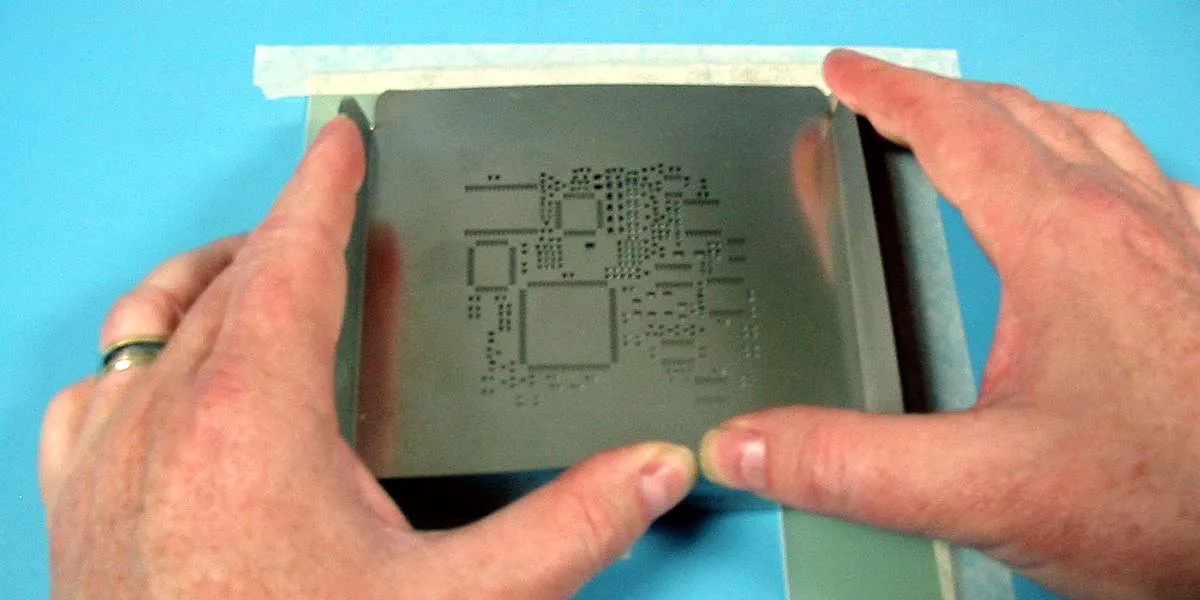
2. Material Preparation and Laser Setup: Securely fasten your chosen material (Mylar, transparency, or polyimide) onto the laser cutter bed. Use tape or a vacuum table to prevent any movement during the cutting process, ensuring the sheet remains perfectly flat for uniform cuts. Load your design into the laser cutter software and adjust the power and speed settings according to your specific material. For a 3-5 mil Mylar sheet, a good starting point is a low power setting (around 10-15 watts) and a moderate speed (50-75 mm/s) to prevent burning. Always perform a test cut on a scrap piece to fine-tune these settings.
3. Cutting and Inspection: Initiate the laser cutter to precisely etch out the openings for the solder paste pads. Once the cutting is complete, carefully remove the stencil and meticulously inspect it for accuracy. Use a magnifying glass to check for any uncut areas or rough edges; minor imperfections can often be cleaned up with a sharp craft knife.
4. Testing and Refinement: Place the newly cut stencil over a spare PCB or a dedicated test board to verify that the openings align perfectly with the solder pads. If any misalignments are observed, adjust your original design file and cut a fresh stencil. Precision is paramount in SMT assembly, so do not bypass this critical testing phase.
Suggested Reading: Step-by-Step Guide to Use a PCB Stencil
How to Utilize Your DIY PCB Stencil for SMT Assembly
Once your custom stencil is prepared, the next phase involves applying solder paste and assembling your PCB. Following these steps will help ensure optimal results for your hobbyist projects.
Application and Reflow Process
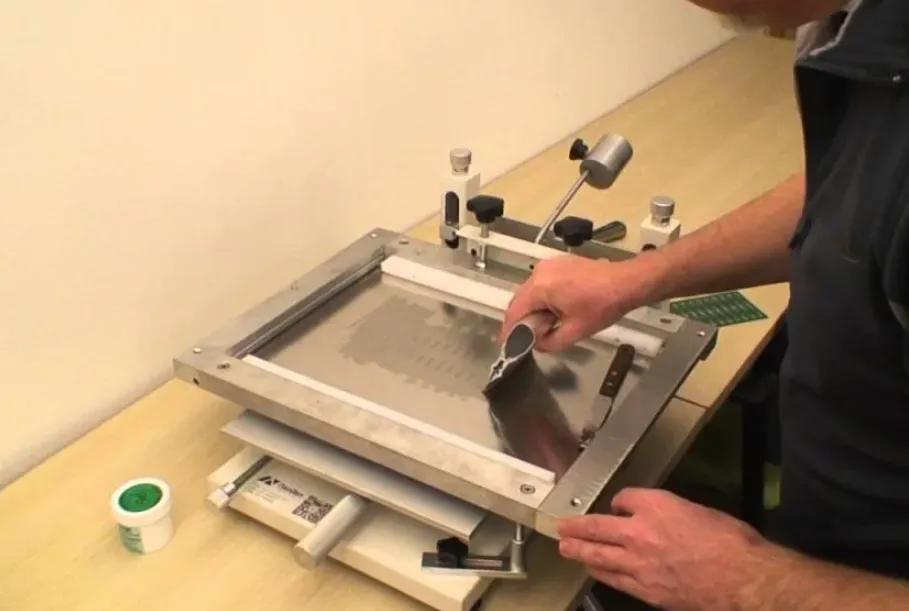
1. Stencil Alignment and Securing: Begin by placing your PCB on a stable, flat surface and securing it with tape to prevent movement. Carefully position the stencil over the board, ensuring that the cutouts align perfectly with the corresponding solder pads. Use additional tape or a custom-built frame to hold the stencil firmly and flat against the PCB.
2. Solder Paste Application: Scoop a small, manageable amount of solder paste onto the stencil. Using a squeegee or a sturdy old credit card, spread the paste across the stencil with consistent, even pressure, typically at a 45-degree angle. Ensure that all the stencil openings are thoroughly filled, but avoid applying excessive paste, as this can lead to unwanted solder bridges between adjacent pads during reflow.
3. Stencil Removal and Inspection: With care, lift the stencil straight up from the PCB to prevent smearing the freshly applied paste. Inspect the PCB to confirm even coverage of solder paste on all pads. Should any stray paste be present, gently remove it using a toothpick or a burst of compressed air.
4. Component Placement: Using fine-point tweezers, precisely place your Surface Mount Technology (SMT) components onto their respective solder paste deposits. The tacky nature of the paste will temporarily hold the components in place.
5. Reflow Soldering: The final step is to heat the assembled board to reflow the solder paste. This can be achieved using a reflow oven, a hot plate, or even a heat gun. For most lead-free solder pastes, the board should be heated to a temperature range of approximately 220-250°C for one to two minutes, strictly adhering to the solder paste’s recommended thermal profile. As the solder melts and then solidifies, it will permanently secure the components to the PCB.
Optimizing Your Results with DIY PCB Stencil Techniques
Creating and effectively using a DIY SMT stencil often involves a learning curve. Here are several practical tips designed to help you improve your results and achieve professional-looking assemblies.
Practical Tips for Success
● Begin with Simpler Designs: For those new to hobbyist PCB assembly, it's wise to start with designs featuring larger pads and fewer components. This simplifies both the stencil creation process and the application of solder paste.
● Maintain Regular Cleaning: After each use, it is crucial to clean your stencil thoroughly with isopropyl alcohol and a soft, lint-free cloth. This removes any residual solder paste, significantly extending the stencil's lifespan and ensuring clean future applications.
● Material Thickness Selection: The thickness of your stencil material is a critical factor. Thicker stencils (e.g., 5-7 mil) will deposit a greater volume of solder paste, which is ideal for larger components. Conversely, thinner stencils (e.g., 3-4 mil) are better suited for fine-pitch components that require less paste to prevent bridging.
● Ensure Secure Alignment: Misalignment is a common challenge. To mitigate this, consider incorporating alignment holes or distinct marks directly into both your stencil design and your PCB layout. These visual guides will greatly facilitate precise positioning during assembly.
Suggested Reading: How Does Stencil Design Impact PCB Assembly Quality?
Understanding the Limitations of a DIY PCB Stencil
While homemade stencil materials like Mylar and transparency sheets offer excellent value for hobbyists, it’s important to acknowledge their inherent limitations when compared to professional-grade stainless steel stencils.
Key Differences from Professional Stencils
● Durability: DIY stencils typically last for a limited number of uses (5-30, depending on the material) before showing wear. In contrast, professional metal stencils are engineered for thousands of cycles, offering significantly greater longevity for mass production.
● Precision: Achieving accurate stenciling for fine-pitch components (pads closer than 0.5 mm apart) can be particularly challenging with homemade materials due to the limitations of cutting tools and material consistency. Professional stencils are manufactured to extremely tight tolerances for such applications.
● Consistency: Handmade stencils may not always provide the same uniform solder paste deposit as commercially produced options. This variability can potentially lead to an increased incidence of soldering defects, especially in complex designs requiring a high degree of precision.
For high-volume production or intricate designs demanding the utmost precision and reliability, investing in a professionally manufactured stencil will likely be more cost-effective in the long run. However, for the majority of hobbyist projects, DIY options offer a remarkably effective and budget-friendly solution.
Cost Comparison: DIY PCB Stencil vs. Commercial SMT Stencils
One of the most compelling advantages of fabricating your own SMT stencil is the substantial cost savings involved. Here’s a comparative breakdown of typical expenses for setting up a DIY SMT stencil system.
Estimated Expenses
|
Item |
Cost (Approximate) |
|
Mylar Sheets (pack of 10) |
$10-15 |
|
Laser Printer Transparency Sheets (pack of 50) |
$25-30 |
|
Polyimide Film (per sheet) |
$5-10 |
|
Solder Paste (small syringe) |
$10-15 |
|
Access to Laser Cutter (makerspace fee) |
$5-20 per hour |
When compared to the typical cost of a custom metal stencil, which can range from $50 to $100 or more, creating multiple DIY stencils costs only a fraction. This makes the DIY approach ideal for experimentation, learning, and managing project budgets effectively.
Conclusion: Start Your DIY PCB Stencil Journey for PCB Assembly
Crafting a DIY SMT stencil using readily available materials such as Mylar sheets or laser printer transparency film provides an accessible and economical entry point into hobbyist PCB assembly. With just a few essential materials, some basic tools, and a commitment to practice, you can achieve results that rival professional quality, all from the convenience of your home workshop.
Whether your goal is to prototype a novel design or assemble a small batch of custom boards, these techniques empower you to save money while simultaneously gaining invaluable hands-on experience. So, gather your Mylar or transparency sheets, access a laser cutter, and embark on your next SMT project today. The realm of precise electronics assembly is now within your reach!