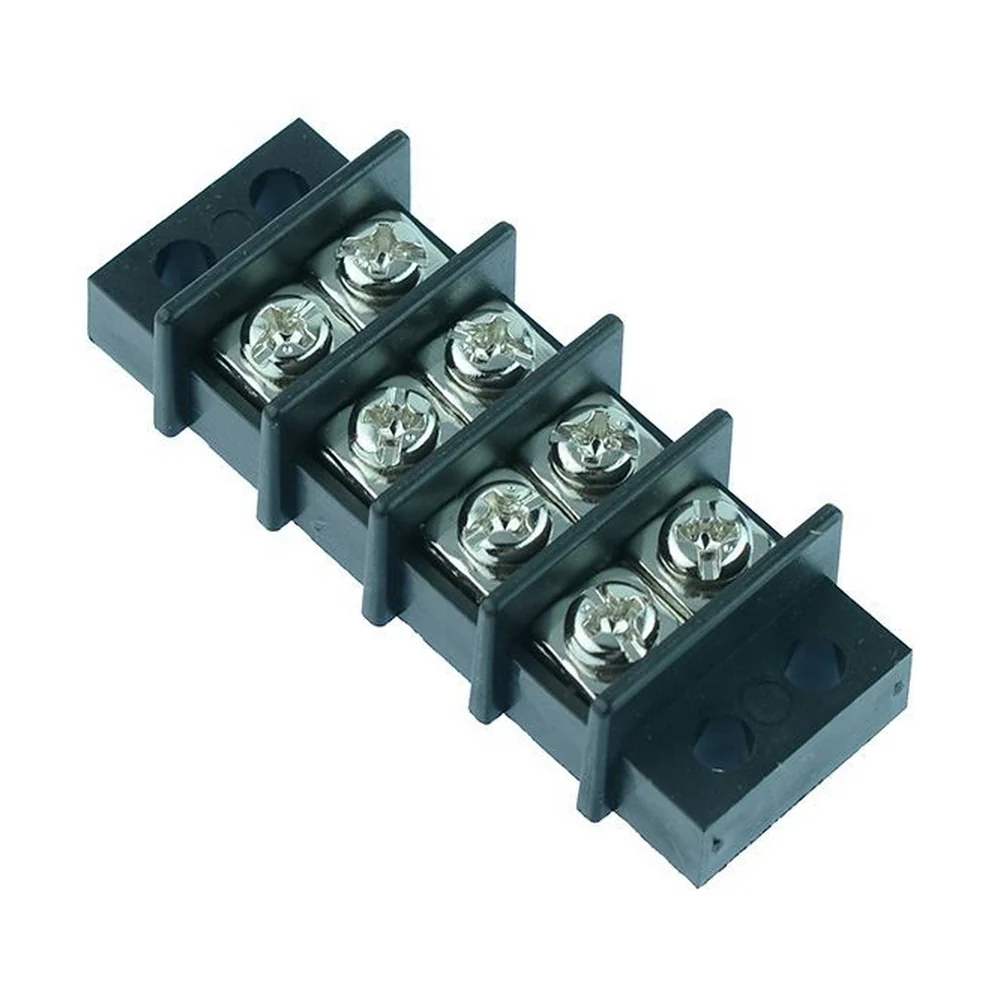
What Are Terminal Blocks and Why Use Them?
Terminal blocks are essentially insulated connectors designed to securely join two or more electrical wires. These modular components come in various forms and sizes, making them highly versatile for hobby electronics. A large PCB manufacturer often integrates terminal blocks into their board designs or provides compatible solutions for prototyping and production. Unlike soldering, which requires specific skills and equipment, terminal blocks enable robust connections that are easily modified or disconnected, making them ideal for prototyping and experimental circuits.
For anyone involved in DIY electronics, from creating Arduino-based automation to setting up LED lighting, terminal blocks offer significant advantages. They eliminate the need for soldering, provide flexibility for circuit adjustments, and enhance safety through insulated designs that prevent accidental short circuits. Their secure grip on wires also minimizes the risk of loose connections, ensuring project reliability.
What Types of Terminal Blocks Are Available?
Before integrating terminal blocks into your projects, it's helpful to understand the different varieties suited for small circuits and hobby applications. The best choice often depends on factors like current and voltage demands, along with the desired mounting style.
Screw Terminal Blocks
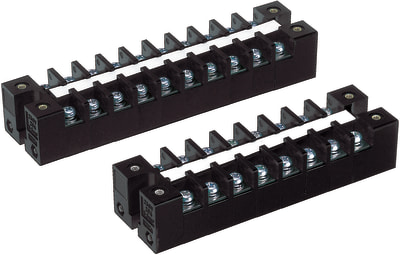
These are perhaps the most common type, featuring a screw mechanism to clamp down on wires. Their reliability and user-friendliness make them a popular choice for Arduino builds and breadboard prototypes. Screw terminals typically accommodate currents up to 15 amps and voltages up to 300V, covering most small-scale electronic needs.
Other Common Terminal Block Styles
Spring-clamp terminal blocks offer a quicker connection method, using a spring to hold wires in place. While convenient for rapid prototyping with LEDs or sensors, they might not be as firm in high-vibration environments. Barrier terminal blocks feature partitions between each connection point to prevent accidental contact, often used in applications with higher voltage or current, though less common in basic hobby setups. DIN rail terminal blocks, while standard in industrial contexts for mounting on a rail, are generally excessive for most beginner DIY projects.
How Do Terminal Blocks Enhance Specific DIY Projects?
Terminal blocks prove particularly valuable for common beginner projects like those involving Arduino microcontrollers, breadboards, and LED circuits. Their design addresses specific challenges faced in these areas, making wiring more manageable and dependable, which is especially helpful during PCBA assembly of small-scale hobby or prototyping boards.
Terminal Blocks for Arduino Setups
Arduino boards are central to many hobby projects, from controlling sensors to motors. Directly connecting external components to Arduino pins can often result in cluttered and unstable wiring. Terminal blocks offer a stable point for these connections. For instance, an Arduino shield equipped with screw terminals allows for neat connections, ensuring a reliable power output (e.g., 5V for a small motor drawing 500mA) without risking intermittent contact.
Terminal Blocks with Breadboards
Breadboards are excellent for quick prototyping, but their internal connections can degrade over time, leading to unreliable circuits. Integrating terminal blocks with a breadboard can create a robust power distribution hub. By connecting a terminal block adjacent to your breadboard, you can provide a consistent power supply (e.g., from a 9V battery or 5V adapter) to all your circuit components, enhancing stability.
Terminal Blocks for LED Lighting Projects
LED projects frequently involve multiple lights wired in series or parallel, requiring secure connections to manage various current levels. Terminal blocks simplify connecting power sources and current-limiting resistors (such as a 220-ohm resistor for a standard 5mm LED) without soldering. This reduces the risk of damaging sensitive components and keeps the wiring organized.
A Beginner's Guide to Using Terminal Blocks
For those new to DIY electronics, incorporating terminal blocks into small circuits is a straightforward process. This step-by-step guide covers the practical aspects for hobby projects.

Step-by-Step Connection Process
Begin by gathering your essential materials: a terminal block (screw or spring-clamp), 22-26 AWG wires, a small screwdriver for screw terminals, your project components (e.g., Arduino, LEDs), and a power source. Next, select a terminal block that meets your project's current and voltage requirements—most beginner setups will be fine with a 10A, 300V rating. Prepare your wires by stripping about 0.25 inches (6mm) of insulation and twisting the exposed strands to prevent fraying.
To connect, loosen the screw on a screw terminal, insert the wire, and tighten securely. For spring-clamp types, press the lever, insert the wire, and release. Always ensure no bare wire is visible outside the terminal. If your terminal block has mounting options, secure it to maintain a tidy setup. Finally, power on your circuit and test all connections to confirm proper operation, troubleshooting any issues by re-checking wire security.
Practical Applications and Best Practices for Terminal Blocks
Terminal blocks offer immense versatility in hobby electronics. Understanding practical examples and safety tips ensures successful and durable projects.
Real-World Project Examples
Consider powering a breadboard circuit: a terminal block can serve as a central power distribution point for sensors and LEDs. Connect a 5V adapter to the block, then run wires to the breadboard's power rails for consistent voltage. For an Arduino-controlled LED array, a terminal block can neatly manage power supply connections to LED anodes, paired with appropriate resistors. In small robotics, a 6V DC motor rated at 500mA can be easily connected to a battery pack or driver circuit via a terminal block, allowing for simple motor or battery swaps during testing.
Safety and Effectiveness Tips
Always check the current and voltage ratings of your terminal block; exceeding these limits can lead to overheating. Use the correct wire gauge (22-26 AWG for most small circuits) to ensure both proper fit and current handling. Avoid overloading a single block with too many high-current devices; distribute loads if necessary. Labeling connections with small tags or color-coded wires helps manage complex circuits. Finally, secure terminal blocks to prevent movement, which can loosen connections over time.
Common Pitfalls to Avoid
Beginners should be mindful of common errors. Loose connections, often from insufficient screw tightening or incomplete wire insertion, can cause intermittent power. Exposed bare wires outside the terminal block pose a short-circuit risk. Incorrect polarity when connecting power sources can damage components. Always replace cracked or worn-out terminal blocks to prevent failure under load.
Sourcing Terminal Blocks for Your Electronics Projects
Terminal blocks are readily available and generally inexpensive, making them accessible to all DIY enthusiasts. You can find them at local electronics retailers, various online marketplaces, or specialized component suppliers.
When purchasing, prioritize options that align with your project's specific current and voltage demands. For those who frequently engage in small circuit projects, buying in bulk often proves cost-effective. Many suppliers offer multi-packs of terminal blocks, making it easy to stock up for numerous hobby electronics endeavors.
Concluding Thoughts on Integrating Terminal Blocks
Terminal blocks stand out as an indispensable tool for anyone venturing into DIY electronics. They provide a straightforward, secure, and reliable method for wiring components, whether you're building an Arduino setup, experimenting on a breadboard, or developing LED lighting projects. By following the guidance provided here, you can confidently incorporate terminal blocks into your hobby electronics, elevating both the quality and efficiency of your builds.
Their inherent versatility and ease of use unlock a myriad of possibilities for beginners. Embrace this practical component, gather your materials, and begin experimenting with your next project. The secure and stable connections you establish today are the foundation for the innovative electronic creations of tomorrow.