Overview
If potholes on your route often force you to swerve, this practical device aims to document their locations so they can be reported for repair. In this article, Nicola King describes a DIY GPS pothole locator built to record precise positions of troublesome potholes.
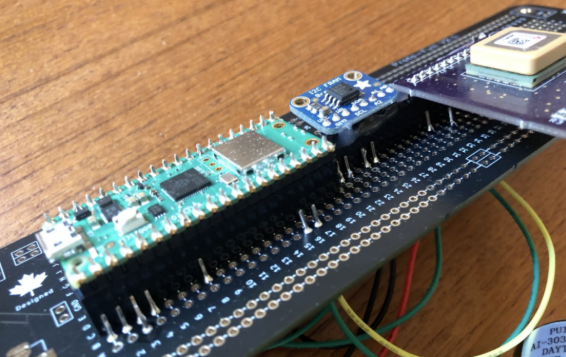
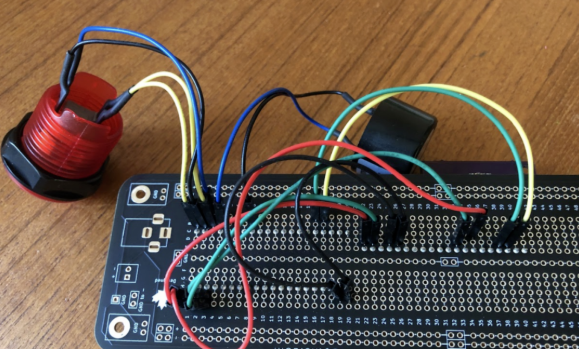
To make the project stable yet modular, the builder soldered rows of headers so boards can be plugged in and removed.
The problem
Potholes are an increasing issue in many regions. Drivers learn where to avoid them by experience, and discovering a new dangerous pothole on a highway can cause damage to your vehicle suspension. The idea behind the device is simple: record the exact location of a pothole so it can be reported to the responsible authorities for repair.
Finger on the button
After a particularly bad, pothole-filled winter in his home country Canada, the maker ScienceDude1990 decided to tackle the issue. He felt a civic duty to help, noting that potholes are annoying for cars and hazardous for cyclists.
Key components
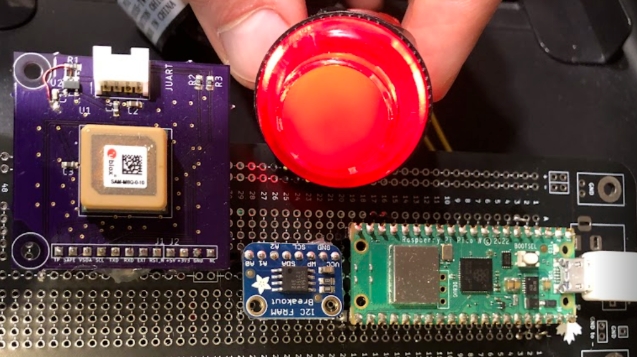
After sourcing components and doing some analog experiments, coding, and soldering, the resulting GPS pothole locator uses a Raspberry Pi Pico W, an Adafruit LED arcade button, a buzzer, a u-blox antenna module (for GPS), and FRAM (ferroelectric RAM) for data storage.
For portable power, the device uses a USB power bank. In the field, users press the button when they encounter a pothole. If the GPS has a lock, the tracker records the button press in FRAM. As the builder explains, "The Pico W receives input from GPS and the arcade button, stores the GPS position, and provides output to the user via the button LED and a buzzer." When users return home, they can create a text file of the recorded locations and forward the pothole information to the appropriate parties.
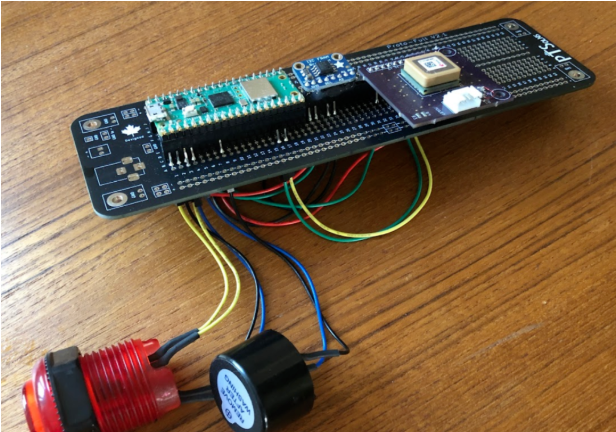
All wiring is on the back of the prototype board, including connections to the button and buzzer.
Software and development notes
The builder reports that the Raspberry Pi Pico W was easy to use with MicroPython and the Thonny IDE. The development environment is lightweight and fast to learn, making it well suited to this kind of project. The most challenging part was learning how to work with the FRAM board using the "os" commands in MicroPython.
He described working with FRAM as a side project to explore how the FRAM chip and Pico W interact, and said he was surprised by how straightforward formatting, mounting, and using the module turned out to be.
Field use and next steps
The device has been used on local roads to report potholes to municipal authorities. The builder recorded potholes in the spring and submitted them through his city's service request system; the potholes were repaired in a timely manner.
When pressed, the arcade button LED flashes and the buzzer sounds to confirm the pothole has been logged.
What remains is a protective enclosure to house the components and improve aesthetics. The builder plans to laser-cut a transparent acrylic case in a makerspace.
Advice for builders
The project is relatively straightforward, but some soldering practice is recommended for complete beginners. The builder suggests prototyping with push-fit wires first, then practicing soldering or using a quick connector scheme. His Hackaday project page provides a link to the GitHub code and includes a Pico pinout diagram.