What Are Thermal Pads and Why Are They Essential for Electronics?
Are you grappling with heat management in your electronic projects and uncertain about the best approach? Thermal pads present a straightforward and highly effective solution for dissipating heat in critical components such as CPUs, GPUs, and various other electronic parts. This guide will demystify thermal pads, explaining their function, proper application techniques, and how they compare to thermal paste. We’ll also discuss how to select the correct thermal pad thickness for beginners and offer practical tips for effortless thermal management. Whether you're undertaking a PC assembly or working on a custom PCB design, this beginner-focused guide is designed to help you maintain optimal component temperatures and ensure smooth, reliable operation. Let’s delve into the world of thermal pads to equip you with the knowledge to safeguard your electronics from overheating using simple, actionable steps.
Understanding the Basics of Thermal Pads
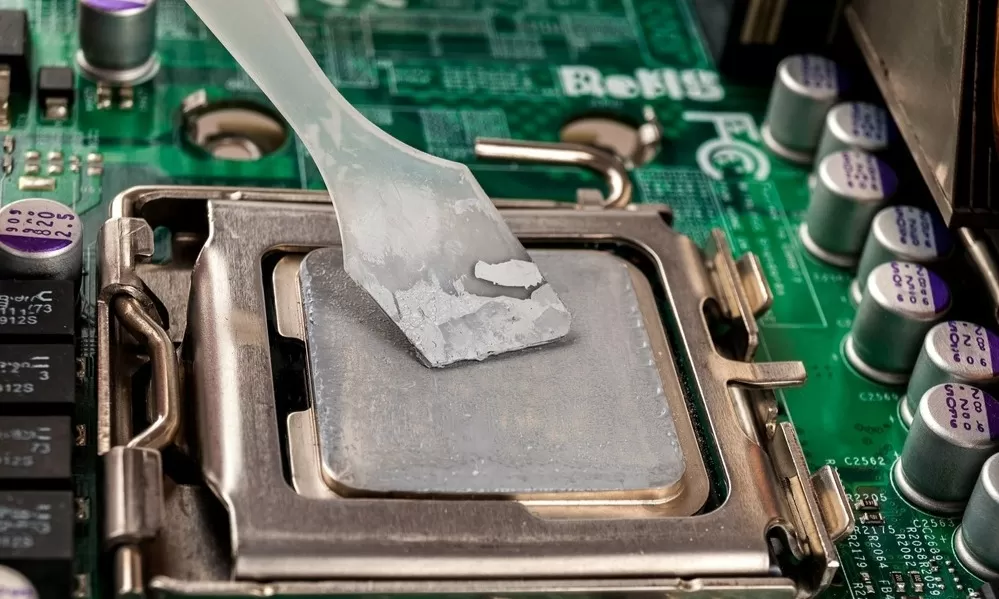
A thermal pad is a soft, conformable material specifically engineered to facilitate heat transfer from electronic components to a heat sink or another cooling system. Typically composed of materials like silicone or graphite, thermal pads are designed to effectively fill the microscopic air gaps that exist between a hot component, such as a processor, and its cooling surface. If these minute gaps are left unfilled, the trapped air—being a poor conductor of heat—can severely impede thermal transfer, leading to potential overheating.
Thermal pads are commonly supplied either pre-cut into precise sizes or in larger sheets that can be trimmed to fit specific requirements. Their thickness generally ranges from 0.5mm to 5mm, and their thermal conductivity is rated in watts per meter-kelvin (W/mK). For example, a standard thermal pad might exhibit a conductivity between 1.5 and 6 W/mK, with higher values indicating superior heat dissipation capabilities. Unlike other thermal interface materials, thermal pads are dry and non-messy, making them an ideal and hassle-free choice for beginners seeking effective heat management in their electronic projects.
Related Reading: Thermal Pad Design for Power Supplies: Enhancing Efficiency and Reliability
Why Use Thermal Pads for Effective Heat Dissipation?
Excessive heat is a primary antagonist to the longevity and performance of electronic components. Elevated temperatures can significantly diminish performance, drastically shorten the lifespan of components, and even result in irreversible damage. For instance, a CPU operating consistently above 85°C for extended durations can experience severe performance throttling or outright failure. Thermal pads mitigate these risks by establishing a direct and efficient pathway for heat to transfer from the component to a dedicated cooling system, thereby ensuring stable and sustained operation.
Thermal pads prove particularly beneficial in a variety of applications, including:
● PC Building: Essential for cooling CPUs, GPUs, and Video RAM (VRAM) modules.
● Laptops and Gaming Consoles: Crucial for managing internal heat within compact enclosures.
● LED Lighting Systems: Where significant heat generation can compromise longevity and efficiency.
● Custom PCB Designs: For protecting heat-sensitive components integrated into bespoke circuit boards.
They are especially well-suited for beginners due to their ease of handling, potential for reusability in some contexts, and the absence of the precision and cleanup typically associated with other thermal solutions.
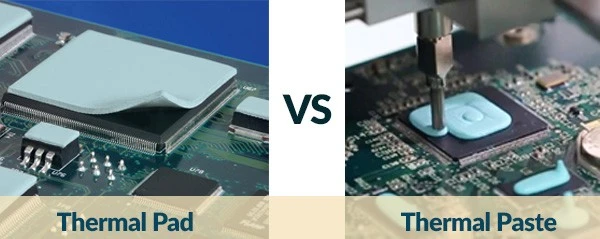
Thermal Pad vs. Thermal Paste: Which is Right for Your Project?
One of the most frequently debated topics in thermal management is the choice between a thermal pad and thermal paste. Both are thermal interface materials (TIMs) designed to enhance heat transfer, yet they possess distinct characteristics. Let’s dissect their differences to help you determine the optimal solution for your specific project.
Thermal Pads: Advantages and Disadvantages
● Pros: Thermal pads are notably easy to apply, entirely mess-free, offer consistent thickness across the interface, are durable, and can even be reused if handled with appropriate care.
● Cons: They generally exhibit lower thermal conductivity (typically ranging from 1-6 W/mK) compared to thermal paste. This makes them less effective for extremely high-performance components or surfaces with significant microscopic unevenness.
Thermal Paste: Advantages and Disadvantages
● Pros: Thermal paste typically boasts higher thermal conductivity (often in the range of 4-12 W/mK or more) and is superior at filling the microscopic gaps on highly uneven surfaces, making it ideal for high-performance CPUs and GPUs.
● Cons: It can be messy to apply, requires careful and precise spreading, can dry out over time, and consequently necessitates periodic replacement to maintain effectiveness.
Making the Right Choice
For beginners or projects where ease of application and cleanliness are top priorities, thermal pads often represent the superior choice. They are perfectly suited for components that do not generate extreme heat or in scenarios demanding a clean, straightforward installation. However, for high-end processors that generate substantial heat (e.g., in gaming PCs), thermal paste is likely to deliver better performance due to its superior heat transfer capabilities and ability to conform to intricate surface imperfections.
Selecting the Correct Thermal Pad Thickness and Application Method
Choosing the Right Thermal Pad Thickness for Beginners
Determining the appropriate thermal pad thickness can initially seem confusing for beginners, but it is a critical factor for effective heat dissipation. Thermal pads are available in various thicknesses, typically spanning from 0.5mm to 5mm. The correct thickness is entirely dependent on the specific gap distance between your component and the heat sink.
If a thermal pad is too thin, it will fail to make proper contact with both surfaces, leaving insulating air gaps that significantly impede heat transfer. Conversely, if the pad is excessively thick, it can generate undue pressure or obstruct the proper mounting of the heat sink, potentially damaging components.
As a general guideline:
● 0.5mm to 1mm: Ideal for extremely tight spaces or components with minimal gaps, such as VRAM chips on graphics cards.
● 1.5mm to 2mm: A common and versatile choice for CPUs and GPUs where a moderate gap typically exists.
● 3mm to 5mm: Utilized for larger gaps, often found in industrial applications or some older hardware designs.
Always consult the specifications provided for your hardware or, if possible, precisely measure the gap using a small ruler or caliper. If uncertainty persists, a 1.5mm pad is often a good starting point as a versatile option for most consumer electronics.
Tip: Some thermal pads are designed to be compressible, meaning they can slightly adapt to the specific gap size when even pressure is applied during installation. Look for pads with a "Shore OO" hardness rating (e.g., 30-50) for greater flexibility and conformity.
Related Reading: Thermal PCB design
Step-by-Step Guide to Applying a Thermal Pad
Learning how to apply a thermal pad is a simple process that does not demand advanced technical skills. Follow these steps to ensure a successful installation:
1. Clean the Surfaces: Begin by thoroughly cleaning both the component (e.g., CPU) and the heat sink using isopropyl alcohol (at least 70% concentration) and a lint-free cloth. This removes any dust, old thermal material, or residue, ensuring maximum surface contact for optimal heat transfer.
2. Measure and Cut (If Required): If your thermal pad is not pre-cut to size, precisely measure the surface area of your component. Use sharp scissors or a utility knife to cut the pad to the exact dimensions. If you are slightly unsure, it's better to leave a small margin, as any overlapping edges can be trimmed later.
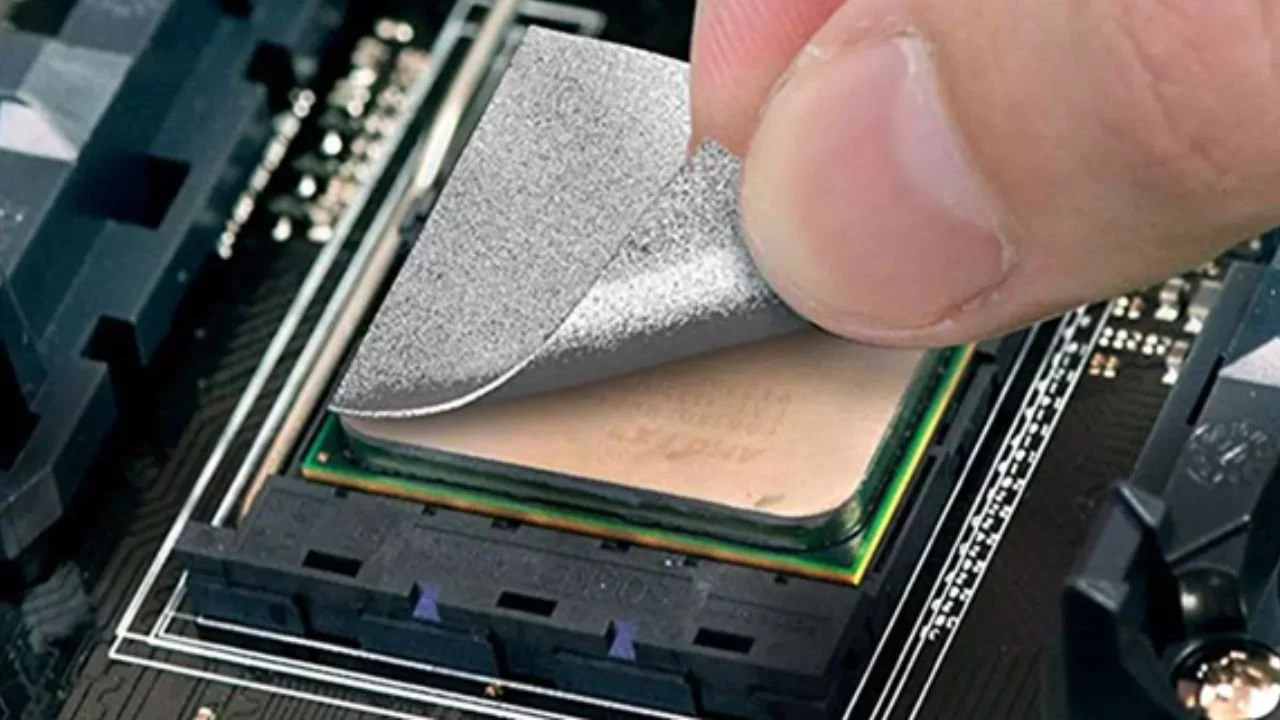
3. Peel and Place: Most thermal pads feature a protective film on one or both sides. Carefully peel off one side of the film and gently place the pad onto the component, ensuring it is perfectly centered and completely covers the entire heat-generating area.
4. Remove the Second Film: Peel off the remaining protective layer (if present) to expose the top surface of the thermal pad.
5. Mount the Heat Sink: Carefully align the heat sink or cooling solution directly over the pad and secure it firmly in place using its designated screws or clips. Apply even pressure during this step to ensure excellent contact without over-tightening, which could potentially damage the component or the pad itself.
6. Check for Gaps: After installation, visually inspect the edges to confirm that the pad is making full, even contact across the entire interface. If you observe any gaps, you may need to consider a slightly thicker pad or readjust the heat sink's positioning.
Easy Thermal Management and Common Pitfalls
Practical Tips for Easy Thermal Management
Achieving effective thermal management doesn’t have to be a complex endeavor. Here are some practical tips to help keep your electronic components cool with minimal effort:
● Monitor Temperatures Regularly: Utilize specialized software tools to consistently monitor the operating temperature of your components after applying a thermal pad. For example, CPUs should ideally operate below 80°C under load. If temperatures are consistently higher, it might be necessary to consider upgrading your cooling solution or re-evaluating the pad's installation.
● Combine Cooling Methods: Thermal pads perform optimally when complemented by efficient airflow. Ensure your device has adequate ventilation or properly functioning fans to effectively dissipate hot air away from the heat sink and components.
● Replace When Necessary: While thermal pads are designed for durability, they can degrade over time due to prolonged exposure to heat and pressure cycles. If you notice a gradual increase in operating temperatures after a year or two, inspect the pad for any signs of cracking, hardening, or loss of flexibility, and replace it with a fresh one if needed.
● Proper Storage: If you have any unused thermal pads, store them in a cool, dry environment, away from direct sunlight. This helps prevent them from hardening prematurely or losing their adhesive and thermal properties.
● Start with Simpler Projects: For those new to thermal management, it is advisable to begin with lower-risk projects, such as upgrading a laptop's cooling system, before tackling more complex and critical builds. This approach helps build confidence and minimizes the risk of costly mistakes.
Common Mistakes to Avoid When Using Thermal Pads
Despite their relative simplicity, there are several common pitfalls that beginners should be aware of when utilizing thermal pads:
● Incorrect Thickness Selection: As previously emphasized, selecting a thermal pad of the wrong thickness can lead to inadequate contact between surfaces and, consequently, inefficient heat transfer. Always meticulously verify the gap size before making a purchase.
● Reusing Worn Pads: While some thermal pads are designed for limited reuse, repeatedly doing so can significantly diminish their effectiveness. If a pad appears worn, compressed, or shows any signs of degradation, it is always best to replace it with a new one.
● Neglecting Surface Cleanliness: The presence of dust, debris, or residues on either the component or the heat sink can prevent the thermal pad from adhering properly, creating insulating air gaps that trap heat and hinder dissipation.
● Overlapping or Misalignment: Ensure that the thermal pad is precisely cut and placed to cover only the intended heat-generating area. Overlapping the pad onto other components or mounting points can interfere with proper assembly or create uneven pressure distribution.
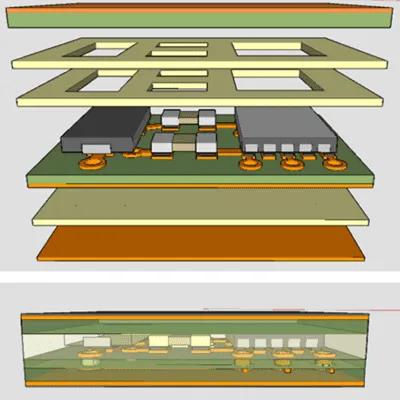
Strategic Placement of Thermal Pads in PCB Designs
For individuals involved in custom PCB design, thermal pads play a critical role in safeguarding heat-sensitive components and ensuring their long-term reliability.
They can be strategically applied to:
● Power Regulators: Voltage regulators frequently generate substantial heat and benefit significantly from thermal pads to efficiently transfer this heat to a metal enclosure or a dedicated heat sink.
● Microcontrollers: Small microcontroller chips that tend to run hot during operation can utilize thin thermal pads for effective cooling without adding undesirable bulk to the design.
● LED Drivers: High-power Light Emitting Diodes (LEDs) produce heat that can degrade their performance and lifespan over time. Thermal pads help maintain efficiency by dissipating this heat effectively.
When devising your PCB layout, it is highly recommended to consider integrating thermal vias near hot components to further enhance heat dissipation. Combining these thermal vias with a well-placed thermal pad can collectively result in a substantial improvement in overall cooling performance.
Suggested Reading: Optimizing Thermal Pad Design for High Power PCB Components: A Comprehensive Guide
Conclusion
Thermal pads offer a beginner-friendly and remarkably effective solution for managing heat in diverse electronic devices. By comprehending the fundamental nature of a thermal pad, mastering the straightforward process of how to apply a thermal pad, understanding the nuanced comparison between thermal pad vs. thermal paste, confidently selecting the appropriate thermal pad thickness for beginners, and adhering to practical tips for easy thermal management, you can successfully maintain optimal component temperatures and significantly extend their operational lifespan. Whether your project involves building a PC, crafting a custom PCB, or upgrading a laptop’s cooling system, thermal pads provide a clean and simple approach to tackling heat dissipation, devoid of the mess or complexity often associated with other methods. It is advisable to begin with smaller projects, meticulously follow the steps outlined in this guide, and consistently monitor your component temperatures to ensure peak performance. With a well-informed strategy, thermal management can be a straightforward and stress-free aspect of your electronic endeavors. Equip yourself with the essential knowledge and proper tools to effectively protect your valuable electronics, and thereby enjoy the enduring benefits of a cooler, more reliable system.