Why are PCB clips the ideal mounting solution for electronics newcomers?
For anyone embarking on their journey in electronics, successfully mounting a printed circuit board (PCB) without causing damage can seem daunting. PCB clips offer an excellent and straightforward answer to this challenge. These small hardware components are designed to hold your circuit board firmly in place, making the assembly process intuitive even for hobbyists. This guide will walk you through everything a beginner needs to know about using PCB clips, from understanding their function to step-by-step mounting instructions for your initial projects. Whether you're aiming for basic PCB mounting or simply an easier circuit board assembly experience, these insights will be invaluable.
At AIVON, we recognize the hurdles beginners often encounter when getting started with electronics. Our goal is to provide comprehensive resources that empower you to confidently master fundamental PCB assembly techniques. Let's explore how PCB clips can streamline your projects and elevate them to a more professional standard.
What defines PCB clips and what benefits do they offer?
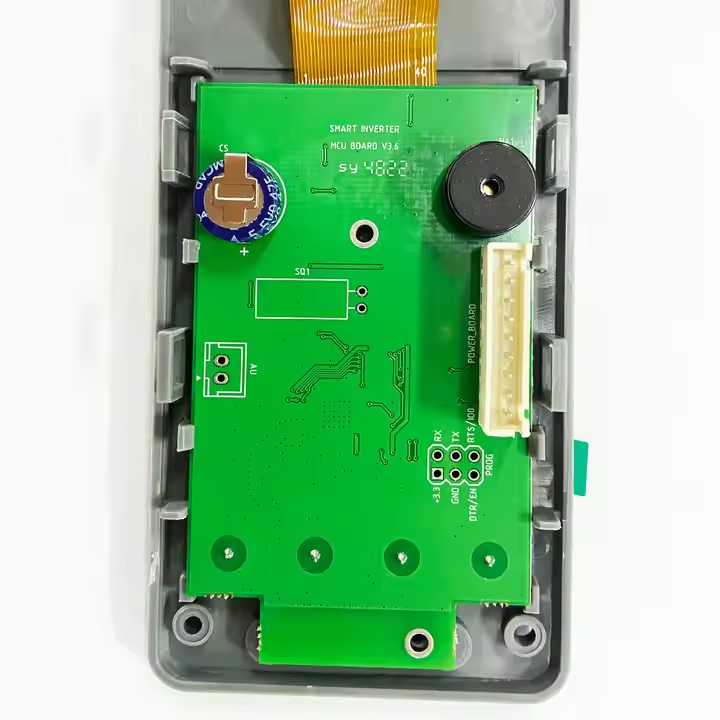
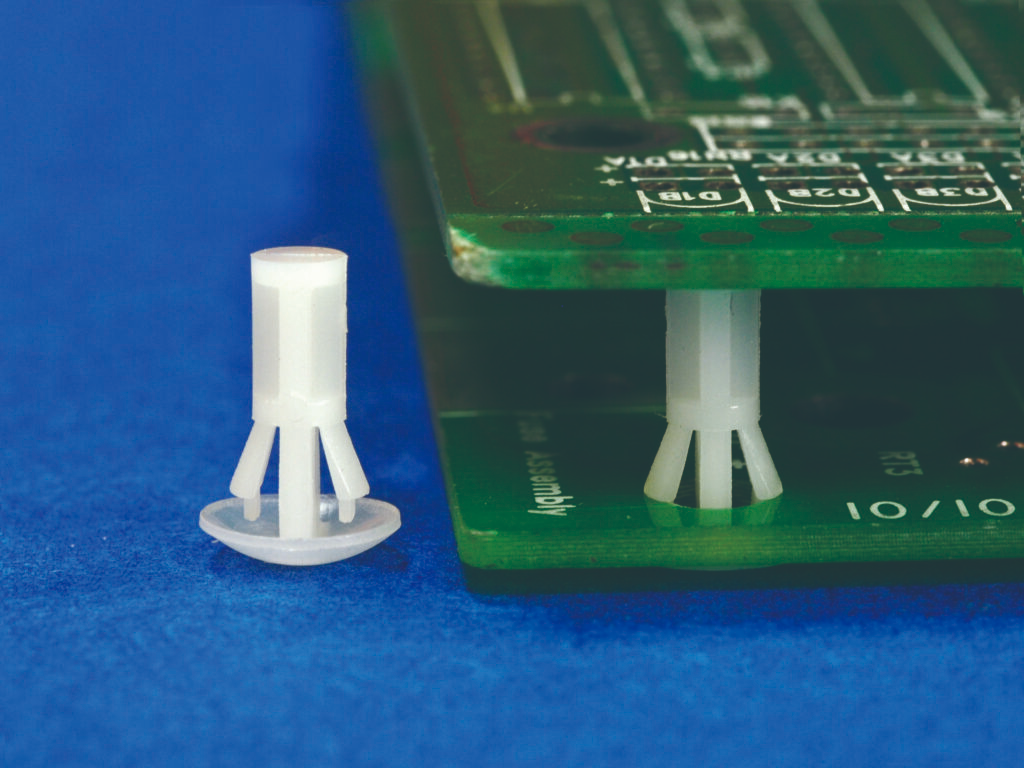
PCB clips are small, typically plastic or metal components specifically engineered to hold a circuit board securely in position without the necessity of screws or adhesives. Available in various forms, such as snap-in or push-fit designs, they are particularly advantageous for temporary setups or quick assemblies. For those new to electronics, PCB clips present a fuss-free method to mount a board inside an enclosure or onto a surface, eliminating concerns about potential damage from incorrect tools or improper mounting techniques.
Utilizing PCB clips comes with several distinct advantages, especially for individuals just beginning their electronics endeavors:
● Effortless Application: No specialized tools or advanced skills are required—simply snap or push the clip into its designated spot.
● Reusability: Many clip designs permit easy removal and reuse, making them perfect for PCB prototype manufacturing and experimental builds.
● Enhanced Protection: By keeping the board stationary, clips significantly reduce the risk of short circuits or physical damage that could occur from board movement.
● Economical Choice: PCB clips are an inexpensive and readily available option, fitting well within the budget of most hobbyists.
What types of PCB clips are best suited for beginners?
Before you begin mounting your inaugural circuit board, it's helpful to become familiar with the different varieties of PCB clips available. Each type is designed for specific applications, so selecting the most appropriate one will depend on your project's particular requirements. Here are some popular choices for hobbyists:
Snap-In Plastic Clips
These are arguably the most user-friendly PCB clips for beginners. Crafted from durable plastic, they are designed to snap into pre-drilled holes on either the circuit board itself or its enclosure. They are lightweight, exceptionally easy to install, and perfectly suited for smaller projects, such as those built around Arduino platforms.
Metal Push-Fit Clips
Metal clips offer greater robustness and are often chosen for supporting heavier boards or for more demanding industrial applications. They secure into place with a push and provide a more substantial hold, though they might require slightly more force during installation. For hobbyists working on projects that demand extra stability, these clips are an excellent choice.
Adhesive-Backed Clips
Some PCB clips feature an adhesive base, allowing them to be directly affixed to a surface without the need for drilling holes. These are ideal for temporary setups or situations where modifying the enclosure is not an option. However, their long-term security might not match that of mechanical fastening methods.
Rail-Mount Clips
While less common for casual hobbyist projects, rail-mount clips are designed for securing PCBs onto standard rails, such as DIN rails. They become relevant if you are developing larger systems or integrating PCBs into enclosures that utilize such rail infrastructures.
Why does simple PCB mounting benefit new electronics enthusiasts?
For those new to electronics, every stage of the assembly process, including mounting, can feel overwhelming. Simple PCB mounting, facilitated by clips, reduces this complexity, allowing you to concentrate on grasping the fundamentals of circuit design and soldering. Inadequate mounting can lead to a host of problems:
● Component Damage: A loose board can shift, potentially causing soldered components to detach or wires to break their connections.
● Short Circuits: Board movement might inadvertently bring conductive parts into contact, risking a short circuit that could permanently damage your PCB.
● Degraded Performance: Vibrations or instability can negatively impact signal integrity, particularly in high-frequency circuits where even minor impedance mismatches (e.g., above 50 ohms) can reduce performance by over 20%.
By correctly using PCB clips, you ensure your board remains secure, freeing you to focus on testing and troubleshooting your circuit without concerns about its physical stability.
A step-by-step guide to mounting your first circuit board with PCB clips
Now that you're familiar with the basics, let's walk through the process of mounting a circuit board using PCB clips. This guide is specifically designed for beginners, emphasizing easy circuit board assembly with minimal tools.
Step 1: Gather Your Essential Materials
Before commencing, ensure you have all the necessary items:
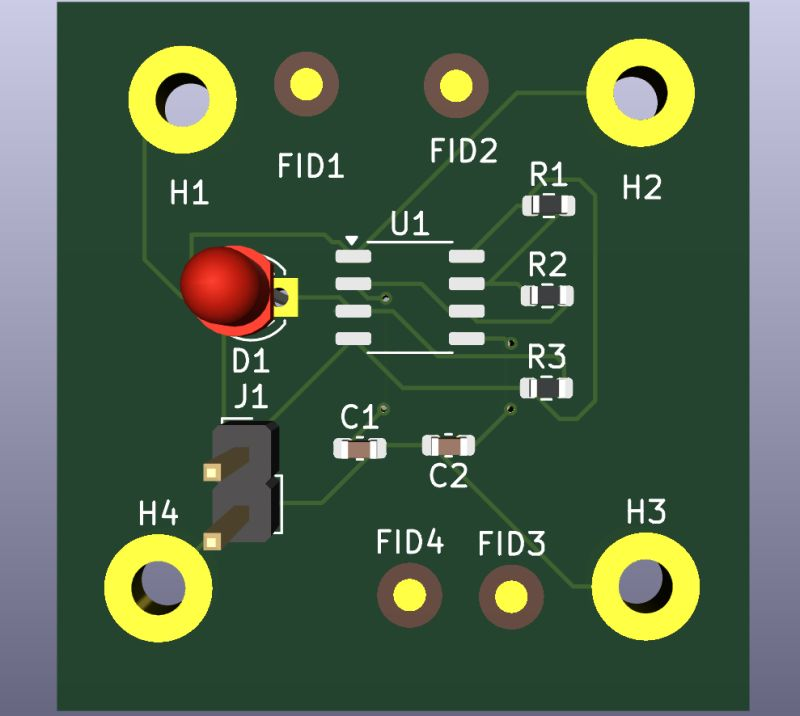
● Your printed circuit board (verify it has appropriate mounting holes for snap-in or push-fit clips).
● PCB clips that are compatible with your board and its intended enclosure (double-check dimensions and type).
● An enclosure or the specific surface where the board will be mounted.
● (Optional) A small screwdriver or pliers, which may be needed for certain metal clips.
Step 2: Strategically Plan Your Mounting Points
Examine your PCB to locate the mounting holes or designated areas for clip attachment. Most PCBs feature holes at their corners for this purpose. Confirm that your selected clips are compatible with the hole diameter (typically 3-4 mm for hobbyist boards). Also, inspect your enclosure for corresponding slots or spaces where the clips will be inserted.
Step 3: Secure Clips to the Enclosure or Surface
If you are using snap-in or push-fit clips, align them with the pre-made slots or holes in your enclosure and press them firmly into place. For adhesive clips, simply peel off the protective backing and press them securely onto the mounting surface. Ensure their positioning precisely matches the PCB’s mounting holes.
Step 4: Mount the PCB onto the Secured Clips
Carefully position your circuit board over the installed clips, aligning the board's mounting holes with the heads of the clips. Apply gentle, even pressure until the board audibly snaps or firmly locks into position. Avoid using excessive force, as this could lead to board cracking or damage to delicate traces. If you are using metal clips, a slight squeeze with pliers might be necessary to fully secure the board.
Step 5: Verify Board Stability
Once the board is mounted, perform a gentle shake test to confirm its security. If any wobbling is detected, re-examine the clips and reposition them if required. A properly mounted board should exhibit minimal movement, ideally no more than 1-2 mm in any direction.
Practical tips for successful basic PCB assembly using clips
Beyond the fundamental steps, these practical tips can further enhance your PCB mounting experience, especially for hobbyists undertaking their first projects.
Ensuring Compatibility and Support
● Match Components: Always verify that the clips are compatible with your board's thickness and mounting hole size. Most hobbyist boards are 1.6 mm thick, so seek clips designed for that range. Mismatched clips can result in either a loose fit or excessive tightness, risking damage.
● Consider Weight Distribution: If your project involves heavy components (e.g., large capacitors, substantial heat sinks), it's wise to use additional clips or combine clips with standoffs for enhanced support. A single clip might not adequately support weights exceeding 50-100 grams per mounting point.
H3: Strategic Placement and Elevated Mounting
● Avoid Sensitive Zones: Position clips away from fragile components or critical high-frequency traces. Physical pressure from clips can subtly alter trace impedance (e.g., from 50 ohms to 60 ohms), potentially affecting signal speeds by up to 10% in some circuits.
● Utilize Spacers: If your board requires elevation (to prevent contact with the enclosure base or to improve airflow), integrate small spacers with your clips. This can significantly improve air circulation, potentially reducing heat buildup by up to 15% in densely packed configurations.
Organization and Avoiding Common Pitfalls
● Labeling Best Practices: When working with multiple boards or complex setups, label where each board mounts to prevent confusion during reassembly or troubleshooting. A simple sticker or marker note can save considerable time.
● Inspect Clips: Before use, always inspect clips for any signs of damage like cracks or bends. A compromised clip may fail under stress, allowing the board to become loose.
● Confirm Stability: Never skip the stability check after mounting. Even a slight shift can lead to intermittent connections, which are notoriously difficult to diagnose and resolve.
H2: Where to find PCB clips and alternative mounting approaches for beginners?
Locating the right PCB clips for your project is generally quite straightforward. Many online retailers and local electronics stores stock a diverse range of clips suitable for hobbyists. When sourcing, look for suppliers who provide comprehensive specifications, including clip dimensions and material (plastic or metal), to ensure optimal compatibility with your board. Additionally, some electronics kits conveniently include mounting hardware, eliminating the need for separate purchases.
At AIVON, we are dedicated to supporting your journey in electronics. While our primary focus is on delivering high-quality circuit boards, we encourage you to explore reputable hardware suppliers for essential accessories like PCB clips to complete your project setups.
Alternative Mounting Methods
While PCB clips excel at simple mounting, they aren't the sole option. If clips don't suit your specific project requirements, consider these alternative approaches:
● Standoffs and Screws: This method provides a highly secure and permanent hold but necessitates drilling and the use of tools. It's often preferred for heavier boards or long-term installations.
● Adhesive Pads: Double-sided tape or foam pads can work for very lightweight boards in temporary projects, though their long-term reliability is generally lower than mechanical fasteners.
● Built-in Enclosure Slots: Some enclosures are specifically designed with integrated slots or grooves that can secure a PCB without the need for additional hardware. Always check your enclosure's design for such features.
Each mounting technique carries its own advantages and disadvantages, so your choice should be guided by your project's specific needs, including board weight, size, and intended operational lifespan.
Final thoughts on utilizing PCB clips for introductory electronics projects
Mounting your first circuit board doesn't have to be an intimidating task. With PCB clips designed for beginners, you have access to a simple yet highly effective tool for securing your board and safeguarding your project. From easy-to-use snap-in plastic clips to more robust metal options, there's a suitable solution for every hobbyist striving for straightforward circuit board assembly. By diligently following the steps and tips outlined in this guide, you will gain proficiency in basic PCB assembly and build valuable confidence in your electronics skills.
Remember, meticulous preparation is key to success—carefully select the right clips, thoughtfully plan your mounting points, and always verify for stability. As you become more comfortable with simple PCB mounting, you'll discover that seemingly minor details like secure assembly significantly contribute to both the performance and the longevity of your electronic creations. At AIVON, we are here to support your ongoing journey with educational resources and inspiration at every stage of your electronics adventure.


