Introduction
In the world of hobbyist electronics, designing multilayer PCBs opens up exciting possibilities for compact, high-performance projects like Arduino shields or custom audio interfaces. However, signal integrity issues such as ringing, crosstalk, and attenuation can turn a promising prototype into a frustrating failure. One often overlooked factor is the copper thickness on inner layers, which directly influences impedance matching and signal loss without demanding expensive materials. For DIY PCB design enthusiasts working on a budget, selecting the appropriate inner layer copper thickness ensures reliable performance while keeping costs low. This article explores how to make informed choices aligned with standard practices, helping you achieve signal integrity for hobbyists using low-cost PCB materials.
What Is Signal Integrity and Why Inner Layer Copper Thickness Matters for Hobbyists
Signal integrity refers to the preservation of electrical signal quality as it travels through PCB traces, avoiding distortion from reflections, noise, or loss. In hobbyist projects involving moderate speeds like USB 2.0 or SPI buses, poor SI manifests as data errors or intermittent glitches that are hard to debug. Inner layers in multilayer boards typically carry critical signals, power planes, or ground returns, making their copper thickness a key parameter for controlled impedance and minimal loss. Thicker copper provides lower resistance for better current handling, while thinner options aid precise impedance in tight spaces. For hobbyist electronics, balancing these with low-cost PCB materials prevents overdesign and keeps fabrication affordable. Understanding this helps beginners prioritize copper thickness for beginners without compromising project success.
Copper thickness, measured in ounces per square foot (oz/ft2), standardizes foil weights like 0.5 oz (about 18 μm) or 1 oz (35 μm) used in inner layers. Variations affect the trace's effective width and height, altering characteristic impedance according to transmission line theory. In budget multilayer boards, defaulting to non-standard thicknesses raises costs due to custom processing. Hobbyists benefit from sticking to common values that support signal integrity for hobbyists up to several gigahertz. This choice also influences board warpage during fabrication, ensuring flatness for reliable assembly.
Technical Principles Behind Inner Layer Copper Thickness and Signal Integrity
The characteristic impedance of a trace on an inner layer depends on its width, height (copper thickness), and surrounding dielectric thickness. Increasing copper thickness lowers impedance slightly because it enlarges the conductor's cross-section, potentially requiring wider traces to maintain 50 ohms. For example, shifting from 0.5 oz to 1 oz might drop impedance by 1–2 ohms, demanding stackup adjustments to avoid mismatches. IPC-2221 provides guidelines for such design considerations, emphasizing consistent parameters across layers. In hobbyist designs, precise impedance control minimizes reflections that degrade eye diagrams at data rates above 100 Mbps.
At higher frequencies, skin effect confines current to the conductor's surface, with depth around 2 μm at 1 GHz in copper. Thicker copper beyond several skin depths offers diminishing returns for AC resistance but reduces overall insertion loss by providing more material for current flow. Thinner inner layers like 0.5 oz can increase conductor loss if the effective thickness falls short, leading to higher attenuation in long traces. Surface roughness exacerbates this, scattering signals and boosting losses, a critical factor even in hobbyist high-speed interfaces. Standard 1 oz inner copper strikes a balance, supporting frequencies up to 5 GHz with acceptable performance.
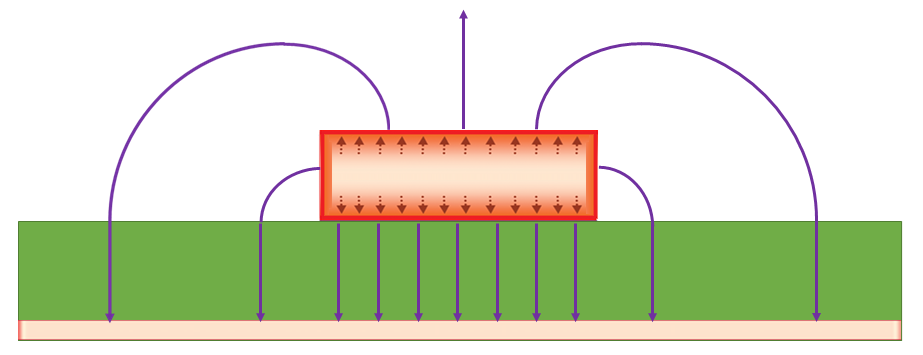
Crosstalk between adjacent inner traces arises from mutual inductance and capacitance, moderated by copper thickness through ground plane proximity. Thicker copper widens the effective field, potentially increasing coupling if spacing is inadequate. Proper layer sequencing, with signals sandwiched between planes, leverages copper thickness for shielding. For low-cost PCB materials, uniform 1 oz across inner layers simplifies fabrication while upholding SI. These principles guide hobbyists toward robust designs without simulation tools.
Practical Solutions and Best Practices for Budget-Conscious Choices
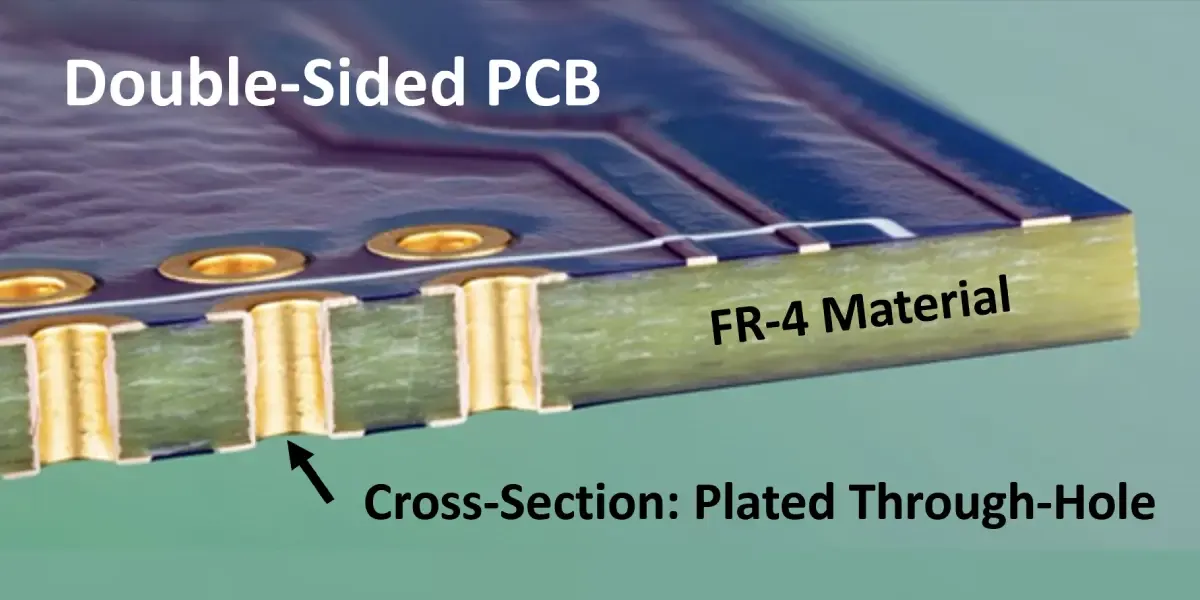
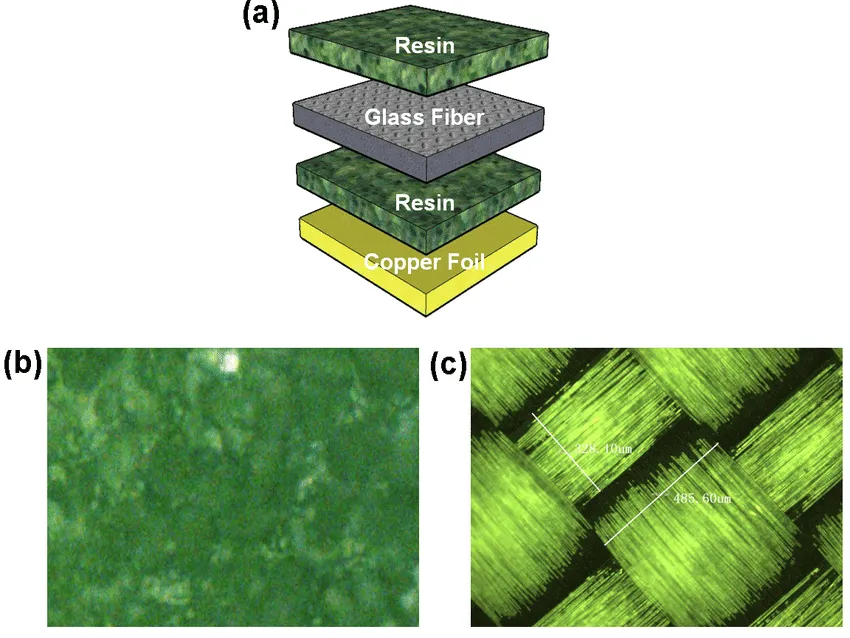
Start with 1 oz copper for all inner layers in four- to six-layer hobbyist boards, as it offers a cost-effective sweet spot for most DIY PCB design applications under 1 GHz. This thickness handles typical currents, maintains 50-ohm impedance with standard trace widths of 5–7 mils, and aligns with manufacturer defaults for quick turnaround. For projects pushing 2–5 GHz like wireless modules, consider 0.5 oz inner copper to fine-tune higher impedances in compact routing, though verify with free online calculators. Always specify symmetric stackups to prevent warpage, pairing inner layers evenly. Low-cost PCB materials with FR-4 dielectric pair well, keeping total board prices under $10 for prototypes.
IPC-6012 outlines minimum copper thicknesses post-fabrication, ensuring reliability for Class 2 boards suitable for hobbyist use. Avoid exceeding 2 oz on inners unless high current demands it, as it complicates etching and raises expenses. Test prototypes with oscilloscopes to measure eye opening and jitter, iterating on thickness if needed. Use ground pours on inner planes liberally to suppress noise. These practices enhance signal integrity for hobbyists without premium features.
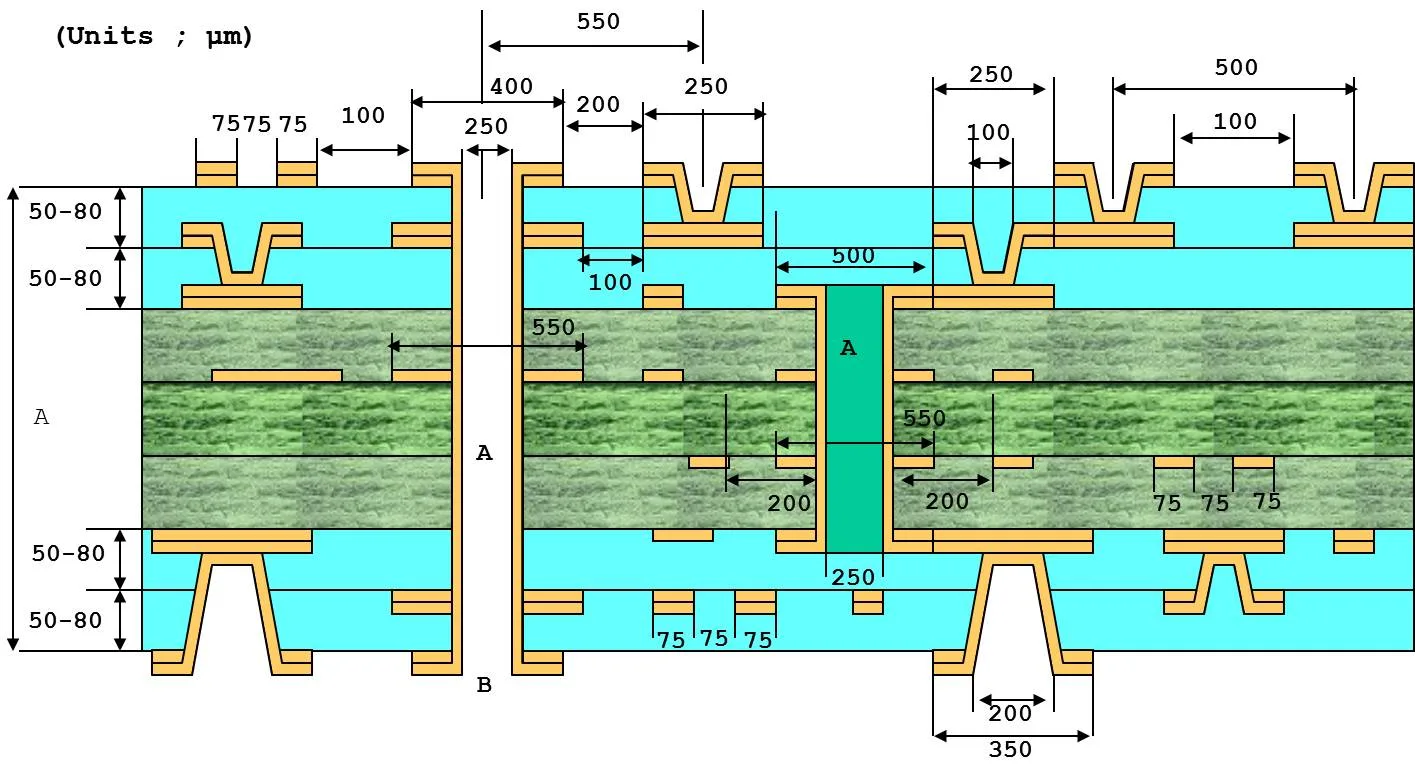
When ordering, request copper weight explicitly in the stackup diagram, noting inner layers separately from outers which often get plated thicker. Budget tip: Standard 1 oz everywhere minimizes surcharges, ideal for copper thickness for beginners. For power-heavy designs, reserve thicker copper for dedicated planes.
Troubleshooting Common Issues in Hobbyist Multilayer Designs
Hobbyists often encounter ringing on clock lines due to unmatched impedances from inconsistent inner copper. Measure trace impedance post-fab with a time-domain reflectometer if available, or infer from signal quality. If attenuation plagues long inner traces, switch to 1 oz from lighter foils to cut losses. Warpage from asymmetric thicknesses manifests as solder joint lifts; IPC-4562 specifies foil tolerances to mitigate this.
A typical case: A four-layer hobby router board with 0.5 oz inners suffered crosstalk at 500 MHz. Upgrading to 1 oz stabilized signals by lowering resistance, at no extra cost since standard. Simulations confirm 20% loss reduction. Such fixes underscore practical thickness selection.
Conclusion
Choosing inner layer copper thickness wisely empowers hobbyist electronics projects with solid signal integrity on a budget. Standard 1 oz delivers versatile performance for most DIY PCB design needs, balancing impedance, loss, and cost. Thinner options suit higher speeds, but verify against project frequencies. Adhering to structured stackups and standards ensures reliable outcomes. Experiment iteratively to refine your designs, turning budget constraints into efficient engineering.
FAQs
Q1: What is the best copper thickness for beginners in hobbyist multilayer PCBs?
A1: For copper thickness for beginners, 1 oz (35 μm) on inner layers works best for low-cost PCB materials in most DIY PCB design projects up to 1 GHz. It provides low resistance, easy impedance control at 50 ohms, and matches standard fabrication without surcharges. Thicker options add cost unnecessarily for signals, while thinner may increase losses. Always pair with symmetric stackups for flat boards.
Q2: How does inner layer copper thickness affect signal integrity for hobbyists?
A2: Inner layer copper thickness influences impedance and insertion loss in signal integrity for hobbyists. Thicker copper like 1 oz reduces attenuation for better high-frequency performance via larger cross-section, despite skin effect limits. Thinner 0.5 oz aids precise Z0 but risks higher loss in long traces. Budget designs favor 1 oz for balanced hobbyist electronics reliability.
Q3: Is 0.5 oz copper viable for low-cost hobbyist PCBs with high-speed signals?
A3: Yes, 0.5 oz inner copper suits low-cost PCB materials in high-speed hobbyist applications above 5 GHz, enabling compact traces with higher impedance. It demands tight manufacturing tolerances to avoid reflections. For budget, confirm availability as it may equal 1 oz pricing. Test prototypes to ensure signal integrity for hobbyists meets your data rate needs.
Q4: Can thicker inner copper improve power delivery in budget multilayer boards?
A4: Thicker inner copper, such as 2 oz, enhances power plane conductivity and reduces voltage drop in high-current hobbyist electronics. However, it raises fabrication costs and risks warpage unless symmetric. Stick to 1 oz for most budget cases, widening planes instead. This maintains signal integrity for hobbyists without excess expense.
References
IPC-2221B — Generic Standard on Printed Board Design. IPC, 2012
IPC-4562B — Metal Foil for Printed Board Applications. IPC, 2013
IPC-6012E — Qualification and Performance Specification for Rigid Printed Boards. IPC, 2017