Introduction
Automotive printed circuit boards (PCBs) are the backbone of modern vehicle electronics, controlling everything from engine management to infotainment systems. Crafting these boards through the automotive PCB etching process demands precision and an understanding of specific techniques tailored to withstand harsh conditions like temperature fluctuations and vibrations. For electronic hobbyists, mastering PCB etching opens doors to creating custom circuits for automotive applications. This guide will walk you through the step-by-step process of etching PCBs at home, focusing on methods like PCB toner transfer and the use of PCB etching chemicals. We'll also cover essential practices such as the positive PCB method and PCB negative resist techniques, ensuring your projects meet the durability needed for automotive use.
What Is Automotive PCB Etching and Why It Matters
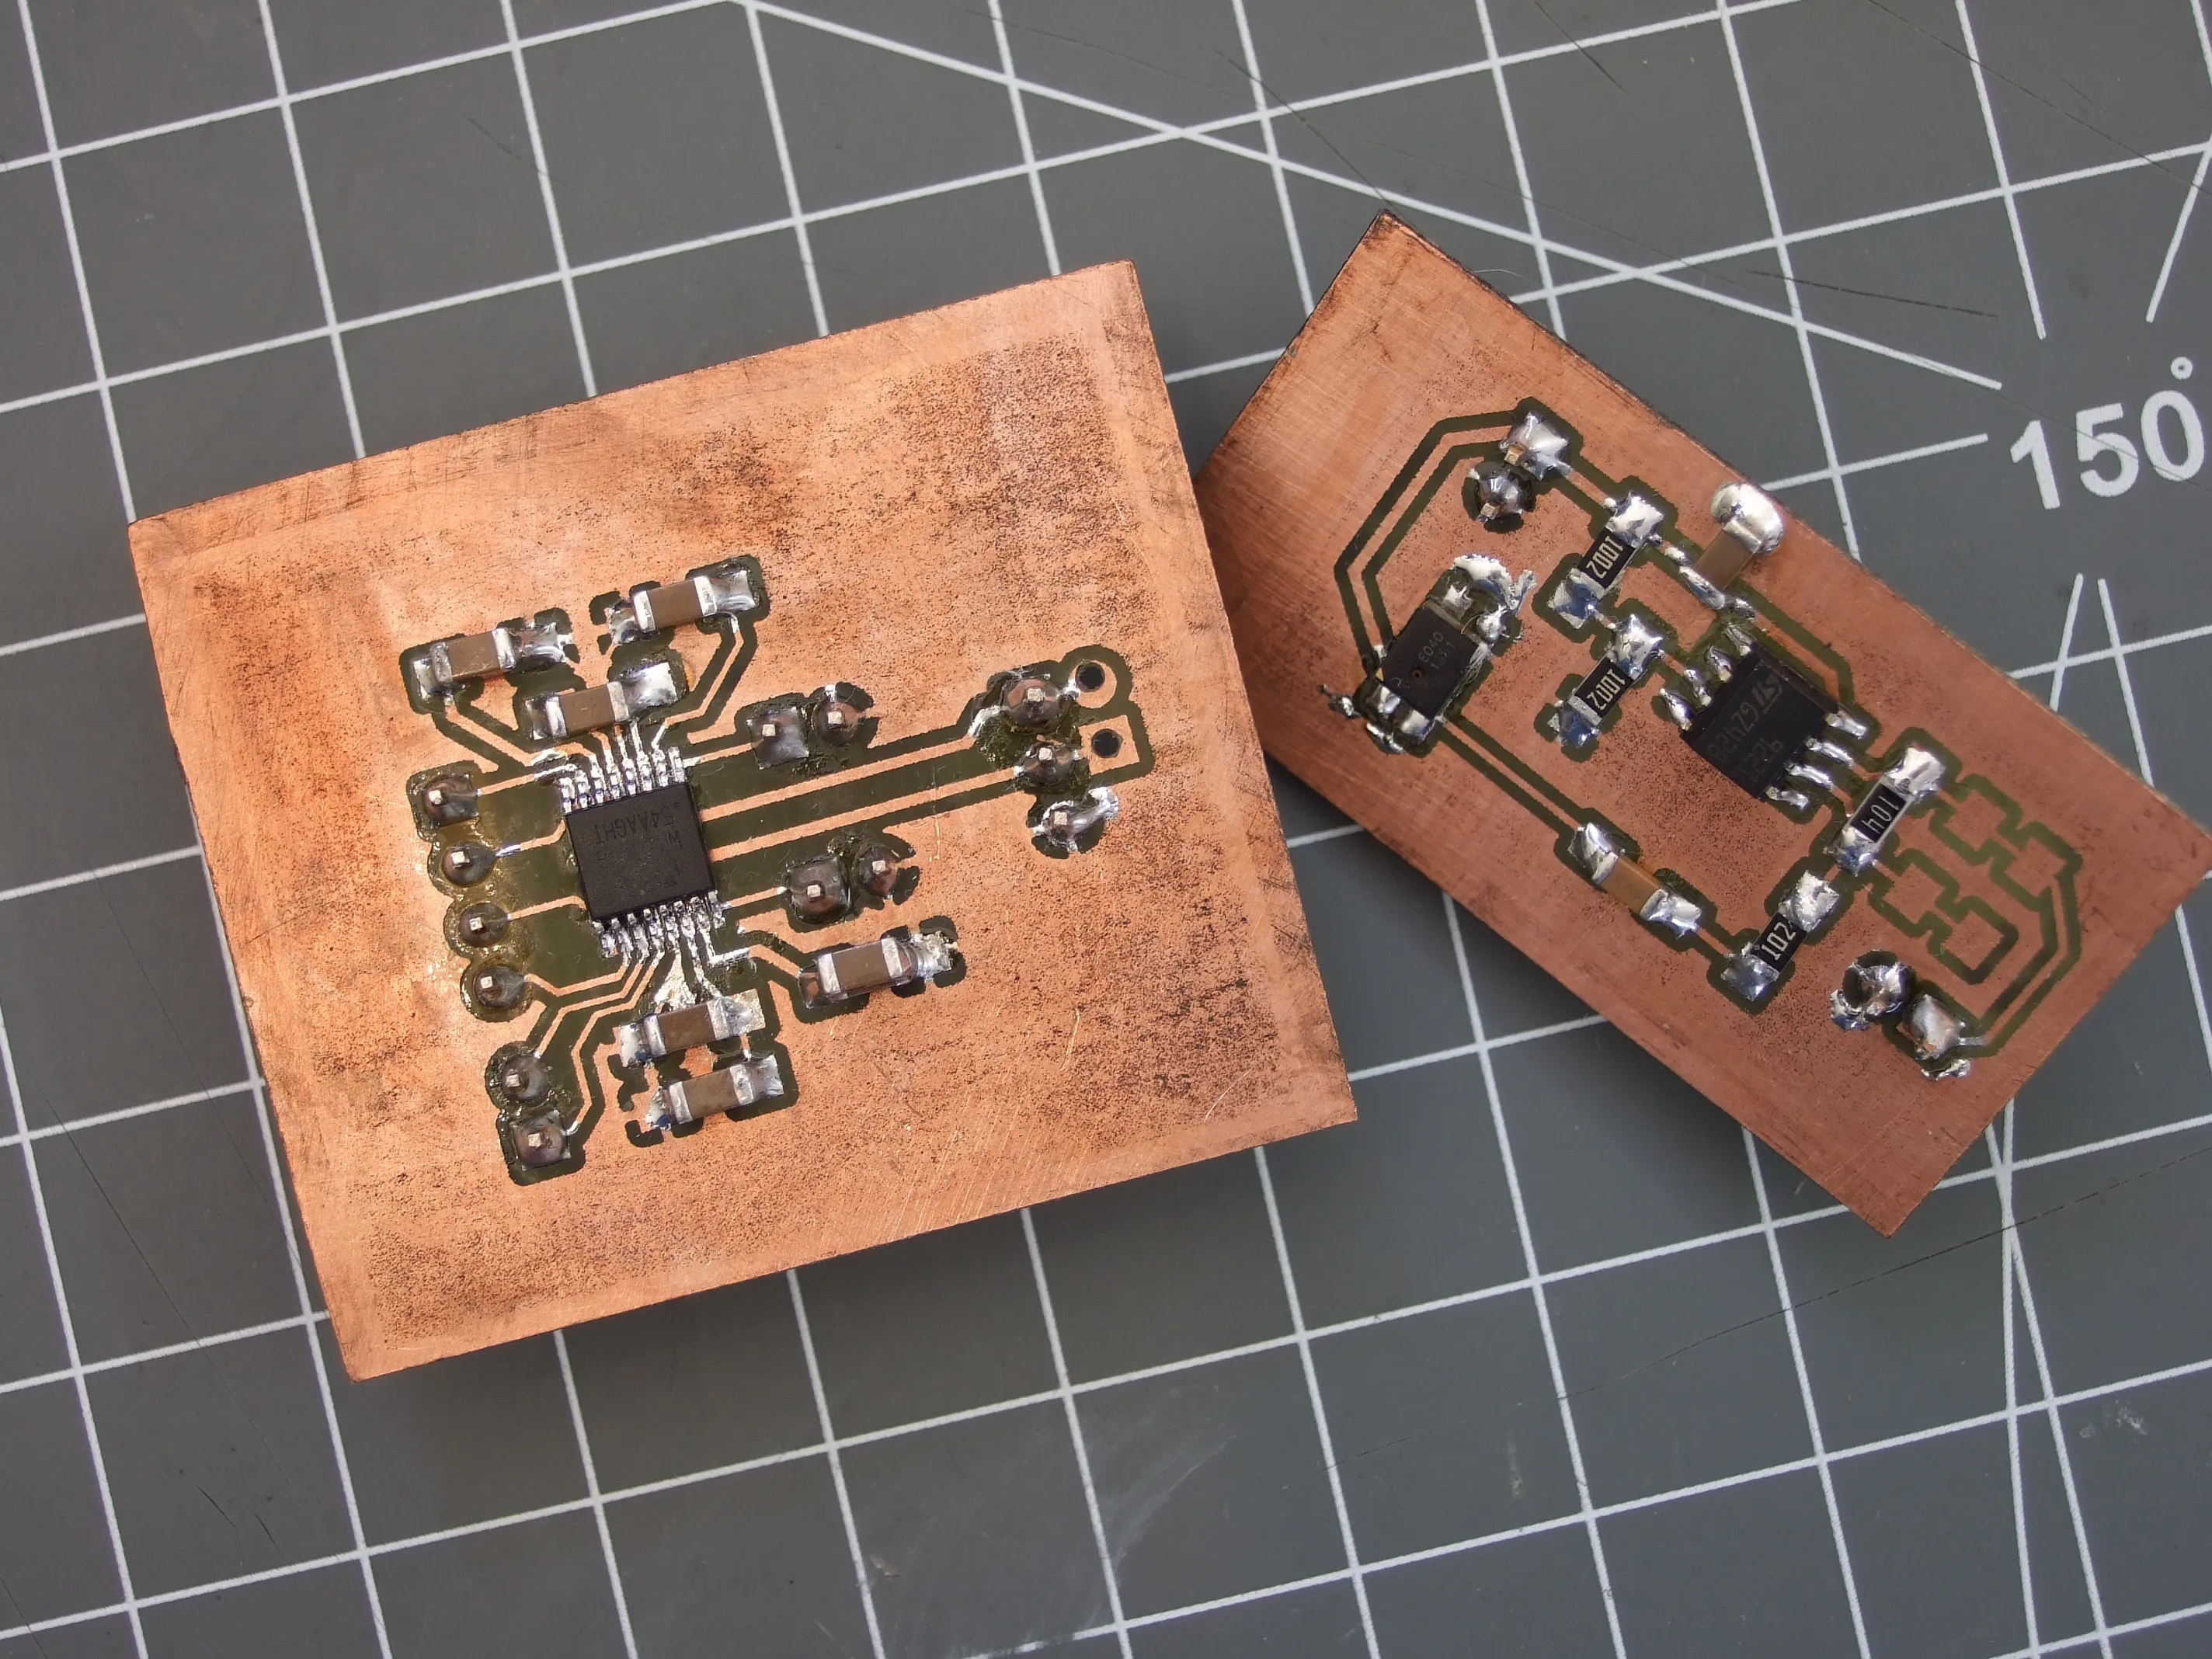
PCB etching is a process that removes unwanted copper from a board to form conductive traces, creating the circuit pattern necessary for functionality. In the automotive context, etching must produce boards that endure extreme environments, ensuring reliability in critical systems like braking or powertrain control. For hobbyists, understanding the automotive PCB etching process is vital to build circuits that can handle such demands. Etching not only defines the circuit layout but also impacts signal integrity and thermal management, both crucial for vehicle electronics. Poorly etched boards may lead to short circuits or failures under stress, making precision in this process non-negotiable for automotive applications.
Technical Principles of PCB Etching
Etching involves selectively removing copper from a clad board using chemical or physical methods. The most common approach for hobbyists uses PCB etching chemicals like ferric chloride, which dissolves unprotected copper areas while leaving the desired traces intact. The process begins with a copper-clad board, typically made of fiberglass or similar material, coated with a resist layer to protect specific regions. This resist can be applied through methods like PCB toner transfer, where a laser-printed design is transferred to the board, or by using photoresist films in the positive PCB method or PCB negative resist approach.
In chemical etching, the board is submerged in a solution that reacts with exposed copper, dissolving it over time. The reaction speed depends on the chemical concentration, temperature, and agitation. Over-etching can damage fine traces, while under-etching leaves unwanted copper, risking shorts. For the automotive PCB, trace width and spacing must account for higher current loads and vibration resistance, aligning with standards like IPC-6012E for rigid board performance. Physical methods, such as laser etching, are less common for hobbyists due to equipment costs but offer precision for complex designs.
Step-by-Step Guide to Automotive PCB Etching for Hobbyists
Step 1: Design Your Circuit
Begin by designing your automotive circuit using software that allows precise trace layouts. Focus on wider traces and larger spacing to handle higher currents typical in vehicle systems. Export the design as a mirror image for the PCB toner transfer method, ensuring the pattern aligns correctly when applied to the board.
Step 2: Prepare the Copper-Clad Board
Select a high-quality copper-clad board, ideally with a thicker copper layer for durability in automotive use. Clean the board thoroughly with steel wool or a mild abrasive to remove oxidation and ensure the resist adheres properly. A clean surface is critical for uniform etching.
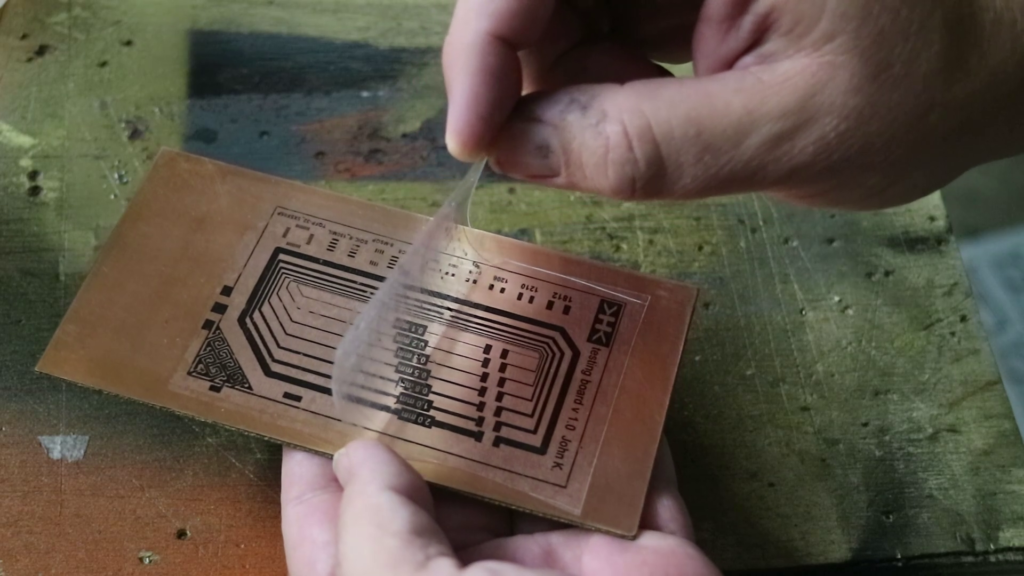
Step 3: Apply the Resist Layer
Choose a resist method based on your resources. For the PCB toner transfer approach, print your design on glossy paper using a laser printer, then iron it onto the board to transfer the toner. Alternatively, use the positive PCB method with a photoresist film exposed under UV light through a transparency of your design. For the PCB negative resist technique, the resist protects areas not meant to be etched after exposure. Ensure the resist covers all intended traces without gaps.
Step 4: Etch the Board with PCB Etching Chemicals
Prepare a solution of PCB etching chemicals, such as ferric chloride, in a non-metallic container. Wear protective gloves and goggles, and work in a well-ventilated area to avoid fumes. Submerge the board in the solution, agitating gently to speed up the process. Check periodically until the exposed copper is fully removed, typically taking 10 to 30 minutes. Avoid leaving the board in too long to prevent damage to traces.
Step 5: Remove the Resist
Once etching is complete, rinse the board with water to stop the chemical reaction. Remove the resist layer using acetone for toner or a suitable solvent for photoresist. Inspect the traces for defects like over-etching or incomplete copper removal, as these can compromise automotive reliability.
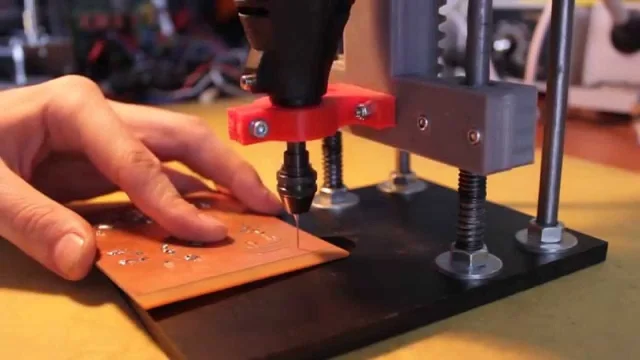
Step 6: Drill Holes for Components
Use a small drill press or handheld tool for PCB drilling to create holes for through-hole components or mounting. Automotive PCBs often require precise hole sizes for robust connections, so use drill bits matching your design specifications. Secure the board firmly during drilling to avoid misalignment.
Step 7: Clean and Inspect the Board
Clean the etched and drilled board with isopropyl alcohol to remove residues. Inspect under good lighting or with a magnifying glass to ensure traces are intact and holes are clear. For automotive applications, consider testing continuity with a multimeter to confirm no breaks or shorts exist.
Best Practices for Automotive PCB Etching
For hobbyists targeting automotive applications, certain practices enhance the quality and reliability of etched PCBs. First, always design with redundancy in mind, allowing for wider traces and additional ground planes to manage heat and current. Adhere to guidelines from standards like IPC-A-600K for acceptable board quality, focusing on clean trace edges and proper copper thickness.
When using PCB etching chemicals, maintain consistent temperature and agitation for uniform results. Store chemicals safely and dispose of used solutions per local regulations to avoid environmental harm. If using the PCB toner transfer method, ensure the iron heat is even to prevent incomplete transfers. For photoresist methods, control UV exposure time precisely to avoid under or over-developing the resist.
Test your etched board under simulated automotive conditions, such as elevated temperatures or vibration, to validate durability. If issues arise, revisit your resist application or etching duration to refine the process. Document each step to replicate successful outcomes or troubleshoot failures effectively.
Common Challenges and Troubleshooting Tips
Hobbyists often face challenges like uneven etching or resist failures during the automotive PCB etching process. Uneven etching may result from insufficient agitation or old chemicals. Stir the solution regularly or replace it if it appears discolored. Resist lifting during etching can occur if the board wasn't cleaned properly or if the transfer was incomplete. Ensure thorough surface preparation and check resist adhesion before etching.
Over-etching, where traces become too thin, happens with prolonged chemical exposure. Monitor the process closely and remove the board as soon as exposed copper is gone. For PCB drilling, misalignment can ruin a board, so use a stable setup and mark hole positions accurately. If traces break during handling, consider reinforcing the design with thicker copper in future iterations.
Suggested Reading: Troubleshooting PCB Etching Problems: Undercutting, Over-Etching, and Uneven Etching
Conclusion
Mastering the automotive PCB etching process empowers electronic hobbyists to create reliable circuits for vehicle applications. By following a structured approach, from design and resist application to etching with PCB etching chemicals and precise PCB drilling, you can achieve professional results at home. Techniques like PCB toner transfer, the positive PCB method, and PCB negative resist offer flexibility based on your tools and skills. Prioritizing precision and adhering to best practices ensures your boards withstand the rigors of automotive environments. With practice, you'll refine your process, turning concepts into durable, functional PCBs for any project.
FAQs
Q1: How do I choose the right PCB etching chemicals for automotive projects?
A1: Ferric chloride is a popular choice for hobbyists due to its effectiveness and availability for the automotive PCB etching process. It works well for copper removal but requires careful handling due to its corrosive nature. Always wear protective gear and work in ventilated spaces. Ensure the chemical is fresh for consistent results, and follow disposal guidelines to protect the environment.
Q2: What are the differences between positive PCB method and PCB negative resist?
A2: In the positive PCB method, the resist is exposed to UV light where traces are desired, and unexposed areas are etched away after developing. With PCB negative resist, exposed areas harden to protect traces, and unexposed resist is removed for etching. Both methods work for automotive PCBs, but negative resist often offers better detail for complex designs.
Q3: How can I ensure precision during PCB drilling for automotive boards?
A3: Precision in PCB drilling starts with securing the board on a stable surface to prevent movement. Use a drill press if possible, or a steady hand tool with marked hole positions. Choose drill bits matching your component sizes, and work slowly to avoid damaging traces. This ensures reliable connections for automotive applications.
Q4: Why is PCB toner transfer suitable for hobbyist automotive PCB etching?
A4: PCB toner transfer is ideal for hobbyists because it uses common tools like a laser printer and an iron to apply resist. It's cost-effective and accessible for the automotive PCB etching process. Ensure the design is mirrored and the board is clean for a successful transfer, providing a solid base for durable vehicle circuits.
References
IPC-6012E — Qualification and Performance Specification for Rigid Printed Boards. IPC, 2020.
IPC-A-600K — Acceptability of Printed Boards. IPC, 2020.


