What Exactly is Manual Solder Paste Application?
Manual solder paste application involves precisely depositing a specialized mixture—comprising minute solder particles suspended in flux—onto the pads of a printed circuit board (PCB) without the aid of automated machinery. This paste serves as the critical bonding agent for surface-mount components during the soldering process. For hobbyists, this technique typically utilizes a solder paste syringe or similar handheld tools to place the paste accurately where it's needed. Unlike industrial setups that rely on stencils and automated dispensers, manual application demands a steady hand and meticulous attention to detail, making it particularly well-suited for smaller-scale, hands-on DIY PCB endeavors.
In the upcoming sections, we will delve into the most effective methods and common errors to avoid, ensuring your soldering results are consistently smooth and effective.
Why Do Hobbyists Choose Manual Solder Paste Application?
For individuals engaged in hobbyist soldering, the manual application of solder paste presents several compelling advantages. It offers a cost-effective solution, eliminating the need for expensive stencils or automated dispensing equipment. This method also provides significant flexibility for small production runs or prototyping, where the creation of a custom SMD solder stencil might be impractical or uneconomical. With just a solder paste syringe or a basic tool, you can successfully work on intricate designs from your home workshop. However, this process inherently requires precision to prevent common issues like uneven paste distribution or unintended solder bridges.
Understanding the correct procedures ("dos") and common missteps ("don'ts") will empower you to maximize the benefits of manual application while minimizing errors in your DIY PCB projects.
Best Practices for Manual Solder Paste Application
Achieving professional-grade results with manual solder paste application hinges on adhering to established best practices. Here are the crucial "dos" to keep in mind for optimal outcomes:
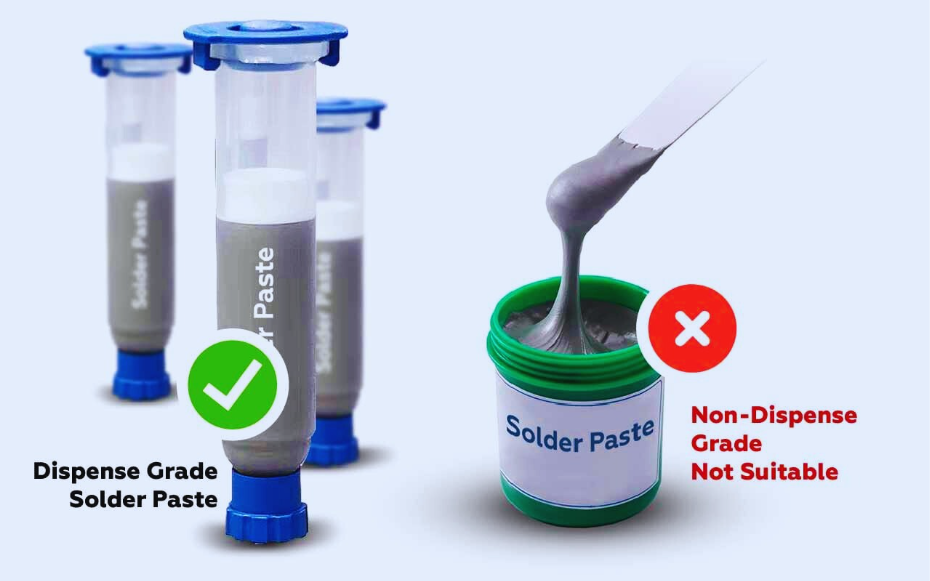
Selecting the Right Solder Paste for Your Project
The quality and type of solder paste can significantly impact your soldering results. For hobbyist use, it's advisable to choose a paste formulation that aligns with your project's needs, such as a lead-free option paired with a "no-clean" flux to simplify post-soldering cleanup. Pay attention to the alloy composition; commonly, Sn96.5/Ag3.0/Cu0.5 (SAC305) is used, with a melting point generally between 217-220°C. Furthermore, ensure the particle size (often categorized as Type 3 or Type 4) is appropriate for the pitch of your components. Finer particles (Type 4) are generally preferred for smaller pads and denser component layouts, providing enhanced precision during application.
Proper Storage and Handling of Solder Paste
Solder paste is highly sensitive to both temperature and humidity. To preserve its shelf life, which typically ranges from 6 to 12 months for unopened containers, store it in a refrigerator at temperatures between 2-10°C. Before each use, allow the paste to gradually warm to room temperature for approximately 1-2 hours. This crucial step prevents condensation from forming, which can compromise the paste's consistency and performance. Correct storage is key to preventing the paste from drying out or separating, ensuring smooth and consistent dispensing for your DIY PCB work.
Using the Appropriate Dispensing Tools
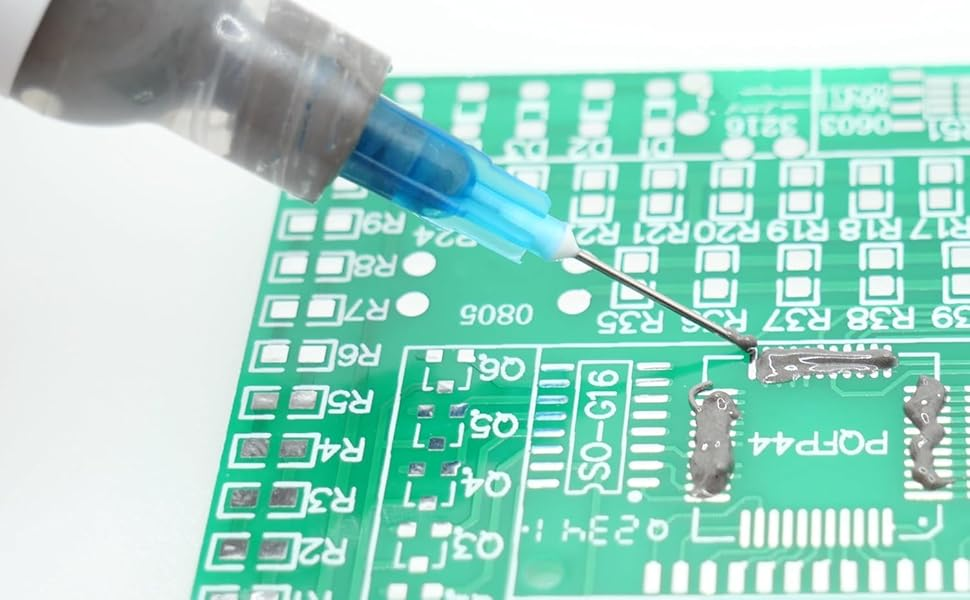
For accurate manual application, a solder paste syringe fitted with a fine needle tip (e.g., 22-25 gauge) is highly effective, offering superior control. Select the needle size based on your pad dimensions: use smaller needles for fine-pitch components and larger ones for broader pads. Apply gentle, consistent pressure to the plunger to prevent clogging or over-dispensing. If a syringe is unavailable, a small toothpick or a fine metal probe can serve as an improvised "stencil alternative" for very small projects, although this method demands even greater care and precision.
Controlled Application: Less is More
When dispensing solder paste, it's generally true that less is more. Aim to cover approximately 50-70% of the pad surface with a thin, uniform layer. For instance, on a typical 0603 component pad (measuring 0.6mm x 0.3mm), a dot of paste about 0.3-0.4mm in diameter is usually sufficient. Applying too much paste can lead to undesirable solder bridges, while too little may result in weak or incomplete solder joints. Practicing on a spare PCB or scrap material beforehand can help you develop a feel for the correct amount.
Maintaining a Clean and Well-Lit Workspace
A clean, well-lit environment is fundamental to successful soldering. Dust, debris, or inadequate lighting can significantly hinder your efforts. Establish your workspace on a clean, stable surface, and utilize a magnifying glass or a dedicated desk lamp to clearly view small pads. Wearing gloves is advisable to prevent contamination of the paste or PCB with natural skin oils. A tidy workspace not only minimizes the risk of defects but also enhances the overall efficiency of your hobbyist soldering projects.
Prompt Component Placement After Paste Application
Solder paste begins to dry out and lose its adhesive "tackiness" within 30-60 minutes, depending on its specific formulation and ambient room conditions. Therefore, it is essential to place your components as quickly as possible after applying the paste to ensure proper adhesion. Use fine-tipped tweezers for precise component placement, carefully aligning the component leads with the paste-covered pads. If any delays occur, check if the paste still feels sufficiently sticky; if not, it’s best to clean it off and reapply fresh paste.
Utilizing a Hot Air Station or Reflow Oven
After the paste is applied and components are placed, the next step is to melt the paste to form solid solder joints. For hobbyists, a hot air station, typically set to temperatures between 250-300°C, works effectively for most lead-free pastes. Heat the PCB evenly, concentrating the hot air over the paste areas for approximately 30-60 seconds, until the paste visibly melts and forms shiny, smooth joints. Always consult the solder paste manufacturer's recommended reflow profile for optimal results, as excessive heat can potentially damage sensitive components.
Common Mistakes to Avoid in Manual Solder Paste Application
Avoiding these common pitfalls is just as crucial as adhering to best practices to ensure high-quality results. Here are the key "don'ts" to steer clear of during manual solder paste application:
Using Compromised Solder Paste
Never use solder paste that has expired or been stored improperly (e.g., at room temperature for extended periods). Such paste can become grainy, separated, or lose its essential properties, leading to uneven application and unreliable joints. Always check the expiration date, typically printed on the container, and discard any paste older than 6-12 months. Utilizing substandard paste is a direct path to poor solder joints or connection failures in your DIY PCB projects.
Applying Excessive Syringe Pressure
When dispensing solder paste from a syringe, applying too much pressure can cause the paste to eject uncontrollably, creating a mess on the PCB. This often results in solder bridges or unintended shorts between adjacent pads. Instead, use light, consistent pressure. If the needle clogs, stop immediately, clean the tip with a small brush or compressed air, and then resume with caution.
Neglecting PCB Cleaning Before Application
Dirt, residual flux, or even fingerprints on the PCB surface can significantly hinder the proper adhesion of solder paste. Always thoroughly clean the board with isopropyl alcohol (90% concentration or higher) and a lint-free cloth before starting. For more stubborn residues, a soft brush can be helpful. A pristine surface ensures the paste adheres correctly to the pads, facilitating robust solder joints during reflow.
Inaccurate Component Placement
Misaligned or off-center component placement with respect to the solder paste can lead to several defects, such as "tombstoning" (where one end of a component lifts vertically from the pad) or weak, incomplete connections. Before reflow, double-check component alignment, using a magnifying tool if necessary. For fine-pitch components, even a minuscule misalignment of 0.1mm can cause problems, so allocate ample time for this precise step.
Reusing Old or Dried Solder Paste
Do not attempt to rejuvenate dried-out solder paste, whether it's on the board or within the syringe, by adding flux or other liquids. This practice fundamentally alters the paste's carefully balanced properties, leading to highly unreliable solder joints. Instead, completely clean off any dried paste with alcohol and apply fresh paste. Always ensure the syringe or container is tightly sealed after use to prevent the paste from drying prematurely.
Overheating During the Reflow Process
Excessive heat during reflow can severely damage sensitive components or cause the solder paste to burn, leaving behind corrosive residues that weaken solder joints. Avoid setting your hot air tool above 350°C, and maintain a safe distance of at least 2-3 cm between the nozzle and the board to prevent localized overheating. Monitor the reflow process closely, and cease heating as soon as the solder appears fully melted and forms a shiny, uniform joint.
Practical Dispensing Tips for Hobbyists
For hobbyist soldering, mastering the art of solder paste dispensing is paramount for achieving neat and consistent results. Here are some actionable tips to refine your technique:
● Practice on Scrap Material: Before working on your actual project, dedicate some time to practicing your syringe technique on a spare PCB or even a piece of cardboard. This helps you gauge the precise pressure required for smooth, even dispensing.
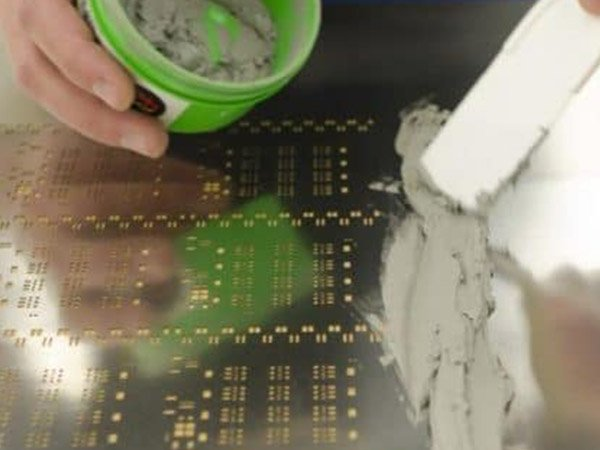
● Consider a Stencil Alternative for Repetitive Pads: If your project involves numerous identical pads, crafting a DIY stencil from thin plastic or sturdy cardstock using a craft knife can be a game-changer. Position it accurately over the PCB and then spread paste with a small spatula for faster, more uniform application.
● Maintain Clean Needles: After each soldering session, detach the needle from the solder paste syringe and clean it thoroughly using a thin wire or compressed air. This prevents blockages that can disrupt future dispensing.
● Work in Manageable Batches: To combat the paste drying out, apply paste to only a small number of pads at a time (e.g., 5-10) before immediately placing the corresponding components.
● Adjust for Ambient Temperature: If your workspace is cool (below 20°C), the solder paste may become stiffer and more difficult to dispense. Gently warm the syringe in your hands for a few minutes before use, but be careful not to overheat it.
Troubleshooting Common Manual Solder Paste Challenges
Manual solder paste application can present its share of obstacles, especially for those new to DIY PCB assembly. Below are some frequently encountered issues and practical solutions:
Challenge 1: Inconsistent or Lumpy Paste Application
● Solution: If the paste appears lumpy or is applied unevenly, your syringe needle might be too wide or partially clogged. Switch to a finer, clean needle. Additionally, try to maintain a consistent dispensing angle (around 45 degrees) to better control the paste flow.
Challenge 2: Solder Bridges Forming After Reflow
● Solution: Solder bridges occur when an excessive amount of paste connects adjacent pads. To correct existing bridges, use a solder wick in conjunction with a soldering iron set to approximately 300°C to absorb the excess solder. For future applications, reduce the amount of paste applied per pad by 20-30%.
Challenge 3: Solder Paste Drying Out Too Rapidly
● Solution: If feasible, work in an environment with controlled humidity (ideally between 40-60% relative humidity). If the paste dries on the board, clean it off completely with isopropyl alcohol and reapply fresh paste. Minimize the paste's exposure time to air by covering unused paste or by working more quickly during component placement.
Conclusion: Achieving Excellence in DIY PCB Assembly
Mastering manual solder paste application is an invaluable skill for anyone involved in hobbyist soldering and DIY PCB projects. By diligently following the "dos"—such as selecting appropriate tools, applying precise amounts of paste, and maintaining a pristine workspace—and consciously avoiding the "don'ts"—like using compromised paste or overheating during reflow—you can consistently achieve robust, high-quality solder joints. With dedicated practice and the practical solder paste dispensing tips provided, you will progressively build confidence, even when working with the most minute components.
Whether you opt for a solder paste syringe or explore creative stencil alternatives, remember that patience and precision are your most reliable allies. Continuously refine your technique, and before long, your DIY PCB creations will exhibit a level of quality that rivals professionally assembled boards. Always prioritize proper storage of your materials and maintain an organized workspace to ensure consistent success across all your electronic projects.