Why Thoughtful PCB Design is Crucial for Vending Machines
Designing a Printed Circuit Board (PCB) for a vending machine might seem like a complex undertaking, especially for those new to electronics. However, with a systematic approach, the right tools, and practical advice, you can create a highly reliable and efficient PCB capable of powering the intricate operations of a modern vending machine. This guide aims to provide a comprehensive roadmap for the vending machine PCB design process, offering layout tips, software suggestions, and guidance specifically tailored for beginners. It covers everything necessary to transform your vending machine PCB concept into a functional reality.
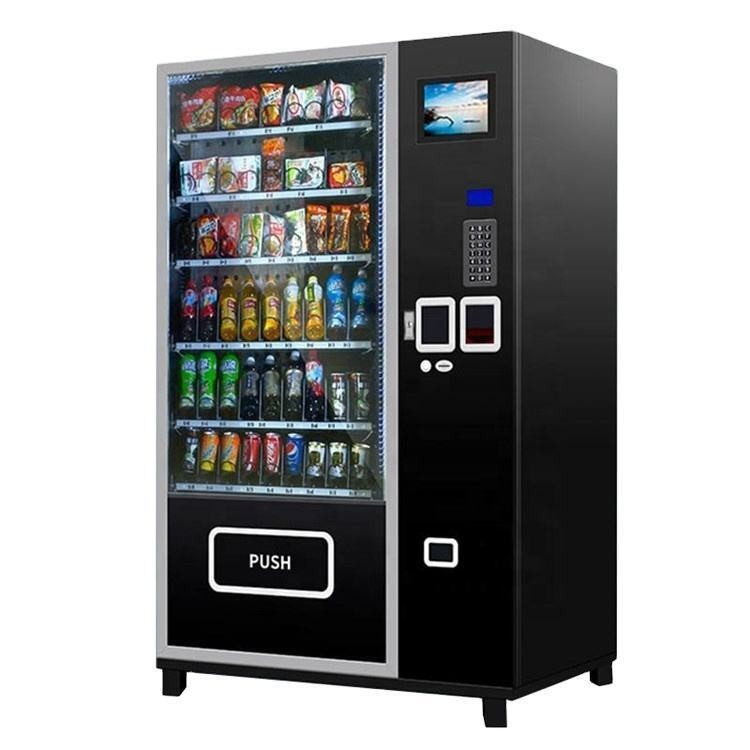
Vending machines are sophisticated systems that depend on precise electronic control to manage tasks such as processing payments, dispensing products, and displaying user information. Central to these operations is the PCB, which serves as the hub connecting and controlling various components like motors, sensors, displays, and communication modules. A well-engineered PCB ensures seamless functionality, minimizes operational errors, and reduces long-term maintenance costs. Conversely, a poorly designed board can lead to frequent malfunctions, signal interference, or even safety hazards. This guide is crafted to help you circumvent common pitfalls and develop a robust, purpose-built PCB for vending machine applications.
Understanding the Fundamentals of Vending Machine PCB Design for Newcomers
For those new to the field, it’s vital to grasp the foundational role a PCB plays within a vending machine. The PCB acts as the central control unit, managing all incoming data (inputs like coin or card payments) and orchestrating all outgoing actions (outputs such as product dispensing or screen updates). The design process, though seemingly complex, can be broken down into manageable steps for beginners. This involves clearly defining the machine’s functional requirements, carefully selecting appropriate components, and crafting a layout that ensures all elements operate together harmoniously.
Key Components Found on a Vending Machine PCB
Before delving into the design workflow, let’s identify the typical components you would encounter on a vending machine PCB:
● Microcontroller Unit (MCU): This is the core intelligence of the system, responsible for all logic and decision-making. A suitable MCU might feature 32-bit processing capabilities with a clock speed ranging from 48-80 MHz to efficiently handle multiple concurrent tasks.
● Power Supply Circuit: This circuit converts incoming voltage (commonly 12V or 24V) into stable, regulated levels (e.g., 5V or 3.3V) required by various components, often delivering 1-2A of current for most modules.
● Motor Drivers: These modules are crucial for controlling the motors responsible for dispensing products. They often manage loads up to 1A per motor, catering to potentially 25-30 motors in larger vending machines.
● Sensors: Various sensors detect events like coin insertion, bill validation, or product availability, necessitating low-noise signal paths for accurate readings.
● Communication Modules: These enable network connectivity (e.g., Wi-Fi or cellular) for remote updates, inventory management, or cashless payment systems, often operating at 2.4 GHz for standard wireless protocols.
● Display Interface: This circuit drives an LCD or LED screen to present menus, transaction details, or other information, typically using SPI or I2C communication protocols at speeds up to 1 MHz. A clear understanding of these components and their specific electrical requirements is the essential first step in creating a functional PCB design for a vending machine.
A Step-by-Step Guide to the Vending Machine PCB Design Process
Designing a PCB for a vending machine demands a structured approach. The following outlines a complete vending machine PCB design process to guide you from initial concept to a fully functional board.
Defining Requirements and Specifications
Begin by meticulously listing all the functionalities your vending machine must possess. Will it exclusively accept coins, or will it also support bills and card payments? How many different products will it dispense, and what types of motors are needed? Precisely define power requirements (e.g., a 24V input for heavy-duty motors) and account for environmental factors (such as an operating temperature range of 0-50°C for outdoor installations). Develop a block diagram to visually map out the major components and their interactions, ensuring no critical features are overlooked during the design phase.
Schematic Design Phase
Once all requirements are clearly defined, proceed to create a detailed schematic diagram. This serves as the electrical blueprint, illustrating how all components are interconnected. Use appropriate design software to place your MCU, power supply, motor drivers, sensors, and any other modules. Ensure that proper voltage levels are maintained (e.g., 5V for sensors, 3.3V for communication chips) and include decoupling capacitors (typically 0.1μF placed close to ICs) to provide stable power and filter noise. Thoroughly double-check all connections to prevent potential short circuits or signal mismatches.
Component Selection
Based on your completed schematic and defined requirements, carefully select each component. Opt for reliable, industry-standard parts with comprehensive datasheets that specify critical parameters such as voltage tolerance (e.g., ±5%) and current limits (e.g., 500mA for small motors). For the MCU, ensure it offers a sufficient number of General Purpose Input/Output (GPIO) pins (at least 30 for a machine managing 25 motors and additional sensors). Factor in future scalability by selecting components with slightly higher specifications to accommodate potential upgrades or expanded functionalities.
PCB Layout Design
With the schematic finalized, move on to the PCB layout. This crucial step involves physically arranging components on the board and routing conductive traces to establish electrical connections. Adhere to best practices, such as maintaining separate power and ground planes to minimize noise, and strategically placing high-current components (like motor drivers) away from sensitive analog circuits (like sensors). Aim for trace widths of 10-20 mils for general signal lines and 30-50 mils for power lines carrying 1-2A to prevent overheating and ensure efficient current delivery.
Design Rule Check (DRC) and Prototyping
Utilize the design rule check (DRC) feature within your software to identify and correct potential errors, such as overlapping traces or insufficient clearances (maintain at least 8 mils between traces for standard 1 oz copper boards). Once the design passes DRC, generate a prototype board. Thoroughly test this prototype for full functionality—verify precise motor control, accurate payment detection, and correct display output. Use a multimeter to confirm voltage levels (e.g., 5V at sensor inputs) and an oscilloscope to monitor signal integrity, ensuring noise levels remain below 50mV peak-to-peak on critical signal lines.
Finalization and Manufacturing
After comprehensive testing and any necessary refinements based on feedback, finalize your design. Generate Gerber files, which are the industry-standard format for PCB manufacturing, and submit them to a reputable fabrication service. Confirm that your chosen board house can support your specific requirements, such as 2-layer or 4-layer boards with a typical thickness of 1.6mm, essential for durability in demanding vending machine applications.
Expert PCB Layout Tips for Vending Machine Performance
The layout phase is paramount for ensuring your PCB operates flawlessly. Here are some critical vending machine PCB layout tips, especially helpful for those new to the process.
Strategic Component Placement
Arrange components logically, grouping related parts together. For instance, position the MCU close to communication modules to minimize signal trace lengths (ideally under 2 inches to reduce delay at 1 MHz speeds). Place components that generate significant heat, such as voltage regulators, near the board edges to facilitate better cooling. Ensure motor drivers have access to thick power traces (at least 40 mils for 2A currents) to handle their power demands efficiently.
Minimizing Signal Interference
Route sensitive analog signals, such as sensor outputs, far away from noisy digital lines, like those controlling motors. Utilize solid ground planes to provide shielding and effectively reduce electromagnetic interference (EMI). Maintain a high signal-to-noise ratio (above 20 dB) for reliable sensor readings by preventing trace crossings over split ground planes.
Optimized Power Distribution
Design a robust power distribution network. Employ wide traces or dedicated copper pours for power and ground connections to efficiently handle currents up to 5A, necessary for multiple motors. Incorporate bypass capacitors (e.g., 10μF near power pins of ICs) to filter out high-frequency noise, ensuring that voltage drops remain below 0.2V during peak load conditions.
Addressing Mechanical Constraints
Vending machines typically operate within limited physical spaces, making careful mechanical planning crucial. Design your HDI PCB to fit precisely within the machine’s enclosure. Incorporate mounting holes (typically 3.2mm in diameter) that align with the machine’s internal frame. Ensure that all connectors are easily accessible for straightforward wiring to external components like coin acceptors or display panels.
Recommended PCB Design Software for Vending Machine Projects
Choosing the right design tools can significantly impact your experience and the quality of your final product. Here are some recommended vending machine PCB design software options, focusing on user-friendly platforms that cater to beginners while still offering powerful capabilities.
Free and Open-Source Software
For designers on a tight budget, free tools provide an excellent starting point. These platforms typically offer schematic capture and PCB layout features suitable for small to medium-sized vending machine projects. They often include extensive component libraries with common parts like MCUs and motor drivers and support 2-layer boards with trace widths down to 6 mils for compact designs.
Professional-Grade Software with Trials
Several advanced design tools offer free trials or educational licenses. These are ideal for learning complex design techniques, supporting multi-layer boards (up to 16 layers) and high-speed routing with precise impedance control (e.g., 50 ohms for communication lines). Such software often includes simulation features, allowing you to test signal integrity before committing to manufacturing.
Cloud-Based Design Platforms
Cloud-based tools facilitate collaborative design and allow access from any internet-connected device, making them perfect for teams working on vending machine projects. They frequently integrate schematic and layout design with real-time error checking, ensuring clearances meet industry standards (e.g., 10 mils for 1 oz copper). Look for platforms with intuitive interfaces that are easy for beginners to learn. Regardless of the software chosen, ensure it supports the export of Gerber files and includes a design rule check feature to identify and correct errors early in the process. Begin with the tutorials provided by the software to familiarize yourself with its interface before tackling a full vending machine PCB design.
Overcoming Common Challenges in Vending Machine PCB Design
Designing a PCB for a vending machine presents unique challenges. Here are some common issues encountered and effective solutions to address them:
● Managing High Current for Motors: Vending machines often employ multiple motors, each potentially drawing 0.5-1A, which can lead to voltage drops or component overheating.
○ Solution: Use substantially thick traces (50 mils or more) for power delivery and consider adding heat sinks to motor drivers if power dissipation exceeds 1W per component.
● Mitigating EMI from Multiple Components: The presence of motors, displays, and wireless modules on a single board can lead to significant electromagnetic interference (EMI), disrupting sensitive signals.
○ Solution: Implement separate ground planes for analog and digital sections of the board. Integrate ferrite beads on power lines (rated for 1A at 100 MHz) to filter high-frequency noise.
● Fitting Complex Designs within Limited Space: Physical space constraints within a vending machine can make the layout phase particularly challenging.
○ Solution: Prioritize surface-mount components (SMD) over through-hole components to maximize space efficiency. For more complex designs, consider a 4-layer board to stack power and signal layers, which reduces the overall footprint while maintaining necessary clearances (e.g., 10 mils).
Concluding Thoughts on Successful Vending Machine PCB Design
Creating a PCB for a vending machine is a rewarding endeavor that combines innovative thinking with precise engineering. By adhering to a structured vending machine PCB design process, applying practical layout tips, and utilizing beginner-friendly design software, you can effectively bring your concept to fruition. Always begin with clearly defined requirements, prioritize meticulous component placement and signal integrity, and conduct thorough testing before proceeding to manufacturing. These steps will set you firmly on the path to designing a reliable PCB that powers a successful vending machine.
AIVON, a professional online PCB manufacturer, is dedicated to supporting engineers and designers throughout every phase of their projects. Whether you are a novice or a seasoned professional, AIVON's comprehensive resources and advanced manufacturing services are readily available to help transform your vending machine PCB designs into tangible, high-quality products with precision and efficiency.


