Introduction
DIY PCB drilling opens up exciting possibilities for electronic hobbyists eager to bring their homemade PCBs to life. After completing PCB etching, the next crucial step involves creating precise holes for components and vias using manual methods. This process allows makers to prototype electronics projects without relying on professional fabrication services. Mechanical drilling stands out for its accessibility, requiring only basic tools found in most workshops. Beginners can achieve reliable results by following structured techniques that prioritize safety and accuracy. Mastering manual PCB drilling empowers hobbyists to iterate quickly on designs and customize boards for unique applications.
What Is DIY PCB Drilling and Why It Matters for Homemade PCBs
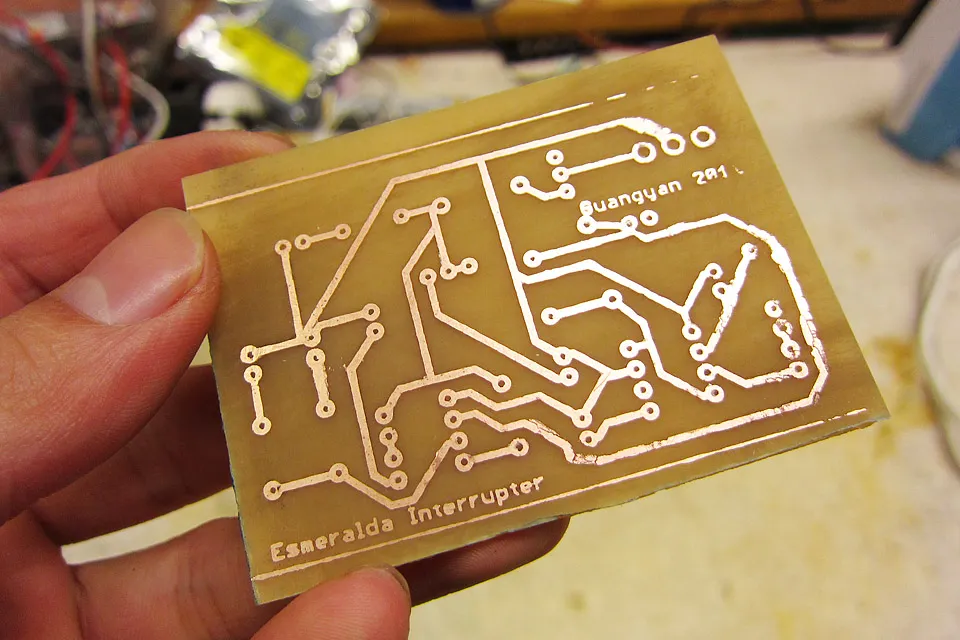
DIY PCB drilling refers to the manual creation of holes in copper-clad boards after the etching process removes unwanted copper. These holes accommodate through-hole components, connectors, and mounting points essential for functional electronics projects. In homemade PCB workflows, mechanical methods like hand drills or small presses replace industrial CNC machines, making prototyping feasible at home. This approach matters because poor hole quality can lead to assembly failures, such as loose fits or damaged traces. For hobbyists, achieving clean holes ensures components sit securely, enabling solder joints that withstand vibration and heat. Ultimately, effective DIY PCB drilling bridges the gap between design software and working prototypes.
Understanding Mechanical Drilling Principles for PCBs
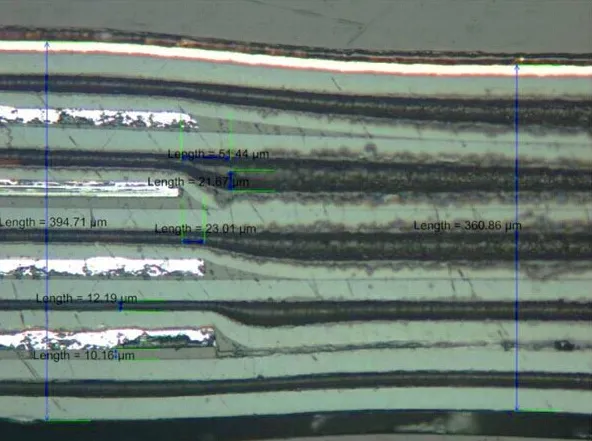
Mechanical drilling in PCBs involves rotating a small bit to remove material from the substrate, typically FR-4 fiberglass reinforced with epoxy. The process generates heat and chips, so proper technique prevents delamination or rough hole walls. Bits must match the board's thickness and hole diameter specified in the design artwork. Carbide or high-speed steel bits designed for PCBs excel due to their sharpness and durability against abrasive fiberglass. Pressure should remain light to allow the bit to cut cleanly rather than grind, reducing breakage risk. Understanding these principles helps hobbyists align their manual efforts with professional standards like IPC-A-600 for hole acceptability.
Drilling creates challenges unique to PCBs, such as burrs on copper layers and potential misalignment if the board shifts. Vias require plating in advanced setups, but for simple homemade PCBs, unplated holes suffice for most through-hole parts. Feed rate and rotation speed influence hole straightness and surface finish, with slower, steadier motions yielding better results. Hobbyists benefit from visualizing the bit's path through multiple layers, ensuring it exits cleanly on the opposite side. Adhering to design tolerances prevents shorts or open circuits during assembly. These fundamentals form the basis for reliable manual PCB drilling. For designs requiring plated holes, review our overview of PCB via plating processes.
Essential Tools and Materials for Manual PCB Drilling
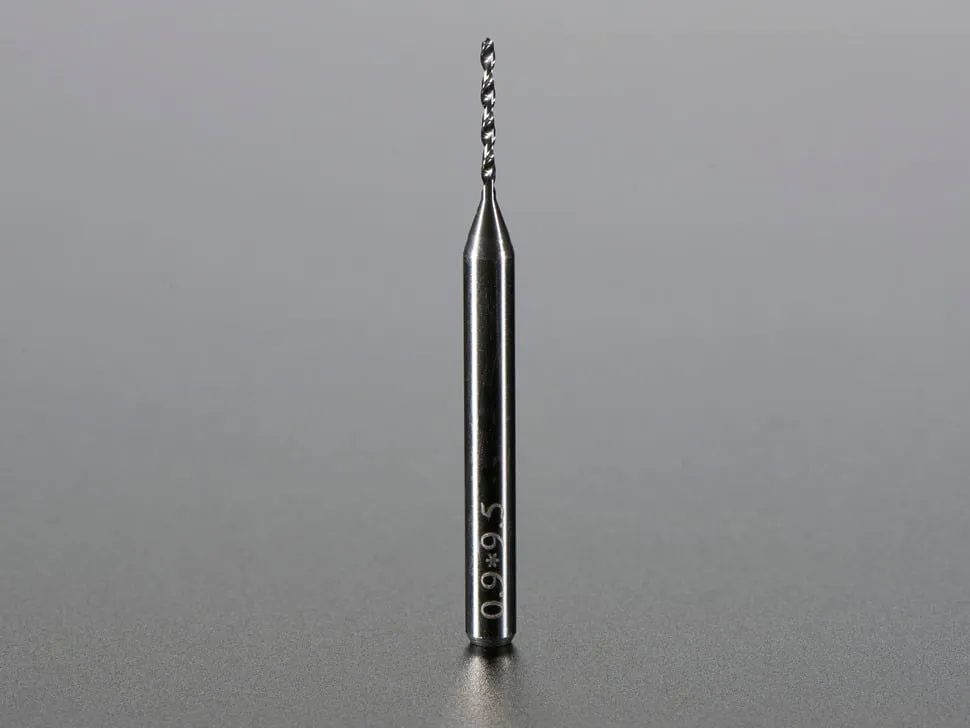
Start with a variable-speed rotary tool, such as a handheld drill or precision press, capable of high RPMs for small bits. A set of micro drill bits in sizes from 0.3mm to 1.5mm covers common component leads and vias in electronics projects. Secure the PCB using a soft clamp or foam-backed vise to prevent slipping without denting the board. Magnification aids like a bench vise with light or loupe ensure precise positioning over drill sites marked from the artwork. Backup materials, such as sacrificial wood under the board, absorb excess drill travel and reduce tear-out. Safety gear including eye protection and a dust mask protects against fiberglass particles generated during drilling. Selecting the right carbide bits is crucial for clean results—see our related guide on simple techniques for accurate PCB drilling at home.
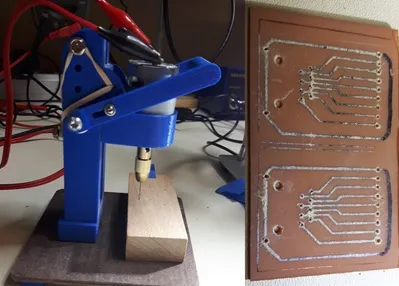
For enhanced control, a mini drill stand converts a rotary tool into a quasi-press, minimizing wander on initial entry. Collets or chucks must grip bits firmly without wobble, as vibration ruins hole quality. Printed drill templates or CNC-generated films align holes accurately with pads. Lubricants like cutting oil reduce friction, though isopropyl alcohol cleans residue post-drill. These tools transform basic setups into effective stations for repeated DIY PCB drilling tasks.
Tool Comparison Table
| Tool Type | Price Range | Best For | RPM Range | Pros | Cons |
|---|---|---|---|---|---|
| Hand Drill / Pin Vise | $5–20 | Very small runs, ultra-budget | Manual | Cheap, portable | Inconsistent speed, fatigue |
| Dremel Rotary Tool | $30–80 | Most hobbyists | 8,000–35,000 | Versatile, easy to find | Can wander without stand |
| Mini Drill Press / Stand | $25–100 | Consistent accuracy | 10,000–30,000 | Perpendicular holes, repeatable | Less portable |
| Desktop CNC Mill | $200–800+ | Scaling up | Programmed | High precision, repeatable | Learning curve, higher cost |
Step-by-Step Guide to Manual PCB Drilling
Prepare the board by cleaning post-etching surfaces and transferring drill coordinates via lightbox or printed overlay. Secure the PCB firmly, aligning the first hole site under the bit using a center punch for a starter dimple if needed. Select the appropriate bit size, insert it securely, and set the tool to a moderate speed suitable for the material. Apply gentle downward pressure while the bit spins, letting it cut progressively without forcing. Advance slowly through the board, pausing briefly midway if multi-layer, to clear chips. Withdraw the bit straight up, inspect the hole for straightness and debris, then deburr edges with a countersink or fine file.
Repeat for all holes, progressing from larger to smaller diameters to avoid bit damage on oversized paths. Verify alignment by test-fitting components periodically. After all drilling, clean the board thoroughly with compressed air and solvent to remove dust. Solder mask application, if planned, protects traces around holes. This methodical process ensures your homemade PCB supports robust electronics projects.
Best Practices for Achieving Professional-Quality Holes
Maintain perpendicularity by using guides or stands, as angled holes complicate component insertion. Peck drilling, withdrawing periodically, evacuates chips and cools the bit, preventing binding. Inspect each hole against IPC-6012 performance specifications for rigid boards, checking for cracks or excessive roughness. Sequence holes away from sensitive traces to minimize vibration impact. Store bits in organized cases to prevent dulling, and replace them at signs of wear like snagging. Consistent practices elevate manual PCB drilling to match factory outputs.
Support the board fully during drilling to counteract flex, which warps thin panels. Use sharp bits exclusively, as dull ones generate heat leading to resin smear. Post-drill inspection under magnification reveals issues early, allowing rework. These habits not only improve yield but also build skills transferable to advanced projects.
Troubleshooting Common Issues in DIY PCB Drilling
Bit breakage often stems from excessive pressure or misalignment; reduce force and ensure true entry. Misdrilled holes result from board shift, so double-check clamps before starting. Burrs around holes, common in copper, require careful deburring without removing pad material. Excessive roughness indicates wrong speed or dull bit; experiment with settings on scrap. If holes are oversized, verify bit size and avoid overheating, which expands material temporarily. Addressing these systematically refines your manual PCB drilling technique.
For plating-like needs in vias, hobbyists can use conductive ink post-drill, though unplated works for prototypes. Warped boards from prior etching heat may cause inconsistent depths; flatten under weight before drilling. Persistent problems signal tool issues, like collet play, warranting maintenance.
Mechanical vs CNC vs Laser: Choosing the Right Method
Pros/Cons Comparison Table
| Method | Cost | Precision | Learning Curve | Best For | Speed |
|---|---|---|---|---|---|
| Mechanical (Manual) | Very Low | Good (with practice) | Low | Beginners, small prototypes | Slow |
| CNC Milling | Medium-High | Excellent | Medium | Repeatable small batches | Fast once programmed |
| Laser Drilling | High | Very High | High | Ultra-fine vias, no contact | Very Fast |
Beginners should start with mechanical methods to master fundamentals. Upgrade to desktop CNC when producing more than 5–10 identical boards or when via counts exceed 100 per board. Hybrid approaches — mechanical for large holes and CNC for dense areas — offer a practical middle ground. Transition to professional fabrication when tolerances tighten below ±0.1 mm or when reliability certification is required.
Post-Drilling Processes and Scaling Up
After drilling, thoroughly clean the board with isopropyl alcohol and compressed air to remove fiberglass dust that can cause shorts. Deburr both sides carefully. For prototypes, unplated holes are usually sufficient. For better reliability, apply conductive ink or use hobbyist electroless plating kits on vias.
When your projects outgrow manual methods, consider professional services that offer quick-turn prototypes with plated through-holes and tight tolerances. Aivon specializes in helping hobbyists and small businesses scale from handmade boards to production-grade PCBs with full DFM support and rapid turnaround.
Conclusion
DIY PCB drilling with mechanical methods empowers electronic hobbyists to realize homemade PCBs fully. From selecting tools to mastering techniques, each step builds toward reliable prototypes. Adhering to principles like light pressure and precise alignment yields holes meeting basic IPC standards. Troubleshooting refines skills, turning challenges into expertise. Whether for simple circuits or complex electronics projects, manual PCB drilling remains a cornerstone of hands-on making. Embrace this process to fuel endless innovation in your workshop.
FAQs
Q1: What tools do I need for DIY PCB drilling as a beginner?
A1: Essential tools include a variable-speed rotary tool, micro carbide drill bits, a drill stand for stability, and a clamping setup. Magnification and backup material enhance precision. These enable clean holes in homemade PCBs after etching, supporting various electronics projects. Always prioritize safety gear to handle fiberglass dust.
Q2: How do I avoid breaking drill bits during manual PCB drilling?
A2: Use light pressure, allowing the bit to cut rather than push through material. Peck drill to clear chips and reduce heat buildup. Select sharp carbide bits matched to hole sizes, and practice on scrap first. Proper technique ensures longevity for repeated DIY PCB drilling sessions.
Q3: Is manual PCB drilling suitable for high-density boards?
A3: For hobbyist electronics projects, manual methods work well for low to medium density homemade PCBs. High-density requires finer control, possibly aided by templates. Aim for hole quality akin to IPC-A-600 acceptability criteria. Upgrade to a press for consistency in denser designs.
Q4: What comes after DIY PCB drilling in the homemade PCB process?
A4: Clean and deburr holes, then populate with components for soldering. Apply solder mask if desired for protection. Test continuity before full assembly. This completes the path from PCB etching to functional prototypes in electronics projects.
References
IPC-A-600K — Acceptability of Printed Boards. IPC, 2020
IPC-6012E — Qualification and Performance Specification for Rigid Printed Boards. IPC, 2017
IPC-2221B — Generic Standard on Printed Board Design. IPC, 2012