In production we routinely apply single-side compensation of 0.05–0.15 mm to coverlay openings depending on pad pitch and stencil aperture. CAM engineers enlarge openings to match the steel mesh size while keeping enough overlap on traces to prevent adhesive squeeze-out from blocking pads. This FPC coverlay opening compensation ensures reliable SMT without rework on most flex runs.

What we typically see is that direct 1:1 openings from the original artwork cause partial pad coverage after lamination due to film movement and adhesive flow. Factories therefore standardize adjustments based on actual stencil data rather than following the gerber exactly.
Common Single-Side Compensation Practices on the Floor
For standard SMD pads we add 0.05–0.08 mm per side on the coverlay window. Finer pitch components (under 0.5 mm) get 0.1 mm single-side enlargement to guarantee full exposure even with ±0.1 mm registration tolerance. Larger power pads or test points usually stay closer to nominal with minimal 0.05 mm offset because alignment is less critical there.
Laser or mechanical cutting of the coverlay film introduces slight dimensional variation, so the compensation prevents the adhesive from flowing inward and reducing the effective solderable area. This is our default FPC coverlay opening compensation approach on most production panels.

Why We Adjust Openings According to Stencil Size
Stencil apertures are the real limiting factor for paste volume and joint quality. When coverlay openings are smaller than the stencil, solder paste sits on top of the film and causes poor wetting or bridging. We pull the coverlay data to be at least as large as the stencil window, usually matching or slightly exceeding it by 0.05 mm all around.
This logic comes directly from SMT line feedback. In recent EQ cases we enlarged coverlay windows to exactly match the customer's steel mesh design after they reported insufficient paste release. The adjustment is always one-way outward to protect assembly yield.
Handling Differences Between Coverlay Data and Original Design
Most incoming gerbers show tight openings that look perfect on screen but fail in real lamination. We compare the coverlay layer against the copper pads and stencil gerber, then apply the necessary flex PCB mask adjustment in CAM. The difference is documented in DFM notes so designers understand why the final board looks different from the original file.
If the original design has zero clearance we flag it immediately. For high-volume orders we may request confirmation before processing, but standard practice is to compensate proactively to avoid downstream issues. Adhesive squeeze-out during pressing makes exact 1:1 matching impractical on flex materials.

What Happens When Compensation Is Ignored
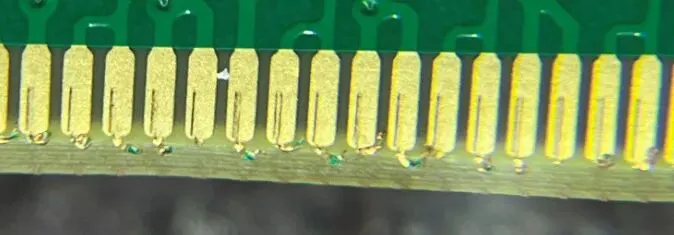
Without adjustment we see pads partially covered by coverlay or adhesive, leading to open joints, insufficient solder fillet, and high rework rates on the SMT line. In one batch of fine-pitch connectors the misalignment caused 30% first-pass failure because paste could not reach the full pad surface. This creates shipment delays and repeated EQ communications.
Trace edges near openings also become vulnerable to lifting when coverlay registration drifts even slightly. These are the typical production consequences we try to avoid by applying consistent FPC coverlay opening compensation.
Factory-Side Methods for Reliable Mask Adjustment
CAM first extracts pad and stencil data, then generates compensated coverlay apertures using standard offset rules stored in our tooling. For laser-cut coverlay we account for beam kerf; mechanical punched films get extra margin for die wear. Registration holes and fiducials on the panel help hold tight alignment during the heat-press step.
We always verify the final opening size against the stencil on first articles with AOI and cross-section checks. This combination of data compensation and process control keeps flex PCB mask adjustment reliable across different panel thicknesses and coverlay types.
When Smaller Compensation or Exceptions Apply
On very large openings or non-critical test points we can reduce single-side compensation to 0.03 mm if the design has generous pad sizes and the stencil is confirmed loose. Prototype runs sometimes use minimal adjustment when quick turnaround is needed and the customer accepts higher assembly risk. Ground planes or shield areas also tolerate tighter settings because solder is not involved.
Exceptions are reviewed case by case. For standard production we stick to the proven single-side compensation values that match our SMT partners' stencil requirements.
From the shop floor, clear communication of stencil data alongside the gerber files helps us apply the right FPC coverlay opening compensation from the beginning. This small adjustment in the mask layer prevents the majority of assembly headaches we see on flex boards.