










Voice-Controlled Robot Dog with a Custom PCB: Complete Build Guide
Key Moment
- 0:00 Intro – offline voice-controlled robot dog
- 0:27 3D-printed parts overview
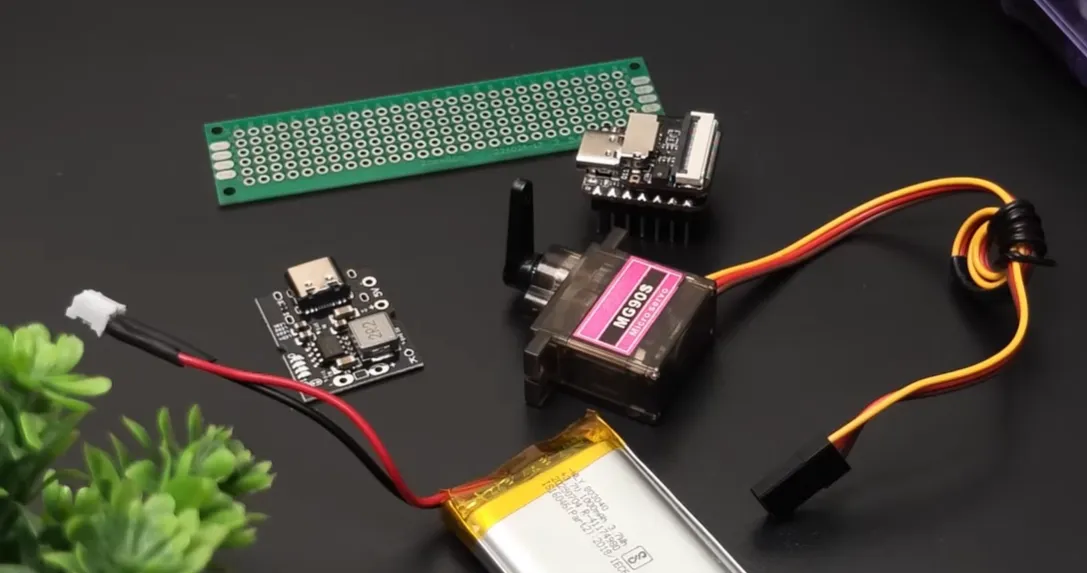
- 0:38 Hardware: XIAO ESP32S3 Sense, 4 servos, battery & charger
- 1:51 Servo orientation & assembly tips
- 2:41 PCB connections & circuit diagram
- 2:56 Servo pin assignments (pins 3-6)
- 3:12 Flashing firmware with web tool
- 3:28 Sponsor segment (Aivon PCB)
- 5:19 Robot ready – voice commands demo (Hi Jolly…)
- 6:29 Outro & subscribe
Project Background
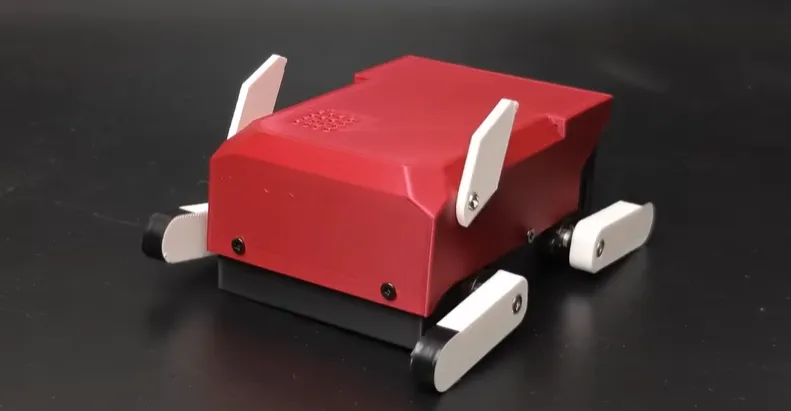
In the fast-growing maker and robotics community, hobbyists and engineers are increasingly seeking compact, responsive, and fully offline interactive projects that bridge mechanical design, embedded systems, and PCB engineering. Voice-controlled robots represent a compelling intersection of AI edge computing and physical hardware, appealing to educators, STEM enthusiasts, prototype developers, and robotics startups. This project by Tech Talkies exemplifies the trend: a charming quadruped robot dog named "Jolly" that responds instantly to voice commands without cloud dependency, powered by affordable components and a thoughtfully designed custom PCB.
AIVON PCB, as a trusted partner in rapid PCB manufacturing, specializes in turning such innovative maker visions into production-ready hardware through high-quality prototyping, DFM analysis, and scalable manufacturing solutions.
What This Video Covers
The YouTube video "How I made this Voice-Controlled Robot Dog from Scratch" by Tech Talkies provides a complete step-by-step journey. It showcases 3D-printed mechanical assembly, component integration, custom PCB wiring, firmware flashing via a browser-based web flasher, and live demonstrations of voice commands. Viewers see real-world assembly challenges being solved on camera, including servo orientation, power management, and fitment adjustments. The video highlights the seamless integration enabled by the custom PCB from AIVON, making the build clean, reliable, and repeatable.
Full source code, STLs, and wiring diagrams are available on GitHub, with direct links in the video description.
Project Highlights and Key Features
- Fully Offline Voice Control: Powered by Seeed XIAO ESP32S3 Sense with built-in PDM microphone and ESP-Skainet for on-device speech recognition. Wake word "Hi Jolly" triggers commands like sit, lie down, stretch, walk, dance, and "good boy" tail wag.
- Smooth, Natural Movements: Smoothstep easing algorithms deliver realistic weight shifts, choreographed dance routines, and expressive tail wagging.
- Compact & Portable Power: LiPo battery with 5V boost/charger module ensures reliable operation without bulky supplies.
- Clean Custom PCB Integration: The AIVON-manufactured board serves as the central nervous system, eliminating messy jumper wires and enabling secure mounting of the XIAO, servo connectors, and power module inside the 3D-printed chassis.
- Maker-Friendly: Browser-based web flasher requires no drivers. Open-source files lower the barrier for replication.
- Robust Engineering: Precise pin mapping (GPIO 3-6 for servos), outward-oriented servo wiring, and optimized power distribution prevent common robotics issues like jitter and brownouts.
This build demonstrates how thoughtful PCB design elevates a fun prototype into a dependable, show-ready companion.
Challenges Encountered During Development
Even polished projects face hurdles. The maker addressed a fitment conflict where the battery connector interfered with the 3D-printed plate by desoldering and flipping it. Servo orientation required careful planning to route wires outward and avoid tangling or pinching during movement. Power management was critical—MG90S micro servos create current spikes that risk MCU brownouts without proper distribution. Audio processing demanded clean grounding to maintain voice recognition accuracy amid servo noise. Mechanical alignment between PCB mounting holes, servos, and 3D-printed parts also needed iteration to account for tolerances.
These real-world issues underscore the importance of early DFM consideration in robotics prototyping.
How AIVON PCB Helps
AIVON PCB transforms these challenges into strengths through professional manufacturing support. The custom 2-layer PCB provided a compact (~50x40mm), rigid platform with wide power traces (15-30 mil), generous copper pours, and multiple decoupling points to handle current demands and minimize noise for reliable voice recognition. Precise mounting holes (±0.1-0.2mm tolerance) and chamfered edges ensured perfect alignment with the 3D-printed chassis, eliminating fitment frustrations.
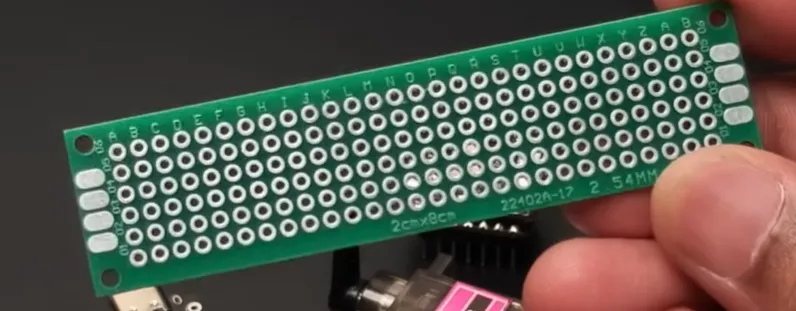
Clear silkscreen labels, polarity markings, and test points accelerated hand assembly and debugging. AIVON's free DFM reviews, rapid prototyping, and engineering guidance optimized trace widths, via placement, and stackup for mechanical strength and cost efficiency. Instant quotes, welcome credits for new users, and responsive support allow makers to iterate quickly—upload Gerbers, receive feedback, and receive high-quality boards that match the design vision exactly. Whether for single prototypes or small-batch production, AIVON delivers the one-stop solution for fast turn PCB manufacturing, high-reliability assembly, and scalable robotics hardware.
Conclusion
Tech Talkies' voice-controlled robot dog is a delightful showcase of creativity powered by smart electronics and precision PCB design. It proves that with the right hardware foundation, anyone can create responsive, personality-filled robotics projects.
FAQ
Q1: What makes a custom PCB essential for a voice-controlled robot dog project?
A1: A custom PCB provides clean power distribution, solid ground planes, and secure mechanical mounting that prevent servo jitter, brownouts, and wiring chaos common in breadboard prototypes. It also reduces noise for better onboard microphone performance.
Q2: How does AIVON PCB support robotics prototyping like this voice robot dog?
A2: AIVON offers rapid PCB manufacturing, free DFM reviews, precise tolerances for 3D-printed integration, and engineering guidance on trace widths, vias, and power integrity to ensure reliable servo control and voice recognition.
Q3: What board specifications are recommended for compact servo-driven robots?
A3: 2-layer FR-4, 1.6mm thickness, compact size (~50x40mm), HASL/ENIG finish, wider power traces (15-30 mil), and clear silkscreen labels work well for balancing cost, rigidity, and assembly ease.
Q4: Can beginners successfully replicate this voice-controlled robot dog PCB build?
A4: Yes— with open-source files, web flasher, and AIVON's quick-turn prototypes and DFM support, makers with basic soldering skills and a 3D printer can achieve reliable results.
Q5: How do DFM best practices improve voice robot projects?
A5: Proper component placement (separating high-current and audio sections), generous copper pours, mounting hole precision, and tolerance considerations prevent fitment issues, noise, and mechanical stress for consistent performance.
[0:07] [snorts]
[0:13] This is my pet robot. He can recognize my voice commands completely offline.
[0:19] If you're curious how I made this or want to learn how to make one yourself, watch till the end.
[0:27] He is made of these 3D printed parts.
[0:38] The robot runs on a Xiao ESP32S3 Sense board. This microcontroller board has an add-on board with a built-in microphone on it. And four micro servo motors
[0:52] and this LiPo battery charger and boost module. It charges the battery and also gives us a boosted 5 volt. A LiPo battery, any size will do. I'm using a 1000 mAh battery
[1:04] and a PCB to make all the connections and put our components on
[1:47] [music]
[1:51] Make sure to pay attention to the orientation of the servos.
[1:54] Make sure that all the wires are pointing outwards.
[2:03] There is a small problem. The battery connector I soldered onto the charging module is getting in the way of this 3D printed plate. So, I'm going to remove it and solder it on the back side.
[2:15] I have soldered it on the back side and connected the battery too.
[2:41] I have made all the connections on the PCB and the circuit diagram link is in the description.
[2:56] Make sure that you're connecting the servos to the correct pins. The front left servo is connected to pin three on the ESP32 and the front right to four, the back left to five, and the back right to six.
[3:12] And before we put the ESP32 on the board, we need to upload the program to it. You can just plug it into your computer and use the Tech Talkies flasher tool to flash the code.
[3:28] And if you need custom PCBs for projects like these, Aivon provides a structured solution for prototyping and production. For new users, the platform includes up to $60 in welcome credits along with a free engineering review. This includes $30 manufacturing credit, $30 for shipping, and even free engineering review. With this, you can do a lot of things like PCB prototyping, making PCBA orders, or even engineering driven jobs. You simply have to sign up and verify your account, and you can start uploading your design and start placing orders.
[4:39] And to give a little more grip to the legs, you can add a small piece of electrical tape to
[5:19] And our pet robot is ready. Once you turn him on, you can start giving him commands by calling his name. And his name is Jolly. So you say, "Hi Jolly." And say a command.
[5:32] Hi Jolly. Dance.
[5:49] [snorts]
[5:51] Hi Jolly. Come here.
[6:03] Sit down.
[6:09] Good boy.
[6:12] Stretch.
[6:20] [snorts]
[6:21] Lie down.
[6:29] And if you like these kinds of projects or starting to learn robotics, subscribe to our channel. It's going to be really helpful. See you on the next one.





