










From Breadboard to Custom PCB: Building an ESP32-S3 AI Chatbot
Key Moment
- 0:00 Intro demo – talking to Jarvis
- 0:31 Required hardware list
- 1:04 Wiring (mic, amp, OLED)
- 2:39 Software setup (VS Code + ESP-IDF)
- 3:40 menuconfig settings
- 5:08 Edit pin definitions in config.h
- 5:35 Flash the firmware
- 5:46 Wi-Fi setup & add device
- 7:35 Add animated face (Face Engine)
- 9:12 Final demo with face
Project Background
In the fast-growing edge AI and voice technology market, makers and electronics engineers are seeking compact, powerful solutions that deliver intelligent interactions without heavy cloud reliance. The ESP32-S3 AI chatbot project featured in this KOL video exemplifies this trend: transforming an open-source Xiaozhi AI framework into a fully functional voice assistant with conversational capabilities, weather checks, music playback, and a delightful animated face on a 128x64 OLED display.
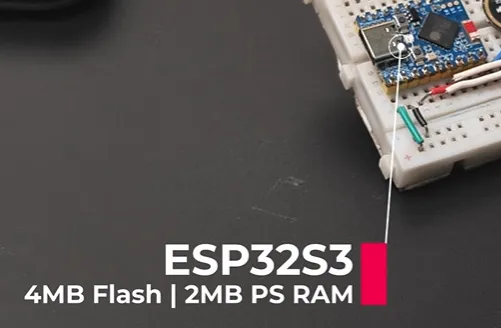
Engineers and hardware enthusiasts often start on breadboards with modules like the Waveshare ESP32-S3-Zero, INMP441 MEMS microphone, MAX98357 amplifier, and OLED, but face challenges moving to reliable, scalable hardware. This project addresses real customer needs for accessible yet robust PCB prototyping and rapid manufacturing. AIVON PCB, a trusted partner in PCB manufacturing and rapid prototyping, helps bridge the gap from prototype to polished product.
What This Video Covers
The video guides viewers through the complete journey of building the ESP32-S3 AI chatbot. It starts with hardware selection and breadboard wiring, moves into ESP-IDF firmware setup in VS Code (including PSRAM configuration, partition tables, wake word setup, and Wi-Fi provisioning), and showcases the integration of voice I/O with the charming animated face UI from the Face-for-Xiaozhi repository.
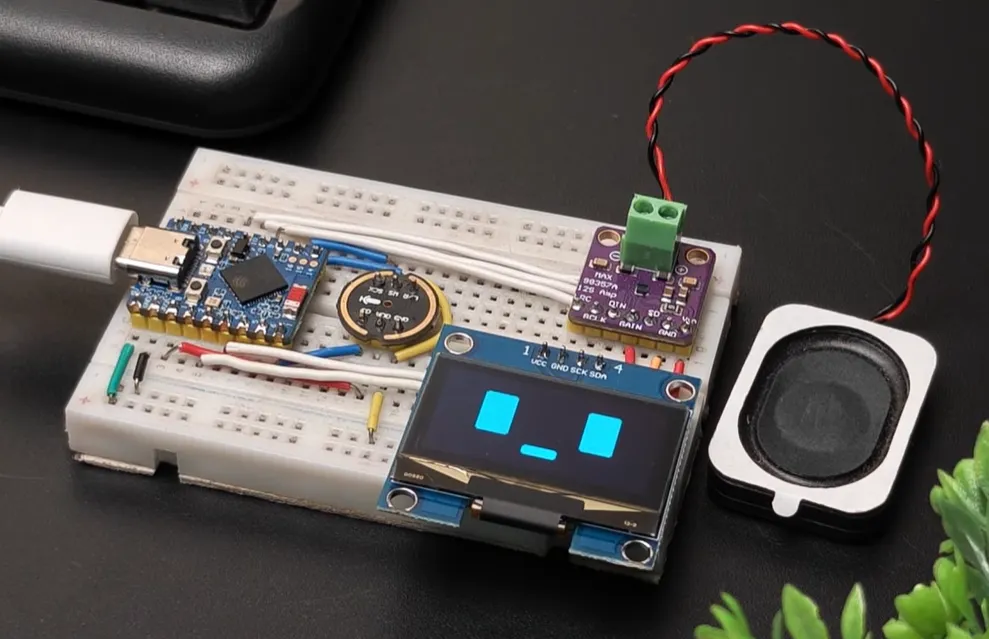
Key sections demonstrate real-time demos of conversational AI, troubleshooting common pitfalls, and practical advice for transitioning to a custom PCB. The content emphasizes modular firmware additions, signal integrity for I2S audio, and design choices that ensure smooth performance on resource-constrained hardware.
Project Highlights and Key Features
This build stands out for its clever balance of functionality and user engagement on compact hardware:
- ESP32-S3 with PSRAM and Flash: Enables local LLM-backed conversations and smooth animated UI.
- Voice Interaction System: INMP441 microphone for input and MAX98357 amp with speaker for natural audio output, supporting wake words like "Jarvis."
- Animated OLED Face: Dynamic eyes that blink/move, expressive mouth syncing with speech, and states for idle/listening/speaking – adding personality without heavy resource demands.
- Wi-Fi & Extensibility: Easy provisioning, custom knowledge bases, and modular code architecture.
- Custom PCB Potential: Optimized for 4-layer stackup with impedance-controlled I2S routing, ENIG finish, and clean power domains for professional reliability.
These features deliver an engaging, shareable device that performs reliably beyond the bench.
Challenges Encountered During Development
Like many edge AI projects, this build encountered typical hurdles: inconsistent behavior across ESP32-S3 board variants, PSRAM mode and flash/partition table mismatches, strict 3.3V power requirements for the INMP441 (to prevent damage from 5V), and precise firmware integration for the animated face plugin (file placement, CMakeLists updates, and SetupUI overrides).
Breadboard wiring introduced noise on I2S lines, variable connections, and power instability, while firmware configuration and pin conflicts added debugging time. Scaling from prototype to replicable units highlighted the need for professional PCB design to address signal integrity, EMI, and enclosure integration.
How AIVON PCB Helps
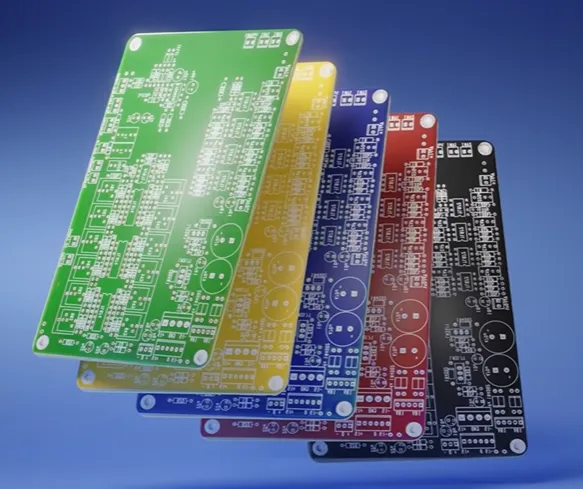
AIVON PCB provides the expert support needed to overcome these obstacles through fast-turn PCB prototyping, comprehensive DFM analysis, and high-quality manufacturing. Our engineering team assists with 4-layer stackup recommendations featuring dedicated GND/power planes and impedance control on critical I2S traces for clean audio performance. ENIG surface finish ensures reliable soldering of fine-pitch ESP32 modules and SMD components like the INMP441 and MAX98357.
We optimize layouts for short, matched traces, isolated analog/digital sections, strategic decoupling, and proper power domains – eliminating breadboard noise and improving stability. Responsive DFM feedback catches issues early, such as clearances, via placement, and mounting holes for enclosures, boosting yield and reducing costs. With rapid PCB manufacturing, one-stop services, and consistent high-quality boards, AIVON turns fragile prototypes into robust, production-ready devices that match or exceed the video's impressive demos. Whether for small batches or further scaling, our expertise in high-frequency PCB, HDI options, and Rigid-Flex ensures your edge AI projects succeed.
Conclusion
This ESP32-S3 AI chatbot project beautifully demonstrates the transition from creative breadboard experimentation to a reliable, animated voice assistant. Key takeaways include the importance of thoughtful hardware foundations, modular design, and professional manufacturing for consistent real-world performance.
FAQ
Q1: What are the most important DFM considerations for ESP32-S3 audio projects with I2S peripherals?
A1: Prioritize short, impedance-controlled traces for I2S signals (BCLK, LRC, DIN), solid ground planes, and proper decoupling to minimize noise. Use ENIG finish for reliable fine-pitch soldering and verify 3.3V power domains early to protect sensitive components like the INMP441 microphone. AIVON's DFM analysis helps catch these issues upfront.
Q2: How do you choose the right PCB stackup for an ESP32-S3 AI chatbot with OLED and audio?
A2: A 4-layer stackup (signal/GND/power/signal) is ideal for providing excellent return paths, noise reduction, and impedance control on I2S lines while remaining cost-effective. AIVON experts tailor stackups to your specific needs for optimal signal integrity in voice AI projects.
Q3: Why is professional PCB manufacturing better than prolonged breadboard prototyping for voice AI projects?
A3: Breadboards introduce noise, unreliable connections, and poor signal quality. Custom PCBs from AIVON deliver consistent performance, smaller form factors, better power stability, and easier enclosure integration, making them essential for reliable, scalable production.
Q4: How critical is impedance control for MAX98357 and INMP441 integration on ESP32-S3 boards?
A4: Highly beneficial for clean audio, especially with longer traces. Controlled routing reduces jitter, crosstalk, and debugging time. AIVON's rapid PCB manufacturing includes impedance control options to ensure high-quality voice performance.
Q5: What materials work best for compact, battery-powered ESP32-S3 AI devices?
A5: FR-4 with ENIG finish offers reliability and cost-effectiveness. Consider 1.2mm thickness for portability. AIVON provides tailored material recommendations and fast-turn production to match your project's power and thermal requirements.
[0:03] Hi there.
[0:04] I'm Jarvis.
[0:07] [music]
[0:09] How are you today?
[0:12] I'm doing great. Thank you for asking.
[0:15] This is an AI chatbot running on an ESP32. You can talk to it and it talks back, but getting this working is way harder than it should be. So, in this video, I will tell you exactly how to set it up and flash it on any ESP32 board.
[0:31] You will need an ESP32-S3 board with at least 4 MB of flash and 2 MB of PSRAM. I'm using an ESP32-S3-Zero from Waveshare.
[0:42] An INMP441 MEMS microphone.
[0:49] [music]
[0:55] A 128 by 64 pixels OLED screen.
[0:55] An I2S amplifier. This one is MAX98357.
[1:01] And a small speaker.
[1:04] You can connect the mic and the amplifier to any I2S supported pins on your board. So, connect the SCK, WS, and SD of the mic to I2S pins.
[1:16] Connect L and R to ground.
[1:19] Connect the VDD pin to 3.3 volts of the ESP32. This is very important. If you connect it to 5 volts, you will burn it.
[1:29] Connect the BCLK, LRC, DIN pins of the amplifier to I2S pins.
[1:35] Connect the VIN pin to 5 volts and gain pin to ground.
[1:41] Connect the OLED SDA and SCL pins to the I2C pins of the ESP32.
[1:45] To know which pins are supported on your board, check its pinout diagram. So, on my board, all the pins support I2S and I2C. This is the case for most ESP32-S3 boards. So, I can connect the components to any pins.
[2:00] Once the connections are done, connect the board to your computer.
[2:05] And if you need a custom PCB for your project, JLCPCB manufacturing and assembly service. Ordering is pretty straightforward. You just go to their website, upload your Gerber files, select your board specs like thickness, layers, and quantity, and you'll get an instant quote. From there, you can place the order, track the progress online, and they handle the rest, including fabrication and even assembly if needed. They support everything from quick prototypes to full production runs. So, it works whether you're building a one-off project or something more serious. If you want to try it out, I've left a link in the description.
[2:39] Then we can set up the software. The project is made in Visual Studio Code, so you will need VS Code installed. And inside VS Code, you need the ESP-IDF extension. This can be installed using the extensions panel, but I will not go into much details about that now. Once that is set up, go to the Xiaozhi GitHub repo and download it.
[3:04] Then head to the Tech Talkies GitHub page and download the face engine repo.
[3:09] Extract both the repos. Make sure that there are no spaces in the entire path to the folder where you are extracting these files.
[3:18] In Visual Studio, go to file, open folder, and open the extracted Xiaozhi folder.
[3:30] Next, at the bottom of the screen, click here to set the board.
[3:37] Select ESP32-S3, then select built-in USB JTAG.
[3:43] Next, go to view, command palette, then type menu config.
[3:47] This opens the ESP-IDF configuration editor.
[3:54] Go to the serial flasher config section.
[3:54] Set the flash size of your board.
[4:02] Change the partition table value to match your board's flash size. Mine is 4 MB.
[4:10] Then go to the Xiaozhi assistant section.
[4:13] Here, you can change the default language.
[4:19] And make sure the board type is set to bread compact Wi-Fi.
[4:25] And select the OLED display driver.
[4:25] [music]
[4:30] Scroll down to the wake word section.
[4:32] Here, you can select the wake word for your assistant. I think I will use Jarvis.
[4:45] Next, search for SPI RAM. Here, make sure the PSRAM mode is set according to what your board has. Mine has quad mode RAM.
[4:53] Now, save and close it.
[4:57] Do a full clean once.
[5:03] And build the project with the new settings. This will take some time.
[5:08] Once done, go into main, boards, bread compact Wi-Fi,
[5:12] [music]
[5:12] and open config.h.
[5:16] [music]
[5:18] These are the pins for the microphone, and these are for the amplifier. Change these to whatever pins you have connected the modules to.
[5:28] Next, change the pins that you have connected the OLED to.
[5:33] Now you are ready to flash the firmware. [5:35] Press the build, flash, and monitor button.
[5:40] If prompted, select the UART option.
[5:46] Once done, the device will go into Wi-Fi configuration mode. Enter the Wi-Fi configuration mode.
[5:56] Use a mobile phone to connect to the Xiaozhi Wi-Fi network. Open 192.168.4.1 in your browser. Use this webpage to connect to your Wi-Fi network and save the settings to Xiaozhi.
[6:06] Once connected, it will give you the device code.
[6:10] Please log in to the control panel to add the device. Enter the verification code.
[6:13] 2 1 8 3 9 3
[6:22] Head over to the Xiaozhi website, click on console,
[6:28] register and log in to the site,
[6:31] add device, and type the code from the device here.
[6:38] Click on configure role. Here, you can change the language, voice, and other settings of the device.
[6:42] [music]
[6:50] Jarvis?
[6:52] Hi there.
[6:55] It's a lovely Saturday, March 28th, 2026. The weather is quite pleasant, perfect for a relaxed day.
[7:02] How can I assist you today?
[7:04] What can you do?
[7:06] I can help adjust device settings, play music, check the weather, and more.
[7:13] Want me to do something specific?
[7:13] Can you set the volume to 100%?
[7:19] Volume has been set to 100%.
[7:21] Enjoy your audio.
[7:25] If you want to use dark mode, you can change that in the IDF config menu.
[7:29] Jarvis?
[7:31] Hi there.
[7:33] I'm Jarvis.
[7:36] How are you today?
[7:38] I'm doing great. Thanks for asking.
[7:40] It's a lovely day here in Bangalore.
[7:42] I just checked the weather, perfect for a light jacket if you're heading out.
[7:46] What about you?
[7:47] How's your day going?
[7:49] Next, if you want to add a face to the assistant, you can add the face engine from the Tech Talkies repo.
[7:58] Copy the two face engine files.
[8:01] Right click the display folder and click reveal in file explorer, and paste it inside the display folder.
[8:07] [music]
[8:14] Next, in the main folder, open the CMakeLists file.
[8:19] At the end of the sources list, add the face engine file.
[8:21] [music]
[8:29] Next, from inside the display folder, open the OLED display.cc file.
[8:36] Open the display code file.
[8:36] Copy all the code in this file.
[8:42] Paste the code at the top of the file after the include statements.
[8:48] Find the original setup UI 128 by 64 function and delete it.
[8:56] Next, open the OLED display.h file.
[8:58] Paste this one line in the file.
[9:00] The new firmware is ready. You can flash it.
[9:02] [music]
[9:09] Now all the old UI is removed and is replaced with an interactive face.
[9:12] Jarvis?
[9:15] Hi there.
[9:16] I'm Jarvis.
[9:19] How are you today?
[9:20] I'm doing great. Thank you for asking.
[9:23] The weather here in Bangalore is quite pleasant, just right for a light jacket.
[9:27] How about you?
[9:28] Any plans for the day?
[9:30] No plans. [music] I'm just recording a video of you.
[9:34] Oh, that's quite the surprise.
[9:37] I hope I'm not making any funny faces, though I do have a knack for them.
[9:41] Let me know if you want a specific mood or expression for the video.
[9:46] Can you do math in English? Of course. I can do math in English, just like this.
[9:52] 2 + 2 = 4.
[9:53] Always happy to help. What is 2 + 3? 2 + 3 is 5.
[9:59] Easy as pie. Can you answer questions about Shakespeare's books? I can help with information about Shakespeare's works.
[10:05] I know a lot about his plays and sonnets. [music]
[10:08] What would you like to know? Who was Romeo's girlfriend?
[10:12] Romeo's girlfriend was Juliet. [music]
[10:15] They're the famous lovers from Shakespeare's Romeo and Juliet. Such a tragic yet timeless story.
[10:21] Comment if you have any questions and subscribe for more useful projects.
[10:23] [music]





