Introduction
This 4-layer rigid-flex PCB measures 138 mm x 128 mm and combines rigid and flexible sections in a single construction. Rigid-flex designs frequently create CAM review challenges because the transition zones, material selections, and via treatments must satisfy both mechanical flexibility and electrical reliability requirements. Our CAM team performs a thorough file check on every order before release. In this case, the review revealed several manufacturability concerns including via treatment conflicts, insufficient copper clearance to the board edge, right-angle corners on the outline, and character placement on the flex area. Clarifying these points early prevented potential cracking during forming, exposed copper after routing, and assembly defects on the five-piece batch.
4-Layer Rigid-Flex Order Specs Reviewed in CAM
The board is a 4-layer rigid-flex construction with a finished thickness of 1.6 mm(#RFP-20260401-039). Minimum hole size is 0.3 mm. Surface finish is ENIG with 1 µ" gold. Via treatment is specified as cover oil. Line width and spacing are 6 mil. The board is shipped as individual pieces with routing plus laser forming and no panelization. Electrical testing is 100% flying probe. IPC Class II acceptance applies. The customer specified Panasonic base material and provided fabrication notes for copper weights and stackup. Quantity is five pieces. The design includes both rigid and flex regions with a defined soft-hard boundary.
Key CAM Engineering Questions on This Rigid-Flex Board
Why Material Grade Confirmation Matters for Rigid-Flex Stackups
The fabrication notes specified Panasonic material for the rigid-flex construction. Our engineering team reviewed the stackup and noted that our standard Shengyi materials for both rigid and flex sections would provide equivalent performance while maintaining better stock availability.
After reviewing the stackup, we prepared a revised construction using Shengyi grades and attached the working draft for confirmation. If the exact Panasonic grade had been insisted upon without prior stock, procurement lead time could have extended beyond the 24-day target. We suggested the material change to protect the schedule while preserving the required electrical and mechanical properties.

Figure 1: Detailed PCB rigid-flex stackup
Via Cover-Oil Spec Versus Open Solder-Mask Windows
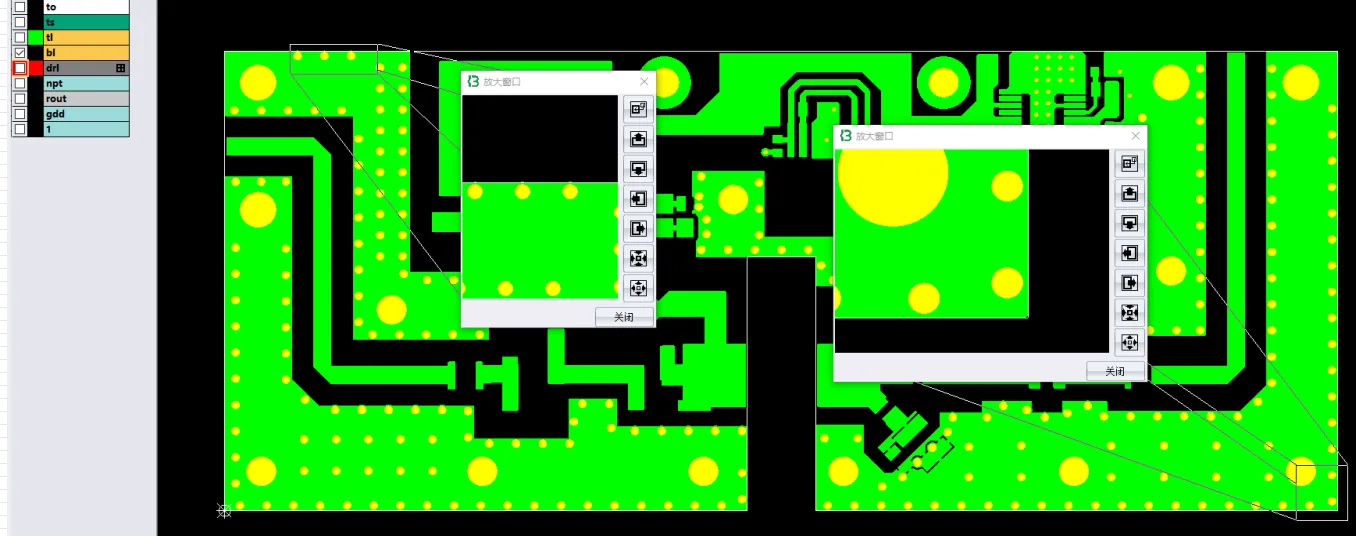
The fabrication requirement stated via cover oil, yet the Gerber files showed solder mask openings on many rigid-flex PCB vias. Our CAM engineer confirmed the mismatch and planned to remove the openings to achieve full cover oil.

Figure 2: Solder mask openings on many vias
If production had continued with the open windows, solder could wick into the vias during assembly, creating potential open circuits or contamination. We noticed the inconsistency during the initial file check and adjusted the solder mask layers accordingly to match the cover oil specification. This change was documented in the working draft.
Board Outline Right-Angle Corners and Edge Clearance
The original outline contained several right-angle corners. Our engineer suggested adding R0.5 mm fillets at these locations to reduce stress concentration during laser routing and subsequent flexing. We also identified multiple pads positioned too close to the board edge.

Figure 3: Right-angle corners in the original outline
If the EQ had been ignored, the pads would have been exposed after routing, resulting in exposed copper that could cause short circuits or poor solderability during assembly. Based on IPC-A-600 edge acceptance considerations, we recommended increasing the clearance where possible and confirmed the fillet radius in the working draft. Our CAM team identified these issues early to avoid scrap boards.
Character Frame on Flex Region and Trace Anomaly
Several character frames were placed within the flex area. Our team recommended deleting these frames because ink on flex material can crack during repeated bending. The Gerber also contained an anomalous trace connection. We planned to correct the connection in the working draft and requested the customer re-provide the original files for final verification.

Figure 4: Character frames within the flex area
If left unaddressed, the character frames could have caused cosmetic defects or reliability issues in the flex zone, while the trace anomaly risked an open circuit.
Soft-Hard Boundary and Size Inconsistency
No soft-hard separation line was indicated in the files. We defined the boundary position as shown in the working draft. The stated board size also differed slightly from the Gerber dimensions. Our engineer adjusted the outline to match the required size and confirmed both changes in the attached draft. These clarifications prevented misalignment during forming and ensured the finished boards met the specified dimensions.

Figure 5: No soft-hard separation line was indicated in the files.
| Engineering Question | Root Cause | Resolution |
|---|---|---|
| Material grade (Panasonic) | Stock availability risk versus schedule | Revised stackup to equivalent Shengyi grades with customer approval |
| Via cover oil versus Gerber windows | Fabrication notes required cover oil; Gerber showed openings | Solder-mask openings removed to achieve full cover oil |
| Right-angle corners and edge clearance | Sharp corners and pads too close to outline | R0.5 mm fillets added; clearance increased where possible |
| Character frames on flex region | Silkscreen placed in bend area | Frames deleted; anomalous trace corrected in working draft |
| Soft-hard boundary and size mismatch | No separation line indicated; Gerber size differed from notes | Boundary defined and outline adjusted to required dimensions |
Table 1:Summary of Rigid-Flex CAM Engineering Questions and Resolutions
Yield Risks if Rigid-Flex CAM Issues Are Left Unresolved
The primary risks were exposed copper at the board edge after routing, via solder wicking from mismatched cover oil treatment, and stress cracking at right-angle corners during flexing or laser forming. The flex character frames and material availability issues could have caused additional yield loss or schedule delays. Common customer rigid-flex PCB design mistakes in this case included insufficient edge clearance, inconsistent via treatment definitions, and placement of non-flex features on the bend area. If these EQs had been ignored, the small five-piece batch could have suffered multiple failures including delamination at corners, open circuits from solder wicking, and poor long-term reliability in the flex section. Early clarification avoided repeated review cycles and protected both quality and delivery.
How the Working Draft Resolved All Rigid-Flex CAM Questions
Our engineering team prepared a complete working draft incorporating all adjustments: R0.5 mm fillets on the outline, increased edge clearance for exposed pads, removal of flex-area character frames, correction of the trace anomaly, definition of the soft-hard boundary, and alignment of board dimensions. Via solder mask was updated to full cover oil. The stackup was revised to standard Shengyi materials for both rigid and flex sections. All changes were documented and the working draft was sent for customer confirmation. Once approved, the files were finalized for CAM release.
Engineering clarification was completed after review of the working draft. All major parameters including stackup, via treatment, outline geometry, edge clearance, and material selection were confirmed. CAM review was approved and the order was released for production.
Practical CAM Checks for 4-Layer Rigid-Flex Designs
- Always indicate the soft-hard boundary line clearly on rigid-flex designs to avoid misinterpretation during CAM processing.
- Specify via treatment consistently between fabrication notes and Gerber layers to prevent solder mask conflicts.
- Avoid right-angle corners on board outlines; add at least R0.5 mm fillets to reduce stress during routing and flexing.
- Maintain minimum copper-to-edge clearance according to the forming method to prevent exposed copper after routing.
- Do not place silkscreen frames or characters on flex regions where repeated bending will occur.
- Verify board dimensions in both fabrication notes and Gerber data before submission.
- Confirm material grades early if a specific brand is required, as stock availability can affect lead time.
- Review trace connections for anomalies before release; factory corrections still require customer verification.
FAQ
Q1: Why do PCB factories recommend fillets on rigid-flex board outlines?
A1: Right-angle corners concentrate mechanical stress during laser routing and repeated flexing. Adding R0.5 mm fillets reduces the risk of cracking or delamination at these locations.
Q2: What happens if via cover oil is specified but the Gerber shows openings?
A2: Solder can wick into the open vias during assembly, leading to poor solder joints, contamination, or open circuits. The factory adjusts the solder mask to achieve full cover oil as requested.
Q3: Why must pads maintain clearance from the board edge on routed boards?
A3: Routing removes material up to the final outline. Pads placed too close will have exposed copper after forming, increasing the risk of short circuits or poor solderability.
Q4: Why are character frames removed from flex regions?
A4: Ink on flex material tends to crack or peel when the board is bent repeatedly, causing cosmetic defects and potential reliability issues in the flex zone.
Q5: What risk does an undefined soft-hard boundary create?
A5: Without a clear boundary, the factory must interpret the transition zone, which can lead to incorrect stackup construction, misalignment during forming, or mechanical failure at the rigid-flex interface.