In this real-world CAM engineering case from a standard 2-layer FR-4 order, our team encountered multiple manufacturability issues during the pre-production DFM review. The board measured 126 × 145 mm with 1.6 mm thickness, 1 oz copper on both sides, and ENIG surface finish. While the basic stackup appeared straightforward, the fabrication data contained several conflicts between the design intent and actual manufacturing capabilities.
This case highlights why thorough CAM review is essential even for simple 2-layer boards. Small discrepancies in outline definitions, hole treatments, and solder mask clearances can quickly escalate into production defects if left unaddressed.
2 Layer 1.6mm FR4 PCB Order Details and Panelization
This was a 2-layer PCB ( #FR4-20260630-014 ) fabricated on FR-4 TG150 material with a finished board thickness of 1.6 mm and 1 oz copper weight on both inner and outer layers. The design specified a minimum hole size of 0.3 mm, green solder mask on both sides, white silkscreen, and ENIG surface treatment. The customer requested 10 pieces (5 sets) panelized in a 2×1 array.
Additional requirements included 100% flying probe testing, mechanical forming, and specific customer notes requesting addition of UL logo with DC marking, fiducial information, and solder mask between certain component pins. The panel utilized V-scoring combined with routing for depanelization. Production was scheduled for an 11-day lead time with Alivon as the supplier.
On paper, this looked like a routine 2-layer job. However, during CAM review, our engineers identified inconsistencies that required multiple clarifications before releasing the job to production.
Key Issues Identified in 2 Layer FR4 CAM Engineering Review
Outline Dimension and old.gko Layer Inconsistencies
One of the first issues our CAM team flagged was the mismatch between the single board outline in the fabrication data, the dimensions noted in the order (126 × 145 mm), and the old.gko layer. The customer also requested specific fiducial mark information and outer dimension verification for the panel.

Figure 1: dimensions of the old.gko layer do not match the specified dimensions or the board dimensions
We noticed that the outline data did not align perfectly across layers. In PCB manufacturing, even small deviations in outline definition can lead to misalignment during routing or V-scoring. Our engineer suggested confirming the authoritative outline data to ensure the final panel dimensions matched the intended 2×1 panelization.

Figure 2: our panelization drawing
If ignored, this could result in boards with incorrect final dimensions, causing assembly fixture misalignment or edge quality issues. According to typical IPC-A-600 acceptability criteria, outline tolerance deviations increase the risk of mechanical stress during depanelization.
Close-Pitch Holes and Solder Mask Bridge Limitations
Multiple EQs pointed to areas where component holes were spaced very closely. Our manufacturing data showed that maintaining required trace and pad clearances would result in broken annular rings on the finished board, and solder mask bridges between pads would be impossible to produce reliably.

Figure 3: the hole spacing of this type of component is relatively narrow
We noticed these tight spacings in several device locations. To guarantee functional trace-to-pad spacing, the finished product risked annular ring breakout. Additionally, the solder mask layer could not form reliable bridges in these areas. Our CAM engineer recommended confirming the design intent — whether to prioritize pad spacing or accept potential solder mask encroachment.
If this issue had been ignored, the production boards could suffer from exposed copper edges or insufficient solder mask coverage, leading to solder bridging during SMT assembly or long-term reliability problems such as electrochemical migration. In severe cases, this contributes to assembly failures and reduced yield.
PTH Hole Definition vs Pad Geometry and Mask Openings
A recurring EQ concerned holes defined as PTH (plated through holes) in the fabrication notes, yet the actual data showed pads exactly matching the drill diameter with no additional copper annulus or clear electrical connection features. Additionally, many PTH locations lacked solder mask openings, meaning ink would flow directly onto the pads during application — a clear process violation.

Figure 4: the corresponding pad is the same size as the hole and there is no electrical connection

Figure 5: the PTH holes do not have solder mask openings
Our CAM engineer identified these mismatches while cross-referencing the drill file against copper and mask layers. We pointed out that true PTH holes require sufficient annular ring for reliable plating adhesion and appropriate mask clearance to prevent contamination. After review, the customer confirmed intent, allowing us to adjust pad sizes and add proper mask windows.

Figure 6: make them as holes as drill drawing and do copper cutout
If ignored, these inconsistencies could lead to incomplete copper plating inside the holes, weak barrel connections, or solder mask residue on pads that severely impacts solderability. In production, this often manifests as open circuits after assembly or boards failing electrical testing, resulting in significant yield loss and potential delamination under thermal stress per IPC-TM-650 standards.
Solder Mask, Silkscreen, and Special Feature Conflicts
Multiple issues arose around surface layers. The TOP solder mask featured arrow-pointed circular grid areas that our team proposed filling solid for better registration and appearance. Silkscreen characters overlapped with solder mask regions in several locations, requiring confirmation of priority and final rendering method. An antenna area was flagged for solid copper fill rather than hatched or segmented treatment.

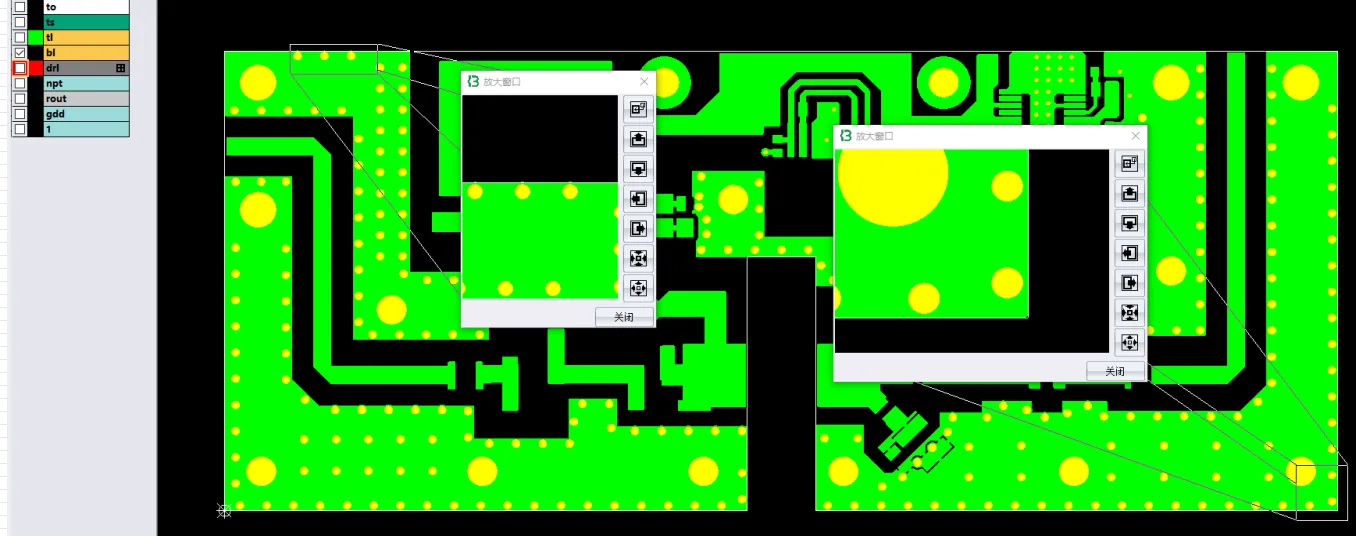
Figure 7: filled the antenna area as a solid copper plane
We also addressed a via that required resin plugging but retained an open solder mask window, plus requests for stamp holes (mouse bites) whose exact placement and sizing needed clarification to avoid damaging board edges. UL E489133 logo with DC marking and fiducial information were verified for correct positioning without covering critical features.
Our engineer suggested adjustments after reviewing the overlapped regions: "We noticed the solder mask and silkscreen conflicts could cause ink adhesion problems or blurred legends, so we proposed prioritizing mask coverage while confirming silkscreen visibility." The antenna was processed as a solid copper pour, and resin plugging was standardized. These steps prevented surface irregularities that could trap flux residues or cause cosmetic defects visible under AOI inspection.
Had these conflicts proceeded without clarification, overlapping features might result in incomplete solder mask coverage, exposed copper in unintended areas, or poor silkscreen durability. In assembly, this increases risks of solder bridging, corrosion, or customer rejection due to visual defects. Resin plug mismatches could further lead to uneven plating or voids affecting high-frequency performance in the antenna region.
| Issue | Root Cause | Potential Impact |
|---|---|---|
| Outline Inconsistencies | Mismatch between .gko, notes, and panel | Dimensional errors, edge defects |
| Close-Pitch Holes | Tight spacing violating annular ring/bridge rules | Breakout, solder bridging |
| PTH Pad Geometry | Same-size pads without annular rings | Plating failures, open circuits |
| Mask/Silkscreen Conflicts | Overlaps and special feature ambiguities | Ink issues, cosmetic defects |
Table 1: Primary CAM Issues in This 2 Layer FR4 Order
DFM Risks in 2 Layer FR4 Designs with Tight Features
This case underscores several common DFM pitfalls in 2-layer designs. Designers often overlook how tight hole spacing interacts with minimum annular ring requirements (per IPC-2221) and solder mask registration tolerances. When annular rings are compromised, the risk of drill breakout during mechanical drilling rises significantly, potentially causing open circuits or unreliable plating.
Dimension mismatches between layers and fabrication drawings frequently lead to panelization errors. If V-scoring or routing paths deviate, boards may experience edge chipping or copper exposure after depanelization, creating short circuit risks during handling or assembly.
Solder mask and silkscreen conflicts are another frequent trigger. Overlaps can cause ink adhesion problems or visual defects that fail cosmetic inspection. In high-volume production, these issues multiply, driving up scrap rates and requiring costly re-runs.
Our experience shows that early clarification prevents 80% of such downstream problems. Ignoring them typically results in production delays, increased engineering cycles, and higher overall costs.
How the Engineering Team Resolved the Issues
Our CAM engineers worked systematically through each point. For the outline inconsistencies, we requested the customer to confirm the master dimensions and adjusted the panelization data accordingly. On close-pitch holes, we proposed optimized clearances that maintained electrical integrity while staying within our process capabilities.
PTH definitions were clarified and updated with proper annular rings and mask openings. The antenna region was filled solid as a solid copper pour after confirmation. Stamp holes were added per standard mouse-bite guidelines to ensure clean breakaway without damaging the board edge.
UL markings and fiducials were placed in non-critical areas. The resin-plugged via conflict was resolved by standardizing the treatment. Throughout the process, we maintained clear communication to minimize revisions.
To reduce manufacturing risk, our engineer adjusted copper clearances near V-scoring lines. This prevented potential exposed copper after depanelization that could cause edge shorting during assembly.
Resolution of Outline, Hole, and Mask EQs
After receiving customer confirmations on all key points, the engineering team finalized the CAM data. Panelization was corrected, drill files updated, solder mask and silkscreen layers reconciled, and special features implemented. The job was approved for production with optimized DFM parameters, ensuring high first-pass yield.
Essential DFM Guidelines for 2 Layer FR4 PCBs
- Always ensure outline data (GKO or equivalent) is consistent across all layers and matches specified dimensions.
- Provide clear hole attributes (PTH vs. NPTH) with adequate annular rings — avoid same-size pad/hole geometries for plated holes.
- Check minimum spacing for solder mask bridges early; tight pitch components often require design adjustments.
- Include detailed fabrication notes for special features like resin plugging, solid fills, and markings.
- Verify panelization intent, especially mixed V-score and routing methods.
- Cross-check solder mask openings against all pads, particularly on PTH holes.
- Supply reference images or clear callouts for logos, fiducials, and UL markings.
- Perform a self-DFM review focusing on manufacturing tolerances before Gerber output.
FAQ
Q1: Why do PCB factories flag close-pitch holes during CAM review?
A1: Close spacing often violates minimum annular ring or solder mask bridge requirements. Without clarification, it leads to breakout, missing solder mask dams, or shorting risks after plating and etching.
Q2: What happens if outline dimensions are inconsistent across layers?
A2: It can cause misalignment in routing or scoring, resulting in incorrect board sizes, damaged edges, or copper exposure that fails quality inspection.
Q3: Why confirm PTH hole definitions when pads appear equal to drill size?
A3: Plated holes require annular rings for reliable copper connection. Same-size geometry risks incomplete plating or no electrical continuity, leading to open circuits after assembly.
Q4: Is it common to adjust solder mask for overlapping silkscreen or grid features?
A4: Yes. Factories often fill or modify these areas for better ink adhesion and registration. Confirmation ensures the final appearance and functionality match designer expectations.
Q5: What risks arise from mismatched via plugging and solder mask treatment?
A5: Inconsistent treatment can cause surface unevenness, trapped residues, or plating defects, affecting reliability in high-speed or environmental stress applications.
Q6: How important is UL marking placement confirmation?
A6: Critical for regulatory compliance. Incorrect placement might cover test points or functional areas, or fail to meet visibility requirements on the finished board.