










Real PCBA Order: Bare PCB to Industrial Robot Safety Controller Assembly
Key Moment
- 0:30 DFM Review & Material Intake
- 1:24 Pre-Production Material Check
- 1:48 Solder Paste Printing & SPI
- 2:37 High-Speed Pick & Place Assembly
- 3:32 Thermal Reflow Soldering
- 3:55 Automated Optical Inspection (AOI)
- 5:06 THT Assembly & First Article Review
- 5:38 Manual Soldering Process
- 6:11 Cleaning
- 6:32 Final Quality Control
- 6:40 Packaging & Shipment
What This Video Covers
This video provides a factory-floor walkthrough of a real customer PCBA order for Aura Sensae's industrial robot safety controller. It follows a bare PCB from initial material intake and DFM verification through full SMT and THT assembly, reflow, AOI, cleaning, de-paneling, and final QC before shipment.
Viewers see critical processes including stencil printing, solder paste inspection (SPI), high-speed and precision component placement, multi-zone reflow soldering, post-reflow AOI, manual THT soldering with ESD protection, and protective packaging. The content highlights practical engineering challenges such as paste volume control, thermal profiling, solder joint verification, and footprint validation that directly impact yield and long-term reliability in industrial control systems.
Whether you are optimizing a new design or comparing turnkey PCB assembly partners, this case study demonstrates how experienced manufacturers translate complex Gerber and BOM data into production-ready safety-critical hardware. It also touches on considerations relevant to industrial control PCB applications where vibration, reliability, and traceability are non-negotiable.
Get an instant PCBA quote or explore our PCB assembly capabilities to start your next project with confidence.
Key Highlights
- End-to-End PCBA Process Visibility: From incoming QC, dual-sided SMT (printing → SPI → placement → reflow → AOI), to THT soldering and final packaging for a functional safety controller.
- Critical Quality Gates: SPI paste volume inspection, First Article Inspection, multi-angle AOI, and human-verified IPC-compliant solder joints reduce defects and ensure reliability under industrial conditions.
- DFM & Production Insights: Real-world verification of component footprint matching, feeder setup, thermal profiling, and ESD-safe handling that prevent common assembly failures in multilayer boards destined for automation systems.
End-to-End Factory Floor Sequence for This Safety Controller PCBA Order
Material intake begins with incoming inspection of the bare multilayer board and all components against the approved BOM and Gerber data. Any discrepancy in copper finish, solder-mask registration, or component package marking is flagged before the board enters the SMT line. Dual-sided SMT follows a fixed sequence: solder-paste printing through a laser-cut stencil, SPI measurement of paste volume and height, component placement on high-speed and precision heads, and multi-zone reflow. After reflow, multi-angle AOI verifies every solder joint and component polarity. Boards then move to the THT station for through-hole connectors and larger components required by the safety-controller design. Manual soldering is performed under continuous ESD monitoring. Post-assembly cleaning removes flux residues, de-paneling separates individual boards, and final visual and functional checks confirm IPC compliance before packaging.
Each step is timed and logged so that any deviation—paste height outside the process window, misaligned feeder, or incomplete fillet—can be traced to its root cause. For safety-controller boards the process window is deliberately tightened because field failures can affect machine safety functions. The video therefore shows both the nominal process and the decision points at which operators or engineers intervene.
Critical Inspection Gates That Protect Yield and Long-Term Reliability
Four quality gates dominate the flow. SPI measures paste volume on every pad; deposits that fall outside the established height and area limits are cleaned and reprinted before placement. First Article Inspection confirms that the first assembled board matches the design data in component value, orientation, and polarity. Post-reflow AOI uses multi-angle imaging to detect insufficient solder, bridging, tombstoning, and lifted leads. Final magnification audit under controlled lighting verifies that every THT joint meets IPC Class 2 or Class 3 criteria, depending on the customer specification.
These gates are not optional checkpoints; they are process controls that remove latent defects before the board leaves the factory. In industrial environments where vibration and thermal cycling are continuous, a single voided joint or under-filled fillet can become a field failure months later. The video illustrates how each gate is documented so that full material and process traceability is retained for the life of the product.
| Inspection Gate | Primary Defects Detected | Typical Process Limit | Impact if Missed |
|---|---|---|---|
| SPI | Low/high paste volume, bridging risk | ±20 % of target height | Open joints or shorts after reflow |
| First Article | Wrong value, polarity, footprint mismatch | 100 % visual + electrical | Systematic lot failure |
| Post-reflow AOI | Tombstone, insufficient fillet, lift | Multi-angle optical | Latent opens under vibration |
| Final visual | THT fillet shape, residue, mechanical damage | IPC Class 2/3 criteria | Field reliability risk |
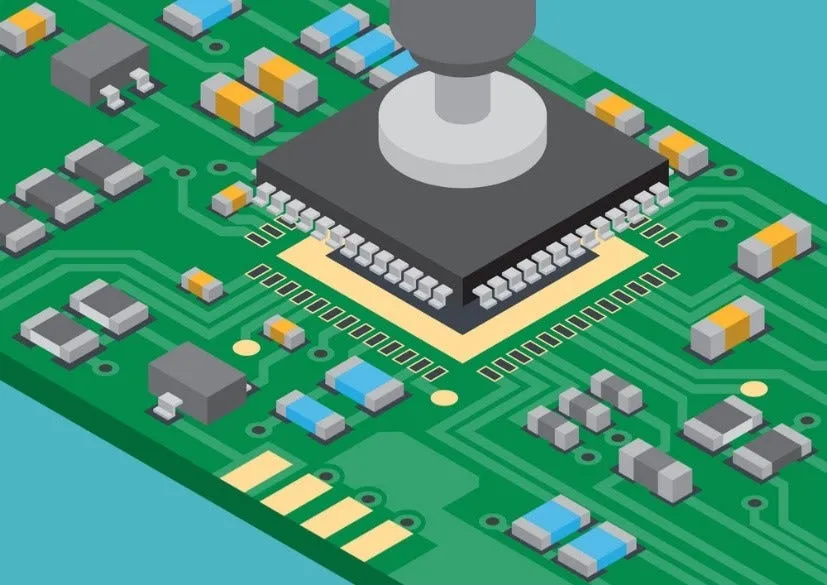
DFM Footprint and Process Validation Observed on the Production Line
Before the first board is loaded, the manufacturer verifies that every land pattern on the bare PCB matches the component footprints listed in the BOM. Mismatches—common when library parts are outdated or when designers use non-standard packages—are corrected by either a stencil redesign or a component substitution request. Feeder setup is cross-checked against the placement program so that polarity and orientation data are consistent. Thermal profiles are developed on a sacrificial board instrumented with thermocouples at the thickest copper regions and under the largest thermal-mass components. The resulting profile is locked into the reflow oven recipe and monitored on every subsequent board.
These steps prevent the most frequent assembly failures seen on multilayer industrial boards: tombstoning of small chip components caused by uneven heating, incomplete wetting of large ground pads, and polarity reversals that only appear after power-up. Because the safety controller operates in a high-vibration environment, any latent defect introduced at this stage can propagate into intermittent opens. The video therefore spends time on the verification activities that occur before high-volume placement begins.
Thermal Profiling and Solder Joint Risks Specific to Multilayer Safety Boards
Safety-controller PCBs typically contain mixed copper weights and large thermal planes that create significant temperature gradients during reflow. If the profile ramp rate is too aggressive, small passive components can tombstone; if the soak is insufficient, large connectors or power packages may not reach liquidus long enough for full wetting. The video shows how thermocouples are placed on critical locations—under BGAs if present, at the center of large copper pours, and on the board edge—to capture real-time data. The resulting multi-zone recipe balances peak temperature, time above liquidus, and cooling rate so that every joint meets the required fillet geometry without overheating temperature-sensitive components.
Common failure modes observed when profiling is incomplete include voiding under power packages, brittle intermetallic growth from excessive time above liquidus, and cold joints on thick copper planes. Each of these defects can pass initial electrical test yet open under the continuous vibration of an industrial robot. Process engineers therefore treat the thermal profile as a controlled parameter that is re-validated whenever the board stack-up, copper weight, or component mix changes.
ESD Handling and Traceability Controls Required for Industrial Safety Controllers
From the moment components leave sealed moisture-barrier bags they remain inside an ESD-protected area. Operators wear grounded wrist straps, and work surfaces are continuously monitored. Sensitive devices such as microcontrollers and interface ICs are handled with vacuum tools rather than fingers. After assembly, each board receives a unique serial number that links the bare-PCB lot, component lot codes, stencil ID, reflow profile, and inspection results. This chain of custody is mandatory for functional-safety applications where a field failure must be traceable back to the exact process conditions that produced the board.
Without these controls, latent ESD damage can appear weeks or months later as intermittent logic failures—exactly the type of defect that is unacceptable in a robot safety system. The video demonstrates the practical implementation of these requirements on a real production order rather than as abstract procedure.
FAQ
Q1: How long does a typical PCBA order for industrial safety controllers take from bare PCB to shipment?
A1: Lead times vary by volume and complexity, but the documented process from material intake through full SMT/THT assembly, inspection, and packaging is typically completed in a few days for standard orders, with full production runs following rapid prototyping validation.
Q2: What quality checks are performed during PCBA assembly to ensure reliability in industrial robot applications?
A2: Multiple stages including incoming component inspection, SPI for paste volume, First Article Inspection, post-reflow AOI with multi-angle imaging, final visual audit under magnification, and cleaning to remove residues—all aligned with IPC standards.
Q3: Can this PCBA process be applied to rigid-flex or HDI designs for more compact safety systems?
A3: Yes. The core SMT/THT workflow scales to rigid-flex PCB and HDI constructions, with additional attention to stack-up, impedance, and bend radius requirements for compact or dynamic industrial applications.
Q4: What is the most common DFM issue found when a safety-controller design first enters production?
A4: Footprint-to-component mismatch, especially on connectors and power packages whose land patterns were taken from outdated library parts. Early verification against the actual component datasheet and a stencil design review eliminate the majority of these problems before the first board is printed.
Q5: How is thermal-profile stability maintained across a production lot of multilayer safety boards?
A5: A golden profile is established on an instrumented first article; subsequent boards are monitored by oven thermocouples and periodic profile boards. Any drift outside the established process window triggers an automatic stop and re-qualification before production resumes.
Have you ever wondered how a PCB actually becomes a fully assembled PCBA?
A few weeks ago, Aivon received a new order from Aura Sensae, a company that develops safety systems for industrial robots.
They were curious about how their boards are manufactured in the real world.
So we decided to document the process.
Right now, it's just a bare PCB.
Before it leaves the factory, it will pass through inspection, assembly, soldering, and quality control before becoming part of a robotic safety system.
Let's follow its journey through the factory.
Act I: Material Intake and Process Verification
The board's journey begins with process verification before a single machine turns on. Here, engineers conduct a Design for Manufacturability review, verifying the Gerber data against double-sided SMT and THT constraints to establish the baseline programming for the printers and placement machines.
Simultaneously, the manufacturing cycle commences at Incoming Quality Control. Inspectors verify component lots against the customer BOM, checking lead planarity and surface oxidation under magnification to ensure baseline solderability. During this stage, the operator also performs a physical footprint check, placing sample components directly onto the bare PCB pads to verify that the component dimensions, pitch, and pin layouts match the board's physical footprint perfectly.
Before production begins, operators perform a final material verification check. By comparing the reel information against the production records, they confirm that every feeder position contains the correct component specified in the customer's bill of materials. This additional verification step helps eliminate loading errors before the first board enters the line.
Act II: The Surface Mount Technology (SMT) Sequence
The bare board now enters the active production line, arriving at the stencil printing station. The immediate challenge is applying a precise volume of solder paste to hundreds of microscopic copper pads. If the paste is too thick, it will bridge adjacent pins; if it is too thin, the joint will crack under industrial vibration. The automatic printer addresses this by driving a squeegee across a laser-cut stainless steel stencil, depositing paste onto the exposed copper.
To ensure accuracy before permanent as sembly occurs, the board moves directly into the SPI system. The scanner projects structured light across the board to measure the exact height and volume of every paste deposit. wThis step protects the substrate from progressing further with underlying printing defects.
With the solder paste verified, the board advances to the component placement stage.Small passive components, such as capacitors and resistors, must be populated by the thousands without delay, while large integrated circuits require slower, microscopic alignment. The factory splits this task between two specialized machines.
First, the high-speed placement head uses vacuum nozzles to source and deposit smaller passive parts onto the sticky solder paste.Next, an internal vision camera scans the component from below, measuring the exact angle of its pins. The system corrects any rotational misalignment in mid-air before placing the controller onto the board, ensuring perfect pad alignment for both tiny resistors and dense silicon chips.
At this point, the components are merely resting on wet paste. Before the entire production run enters the oven, the operator conducts a First Article Inspection on this initial board. By verifying every component value against the design layout under magnification, human judgment confirms the line is configured correctly.
Once approved, the batch enters the multi-zone reflow oven. To manage thermal stress, the board travels through highly calibrated stages of preheat, soak, reflow, and cooling. This gradual temperature profile safely liquifies the solder alloy, forming stable metallurgical bonds across every connection point before controlled cooling solidifies the joints.
Now out of the oven, the board contains hundreds of freshly formed solder joints. The manufacturing challenge shifts to verification: how to confirm that every single connection is structurally sound. Manually inspecting thousands of joints across an entire batch would invite human fatigue. The factory solves this by routing the board into the post-reflow Automated Optical Inspection system.
Using multi-angled LED lighting, the system captures high-resolution images of the assembly and compares them against verified geometric parameters. It scans for hidden anomalies like component shifting, lifted leads, or solder beads.If the software flags a questionable connection, an operator or quality engineer reviews the image on a terminal, applying human expertise to determine if the joint meets IPC structural standards before letting the board leave the SMT area.
The top-side SMT process is finished at this stage. Operators flip the boards and repeat printing, placement, reflow and AOI procedures to guarantee consistent high soldering quality on the bottom side. After double-sided mounting and AOI, the PCB surface mount proce ss is concluded.
Act III: Through-Hole Component Assembly and Final Certification
The assembly next enters the THT department. Here, an inspector completes a first-article review—cross-referencing component positions with the bill of materials to eliminate any mismatch before assembly begins.
To maximize efficiency across different batch sizes, the factory utilizes a flexible production strategy. Depending on the order volume and design constraints, engineers route the boards to either automated wave soldering or dedicated manual soldering stations.
Here is a look at the manual soldering process. To protect the onboard microcontrollers from electrostatic discharge, the technician operates with a grounded ESD wrist strap. After applying flux, they employ a standardized soldering technique, holding the iron tip against both the lead and pad for uniform thermal transfer. This allows the molten solder to fill the through-hole completely via capillary action, forming a solid fillet with a clean wetting angle that meets IPC reliability guidelines.
Before leaving the production floor, the assembly passes through final post-processing. To prevent long-term electrochemical corrosion from chemical residues, the board undergoes a dedicated cleaning stage to remove any invisible contaminants. Once dried, a routing de-paneling machine mechanically trims away the manufacturing frame, isolating the individual modules according to the design layout.
The manufacturing cycle concludes at the final quality control station. A quality inspector performs a final visual audit under magnification, checking the physical integrity of the substrate and mechanical interfaces.
Once approved, the completed safety controllers are sealed inside static-shielding ESD bags and placed into shock-absorbing, protective packaging designed to prevent physical or electrical degradation during transport. This production lot for Aura Sensae is now complete and prepared for shipment.
Only a few hours ago, this assembly was nothing more than a bare PCB.After passing through inspection, assembly, soldering, and verification, it is now ready to perform the task it was designed for.Soon, it will become part of an industrial safety system, helping monitor the interaction between people and machines in real-world production environments.
Every inspection,every verification step,and every manufacturing control contributes to the same objective:turning a design into reliable hardware ready for deployment.
Thanks for watching! Due to video length limitations, processes such as wave soldering, X-ray inspection, and automated through-hole insertion were not covered in this episode—we'll dive deeper into those in future videos. If you enjoyed the journey, hit the like button, share it with others, and drop a comment telling me which production process you'd like to explore next. Catch you in the next chapter of modern manufacturing!





