










ESP32 AI Pendant with a Custom PCB: From Prototype to Wearable
Key Moment
- 0:00 Introduction – Building an AI Pendant
- 0:26 Components Overview (XIAO ESP32S3 Sense, Amp, Speaker, LEDs)
- 0:50 3D Printed Enclosure Options
- 1:21 Wiring & Assembly
- 3:23 AIVON PCB Sponsorship
- 4:28 Flashing Xiaozhi Firmware
- 4:50 Wi-Fi Configuration Mode
- 5:35 Adding Device & Selecting DeepSeek Model
- 6:28 Live Demo – Voice Chat & Camera Features
- 8:29 Outro & Subscribe
Project Background
The rise of compact AI wearables has captured the imagination of electronics engineers and makers worldwide. Devices that can listen, speak, see, and respond in real time—while remaining small enough to wear comfortably—represent a compelling intersection of embedded systems, edge AI, and industrial design. In the Tech Talkies video "How to built an ESP32 AI Pendant | Full build with code", the creator set out to transform an affordable microcontroller into a fully functional AI companion pendant. The goal was ambitious yet practical: a device that wakes on voice commands such as "Hi ESP" or "Jarvis," answers questions, identifies objects via an onboard camera, provides visual status feedback through RGB LEDs, and operates for usable periods on a small LiPo battery—all housed inside a 3D-printed enclosure suitable for daily wear.
This project reflects a broader market need. Engineers and product teams increasingly seek rapid ways to validate wearable concepts without committing to full-scale production tooling. Module-based prototypes using the Seeed Studio XIAO ESP32S3 Sense offer a fast starting point, yet the transition from breadboard or flying-wire assembly to a robust, manufacturable product introduces packaging, power integrity, signal integrity, and mechanical reliability constraints that cannot be ignored. The video, supported by the detailed analysis at Watching an ESP32 AI Pendant Leave the Bench – What the PCB Side of the Story Reveals, illustrates exactly where those constraints appear and how professional PCB manufacturing support bridges the gap between a working demo and a reliable wearable.
What This Video Covers
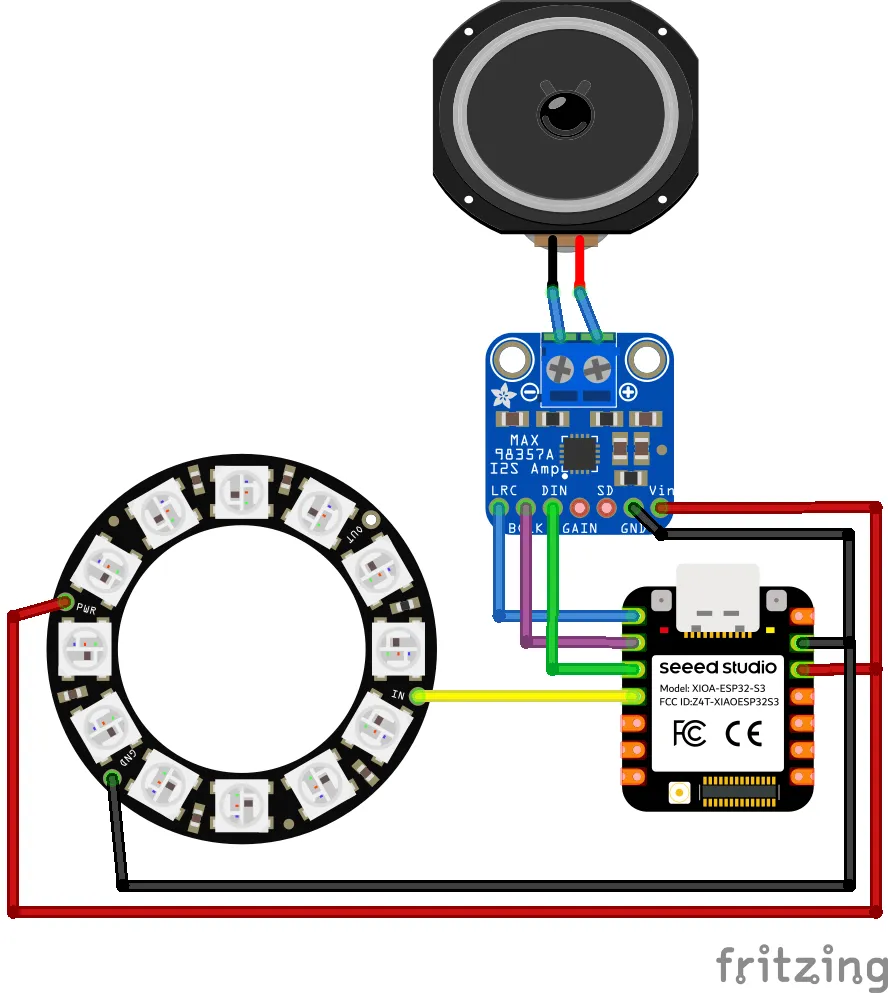
The video walks viewers through the complete hardware and firmware journey of the ESP32 AI pendant. It begins with the core module—the XIAO ESP32S3 Sense that already integrates the ESP32-S3, PDM microphone, and OV2640 camera—then shows the addition of a MAX98357A I2S amplifier driving a compact 23 mm speaker, a 12-LED NeoPixel ring for status indication, a rechargeable LiPo battery with slide switch, and a custom translucent PLA enclosure. Wiring tables, pin assignments (I2S data on GPIO 3, BCLK on GPIO 2, LRC on GPIO 1, NeoPixel data on GPIO 4), and mechanical fit considerations are covered in practical detail. Firmware setup is streamlined: no local toolchain is required; the Xiaozhi firmware is flashed directly from a browser, the device is connected via its temporary hotspot, Wi-Fi credentials are entered, and the pendant is registered on the Xiaozhi platform. Live demonstrations include wake-word activation, spoken responses, object recognition (fingers, plants, breadboards), and even technical Q&A about ESP32 5 V compatibility. Near the end, the creator points viewers toward professional PCB services as the logical next step once the concept is proven.
Project Highlights and Key Features
- Thumb-sized XIAO ESP32S3 Sense module that consolidates MCU, PDM microphone, and OV2640 camera, minimizing interconnect complexity in a wearable form factor.
- Clear voice interaction via MAX98357A I2S amplifier and 0.5–1 W 8 Ω speaker, delivering intelligible responses without a large enclosure.
- Visual status feedback from a 12-LED NeoPixel ring behind a translucent PLA diffuser—low-power signaling for listening, thinking, and responding states.
- Rechargeable LiPo power system with simple slide-switch control, enabling practical battery life for intermittent AI interactions.
- Browser-based firmware flashing and cloud AI backend (Xiaozhi with DeepSeek), eliminating complex local development environments.
- Real-world demonstrations of object identification and technical question answering, proving the pendant's sci-fi capability in everyday bench scenarios.
- Compact 3D-printed mechanical design that packages all electronics into a wearable pendant form, highlighting the importance of component height mapping and keep-out zones.
Challenges Encountered During Development
Compact wearable designs surface several interconnected technical and manufacturing challenges. First, the density of components forces every decision about board layout, wiring, power distribution, and mechanical mounting into the same limited volume. Flying wires that function on the bench become fragile under vibration and movement once the pendant is worn. Signal integrity on the I2S lines (data, BCLK, LRC) must remain clean to avoid audio artifacts at the speaker. The NeoPixel ring demands adequate power delivery and local decoupling; insufficient copper or missing capacitors can cause brown-outs or data glitches that disrupt visual feedback. Camera and microphone placement require careful keep-out zones so optical and acoustic performance are not compromised by the enclosure walls or nearby components. Battery safety and runtime introduce further constraints: proper charge-path design, under-voltage lockout, and low quiescent-current paths are essential for both user safety and usable operating time. Finally, any future transition to higher volumes exposes assembly and reliability risks—insufficient annular rings, marginal via sizes, unsuitable surface finishes for skin contact and humidity, and component heights that no longer fit the final shell. The video's brief discussion of 5 V versus 3.3 V logic compatibility further underscores the need for disciplined interface design; driving unprotected ESP32 pins with 5 V signals risks permanent damage. These issues are typical of the prototype-to-product transition and are precisely where many wearable projects stall.
How AIVON PCB Helps
AIVON PCB provides a direct path from the validated XIAO-module prototype to a compact, reliable custom board. A typical implementation would be a 2- or 4-layer rigid or rigid-flex design that integrates the ESP32-S3 (or module footprint), camera connector, PDM microphone, I2S amplifier, NeoPixel driver, and battery-management circuitry onto a single panel. Controlled-impedance routing keeps I2S clocks and data clean; solid power and ground planes prevent the NeoPixel ring and speaker from starving the radio; ESD protection and proper battery circuitry enhance safety; and an ENIG surface finish ensures reliable solder joints under the vibration and humidity conditions of a wearable.
AIVON's platform is purpose-built for this transition. Engineers upload Gerber files, select layer count, thickness, surface finish, and quantity, then receive an instant quote. Full turnkey assembly with component sourcing is available, eliminating the need to coordinate multiple vendors. Expert DFM analysis automatically flags the exact issues that appear in the pendant prototype: insufficient clearance around the camera, NeoPixel current paths that are too narrow, via placements that complicate small-enclosure assembly, or annular-ring sizes that fail under flex and vibration. Fast-turn PCB options and rapid prototyping services accelerate iteration cycles, while consistent quality and reliable delivery reduce the risk of field failures. For teams that have already proven the concept with modules and hand wiring, AIVON removes the remaining reliability weak links—replacing flying wires with short controlled traces, consolidating multiple modules into one board, and applying stack-up and material choices that improve both RF performance and battery life. The result is a wearable AI pendant that can be produced in small batches with the mechanical robustness and electrical integrity required for daily use.
Conclusion
The Tech Talkies ESP32 AI pendant demonstrates that a capable, voice- and vision-enabled wearable is within reach of any engineer willing to combine a strong module, open-source firmware, and thoughtful mechanical design. At the same time, the project makes clear why professional PCB manufacturing becomes essential once the idea moves beyond the bench. Wiring that works in a laboratory can become the weak link in a product that must survive daily wear. A well-designed board, produced with rigorous DFM review and high-quality assembly, eliminates those weak links and allows the creative vision to scale.
FAQ
Q1: Do I need a custom PCB to make a reliable ESP32 AI pendant?
A1: A module-based prototype using the XIAO ESP32S3 Sense works well for initial validation. A custom PCB becomes essential when you require consistent assembly, improved signal integrity, smaller size, better power delivery, or production quantities beyond a handful of units. AIVON PCB's rapid prototyping and DFM services make that transition straightforward.
Q2: What surface finish is best for a wearable PCB exposed to skin contact and humidity?
A2: ENIG is preferred for corrosion resistance, reliable soldering of fine-pitch components, and long-term durability in wearable environments. HASL is acceptable for early prototypes but less ideal for devices intended for daily wear.
Q3: How critical is impedance control on the I2S lines in a compact pendant?
A3: Moderately critical. Short, well-routed traces on a 2- or 4-layer board with solid reference planes are usually sufficient. Longer or poorly spaced traces can introduce noise that becomes audible at the amplifier and speaker. AIVON's DFM checks help ensure proper routing and stack-up.
Q4: How can I improve battery life on an ESP32 wearable that includes a speaker and Wi-Fi?
A4: Limit NeoPixel brightness, reduce audio volume, implement deep-sleep between interactions, and design a low-quiescent-current power path with proper under-voltage lockout. Measure actual current draw with the final enclosure closed to validate runtime.
Q5: What DFM items should I check before ordering a wearable AI PCB?
A5: Key items include I2S trace length and impedance, NeoPixel power pours and local decoupling, camera and microphone keep-out zones, battery connector and protection circuitry, via size and annular ring, surface finish (ENIG preferred), and component height versus enclosure constraints. AIVON's free DFM analysis automatically flags these issues.
I wanted to see if I could build a real AI wearable device, something that looks futuristic. So, I made this an AI pendant that can listen to me, talk back, and even see what I'm looking at.
Now, let me show you how I built it.
The device runs on a Xiao ESP32S3 Sense microcontroller. It has an onboard microphone and a camera. And the audio output is done using the MAX98357A amplifier paired with an 8 ohm 1 W speaker. This is 23 mm in diameter and a 12 LED Neopixel ring.
That's all the components we need for this device and a custom 3D printed enclosure.
I have printed the front panel using translucent PLA, but white also works, but it's going to look a little different. Let me show you the difference. So, this is the translucent PLA, and this is the white. The white gives a more cleaner look, but it won't let so much light outside. Again, it all depends on your preference. I like how the transparent PLA looks, so I'm going to keep that.
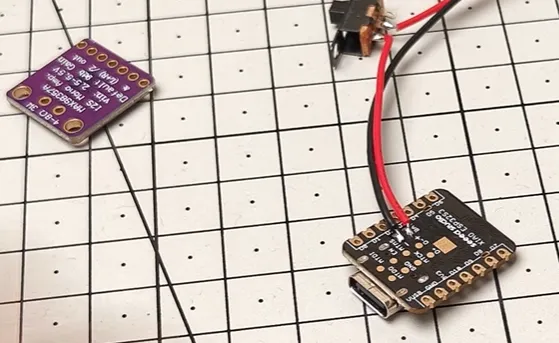
I'm going to go ahead and make all the connections. The connection diagram is linked in the description. If you just want to make this on a breadboard, you can just use the same connections to do that.
And if you need a custom PCB for a project, Aivon is a one-stop PCB manufacturing and assembly service. So you can go from design to fully assembled board without juggling multiple vendors. Ordering is also pretty straightforward. You can go to their website, upload your Gerber files, select your board specs like thickness, layers, and quantity, and you'll get an instant quote. From there, you can place your order, track the progress online, and they handle the rest, including fabrication and even assembly if needed. They support everything from quick prototypes to full production runs. If you want to try it out, I have left the links in the description. Go check them out.
Once the assembly is complete, I can flash the Xiaozhi firmware onto the board. Just connect it to your computer and head over to the techies flashing page and select the AI pendant firmware and flash it. That's it. You don't have to do anything else.
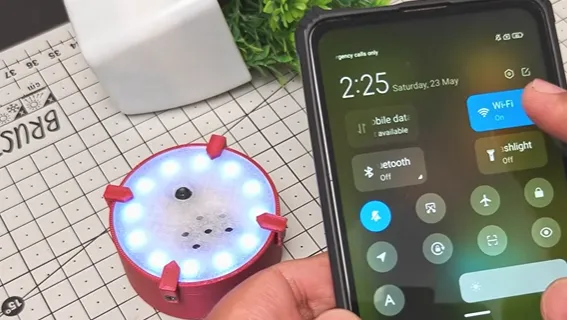
Once the flashing is complete, the device will go into Wi-Fi configuration mode. Using any smartphone, connect to the Xiaozhi Wi-Fi network and open 192.168.4.1. In this Wi-Fi configuration page, select the Wi-Fi network to connect to and give the password and connect to it. That's it. The device will be connected to the selected network.
Now, as a next step, it will give you a code. Please log into the control panel to add the device. Enter the verification code. Note this code. Head over to xiaozhi.me and go to the console page and add a device. Here you can enter the code for the device.
Next, click on configure role. This will open the settings for the device. Here you can change the name of the device and select the language. Scroll down to the bottom and select DeepSeek as the AI model. Now save the settings and restart the device.
And that's it. The configuration is done and you can start using your AI pendant.
Jarvis, how are you today? I'm doing great today. It's a lovely Saturday and the weather is quite pleasant. How about you?
I am good, thank you. Can you raise the volume to 100%? Volume has been raised to 100%.
Can you take a picture and tell me how many fingers I'm holding up? Sure. Let me take a photo to check. You're holding up two fingers.
Can you take a picture and tell me what this is? Sure. Let me take a photo to check. It's a potted artificial plant on a black adjustable stand used as a decorative ornament indoors.
How are you today? Good morning. It's a lovely Sunday, May 24th, 2026. The weather is pleasant.
Jarvis, take a picture and tell me what I'm holding. You're holding a small rectangular white breadboard, an electronic prototyping tool with a grid of connection holes often used for building circuits without soldering.
Jarvis, I have an ESP32 microcontroller here. Will this work with 5 volts? Great. The ESP32 microcontroller is compatible with 5V systems, but keep in mind that it operates on 3.3 volt logic. You can safely connect 5V signals to its input pins, but avoid connecting 5V output signals directly to the ESP32 to prevent damage.
And subscribe for more projects like this.





