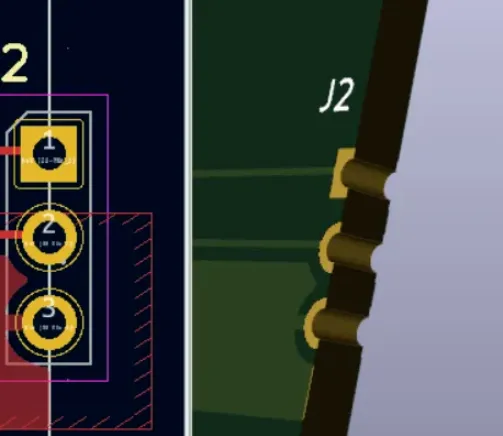
In surface-mount technology (SMT), two common assembly approaches are the red glue process and the solder paste process. Both aim to secure electronic components on a printed circuit board (PCB), yet they differ significantly in materials, equipment, process flow, and the types of products they suit. This article explains how KiCad's Adhesive layers relate to manufacturing, and provides a practical overview of the SMT red glue process—when and why it is used, how it is applied, and how it compares with solder paste and mechanical fixtures.
Adhesive Layers in KiCad
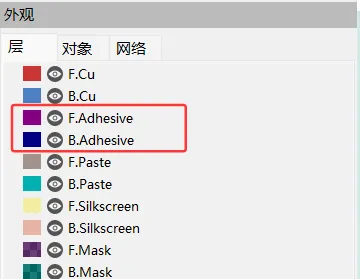
KiCad includes two layers that are less commonly seen in other EDA tools: F.Adhesive and B.Adhesive. These can be thought of as glue layers or dispensing layers. Their role is similar in concept to the Paste layers used to generate solder paste stencils, but instead of indicating paste deposition, they indicate where glue should be dispensed to temporarily fix components during assembly.
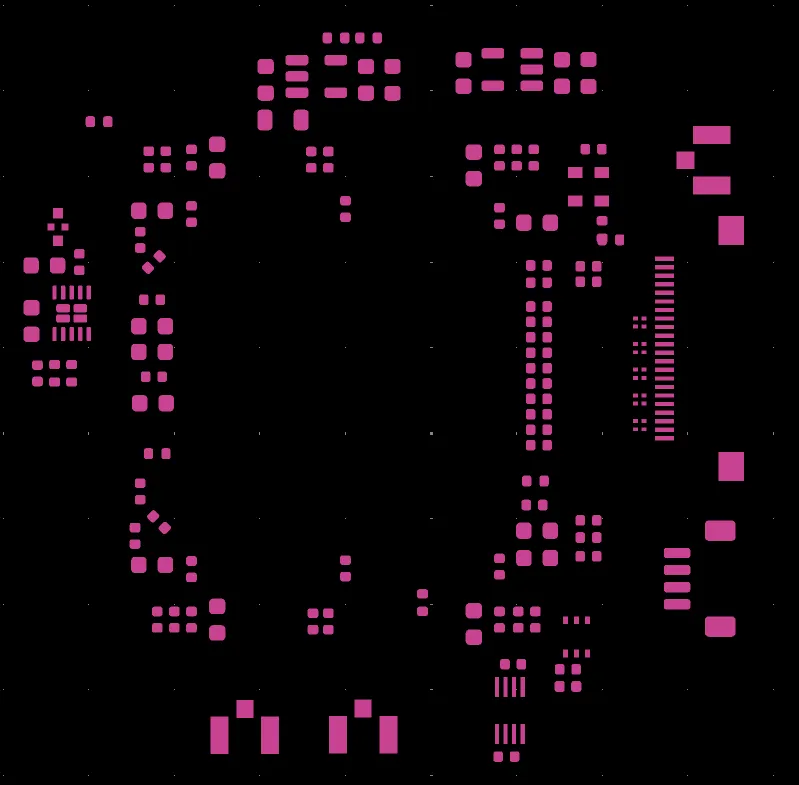
Paste layers are not part of the PCB's physical copper features; they are used to fabricate the stencil for printing solder paste. Accordingly, the pads of surface-mount devices (SMDs) appear on Paste layers, and those locations receive solder paste during printing.
The Adhesive layers serve a similar purpose, but they indicate positions for red glue (adhesive) deposition. Compared with solder paste, adhesive is less commonly used and is specific to particular SMT manufacturing flows. As a result, many design engineers may not be familiar with the practical details of the red glue process.
What Is the SMT Red Glue Process?
The term "red glue" refers to the use of a red epoxy adhesive deposited at specific locations on the PCB to temporarily secure SMD components. The goal is to prevent components from shifting, lifting, or falling off during subsequent soldering processes, especially when subjected to heat, vibration, or handling.
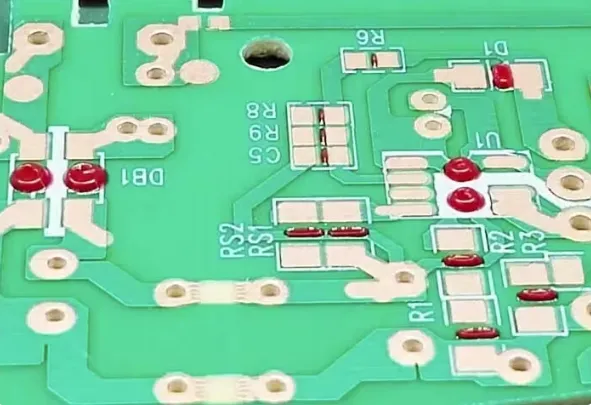
In typical production, red glue is applied—via a stencil-like printing operation or an automated dispenser—between pads or at the sides of a component. After placement, the assembly proceeds through a reflow oven. The adhesive cures at elevated temperature (around 150 °C), undergoing an irreversible chemical reaction that transforms it from a viscous paste into a solid. In hybrid flows that include wave soldering, the SMT side can then pass over the wave without special fixtures because the glued components remain fixed in position.
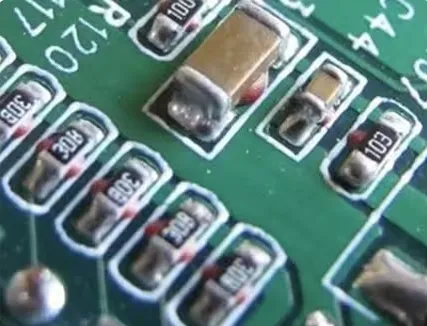
Unlike solder paste—which melts, wets the pads and terminations, and solidifies on cooling to form the electrical and mechanical joint—red glue's primary purpose is fixation. It provides mechanical support so that components stay in their intended positions during thermal cycles and mechanical stress. Electrical connectivity still relies on solder, either from a separate reflow step or wave soldering.
Common Application Scenarios
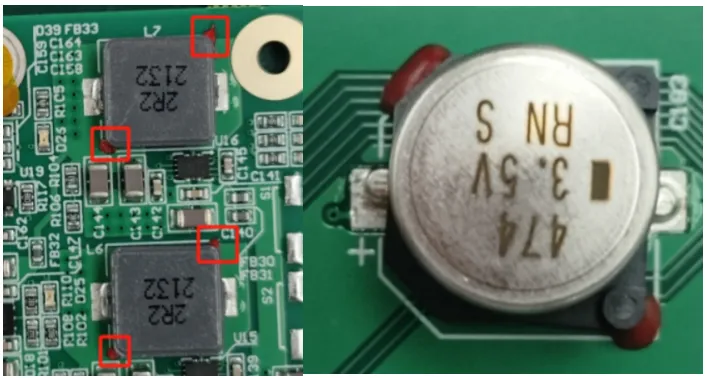
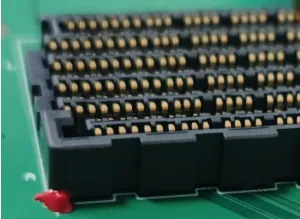
1) Heavy or Large SMDs on Double-Sided PCBs
This is the most common use case in production. Double-sided assemblies undergo two reflow cycles—one for the top side and one for the bottom side. During the second reflow, solder joints from the first side re-melt. If that previously soldered side faces downward, gravity can cause larger or heavier components to shift, float, or fall, leading to defects.
Solution: Apply red glue at the sides of such components. With adhesive in place, components are fixed before the second reflow and do not move when the solder re-melts.
Typical components: Large SMD capacitors and inductors, crystals, transformers, SMD sockets, and other relatively heavy SMDs.
2) Products Requiring High Vibration or Shock Robustness
Assemblies that experience strong vibration or shock during manufacturing or use may specify red glue to enhance mechanical retention of certain components. For example, during enclosure assembly by ultrasonic welding, vibration can loosen components like fuses. Adding red glue to such parts increases their mechanical stability.
3) PCB or Component Coplanarity Issues
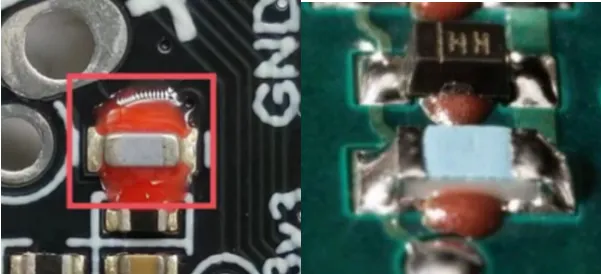
If the PCB or the underside of a component is not sufficiently flat, the component can shift or lift during reflow. In such cases, pre-fixing the part with red glue can improve yield. For example, poor coplanarity on an inductor may allow solder paste to wick under the body, and as the solder solidifies, it can push the component up, causing lifted leads or weak joints. Dispensing adhesive at the sides helps hold the component in place until soldering is complete.
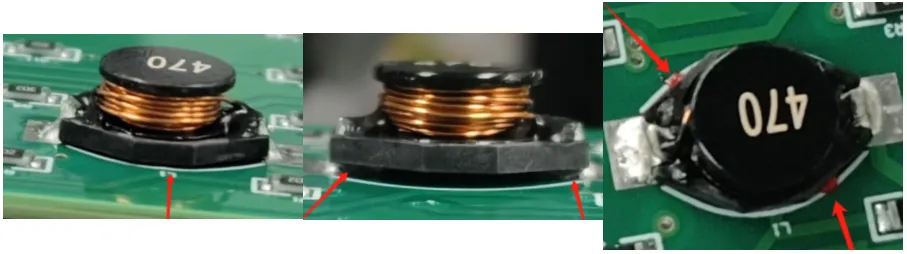
These are among the most common production scenarios where red glue is applied. Other situations may also benefit from adhesive, depending on component geometry, process constraints, and reliability requirements.
How to Apply Red Glue
For small batches, red glue is often applied manually. For higher volumes, either printing (also called "screening" or "squeegee" application) or automated dispensing is used to control the volume and placement consistency.
There are two mainstream methods to apply red glue accurately to a PCB:
-
Printing (screening) process: Similar to printing solder paste, a dedicated stencil with openings at the intended glue locations is used. A squeegee presses the adhesive through the stencil onto the PCB, depositing glue at precise positions. This method is fast and efficient, well-suited for high-volume production.
-
Dispensing process: An automated dispenser uses controlled air pressure and a fine needle to place discrete dots of red glue. The dot size, shape, and quantity are programmable, making this approach ideal for boards with diverse or irregular component types.
After application, the pick-and-place machine mounts the components. The adhesive's tack temporarily holds parts in place. The board then enters a curing oven (often the same reflow oven), where the adhesive cures at approximately 150 °C, forming a rigid bond that firmly secures the components. In hybrid flows, the SMT side can pass over a solder wave without fixtures because the adhesive prevents parts from detaching when exposed to the molten solder wave.
Note: When dispensing is used and a large number of glue dots are required, the adhesive step can become a throughput bottleneck in the SMT line.
Red Glue vs. Solder Paste
Red glue and solder paste serve different roles in SMT. The table below summarizes their key differences.
| Characteristic | Red Glue (Adhesive) | Solder Paste |
|---|---|---|
| Main composition | Epoxy resin, curing agent, fillers | Solder alloy powder, flux |
| Core function | Mechanical fixation to prevent drop or movement | Electrical connection and mechanical joint |
| Electrical conductivity | Non-conductive (insulating) | Conductive |
| Thermal process | Irreversible cure at elevated temperature | Melts at elevated temperature, solidifies on cooling (reversible) |
Red Glue or Fixtures: Which Is More Cost-Effective?
Because red glue's primary purpose is fixation, an obvious question is whether mechanical fixtures can replace it. Fixtures physically support or clamp components that might otherwise fall during soldering, achieving a similar effect.
Both approaches add cost, and the better choice depends primarily on production volume:
-
Small quantities and prototyping/pilot runs: Red glue is usually more cost-effective. Design changes are frequent, and investing in fixtures is less attractive at this stage.
-
Large quantities and long-term production: Custom fixtures are usually more cost-effective over time. The upfront non-recurring engineering (NRE) cost is amortized over the production volume, and fixtures can streamline the process once the design is stable.
In short, fixtures are best justified when the product is finalized and in medium to high-volume production. During early prototyping or trial runs, red glue provides flexibility at lower initial cost.
Conclusion
In modern, highly automated SMT and PCBA processes, red glue is one specialized step among many, yet its unique fixation capability solves practical problems in double-sided assembly and mixed process flows. When correctly specified, applied, and cured, adhesive provides a robust "red line of defense" that improves mechanical stability and reduces risk of defects caused by gravity, vibration, shock, or coplanarity issues.
Quick Q&A
Q1: When is red glue required in SMT assembly?
A1: When heavy components are mounted on both sides of a PCB and are prone to movement during reflow, red glue is required to hold them in place.
Q2: How does red glue increase SMT production cost?
A2: It adds material cost, dispensing and curing labor/time, and may extend the production cycle, especially if glue dispensing becomes a line bottleneck.