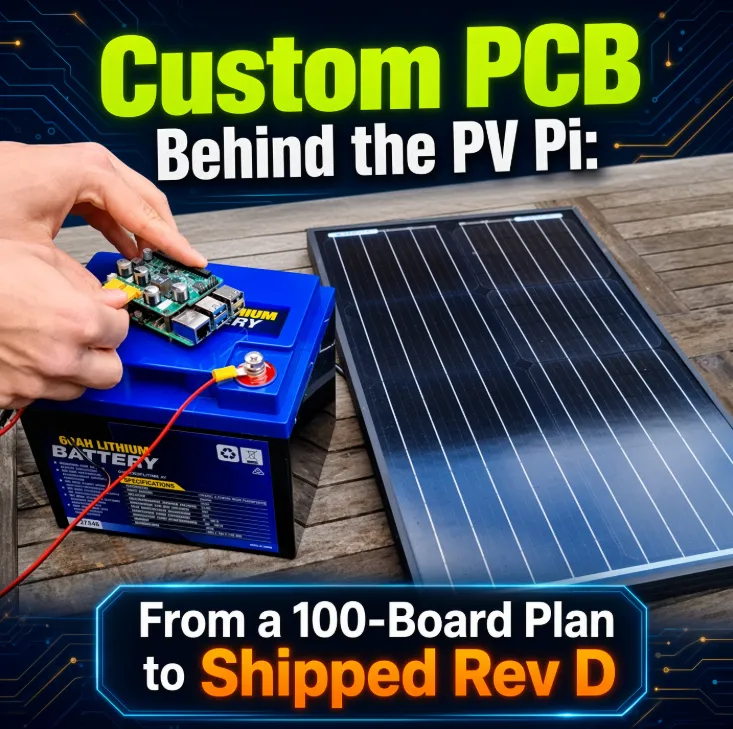
Five hundred solar HATs do not leave a Melbourne bench because the schematic looked tidy. In the video, Luke Ditria and Matt open the fixture. The PV Pi from AutoEcology is a Raspberry Pi HAT that takes a 12 V LiFePO4 pack and a solar panel on XT30s, runs true MPPT on a TI BQ25756, talks UART from an STM32F103, and back-feeds 5 V into the 40-pin header.

They wanted every board programmed, current-set resistors verified, rails measured, and a short charge cycle proven. That means a second PCB, a bed of nails, and a script near 23 seconds a board. Both boards live on the same 2-layer FR-4 habits: honest holes, matching mask, copper off the router, and pads a pogo can hit five hundred times.

What a 10 A Solar HAT Has to Prove in Under Half a Minute
Charge a 12 V LiFePO4 pack at up to 10 A. Accept a wide solar window. Hold a stout 5 V rail for a Pi and accessories. Keep time with an RTC, watchdog a locked SBC, and wake when the pack is healthy. UART on pins 14 and 15 carries voltage and current.
None of that is visible if the wrong sense resistor sets charge current. Matt ohms that part instead of building a 10 A station, then scans LED rails and feedback.

A Pico has a handful of ADC pins and they needed fifteen or twenty nodes, so two 16-channel muxes do the walking.

An ST-Link flashes the STM32 first.

USB-serial talks the same UART a customer will use. Supplies sit at 24 V, 20 V and 12.5 V, each limited to 1 A.

Luke hits enter. Resistances print, voltages print, 20 V comes up, the charger hunts through an MPPT cycle. Early timing used long settles. Five hundred and fifty boards will not wait 30 seconds. They trimmed waits until a comment could report about 23 seconds. One owner asked why there were so many test points, then praised the large SMD capacitors. Another wanted a 12 V pass-through and learned the HAT had simply run out of copper.
Two Boards, One 2-Layer Discipline
Neither board needs HDI. Current loops, sense accuracy, pogo pads, and whether CAM can tell plated holes from mounting holes are the story.
|
Parameter |
PV Pi product HAT |
Tester board |
|---|---|---|
|
Layers / material |
2-layer FR-4 |
2-layer FR-4 |
|
Thickness / copper |
1.6 mm class, heavier copper in power areas |
1.6 mm, 1 oz typical |
|
Finish |
Lead-free HASL or ENIG |
Lead-free HASL |
|
Form |
HAT outline, stackable 40-pin |
Probe breakout + Pico / mux |
|
Silicon |
BQ25756, STM32F103, bulk caps, XT30 |
Muxes, ADC path, programming header |
|
Access |
Dense backside test points |
Pogo landings and harness |
Test Points, Mux Channels and the Timing Tax
Coverage, contact, and time. Muxes add settling you cannot afford at 23 seconds. The set resistor is safer to measure than a 10 A pass. An unflashed STM32 fails UART in a way that looks like a solder defect. A 12 V pass-through would have been nice; the outline won.
Those constraints show up as test pads near the edge, mixed via covering, headers that must be plated, and silkscreen on a capacitor pad. That pile fills the 2-layer EQ queue. We keep asking whether the quote says tented vias while the mask leaves them open, whether ink sits on an SMD pad, whether copper is closer to the routed edge than about 0.2 mm (0.4 mm on a V-cut), and whether mounting holes are PTH or NPTH. Mixed answers put solder in a barrel you wanted tented, or leave a pogo pad with no copper after the router.
The panel twin is familiar. A 179 × 158.3 mm 2-layer job arrived as a customer 3×2 with V-cut, 4 mil pad-to-pad where 7–8 mil would have held a mask bridge, and features on the outline. After routing that is exposed copper and a ground a 10 A charger should not share with a probe. Spread the pads, pull features 0.3–0.5 mm off the edge, open the large PTH holes.
How AIVON Custom PCB Made a 500-Board Run Possible
Luke and Matt already had the product thinking: true MPPT, a current limit you can audit with a meter, UART that a Pi can speak, and a fixture that pretends to be a solar panel. What they needed next was copper that would not invent failures. A tester with lifted probe pads is a false-fail machine. A HAT with copper on the routed edge is a field return that looks like firmware. That is the job AIVON takes on a 2-layer FR-4 panel — not to redesign the PV Pi, but to make both the product board and the tester board boring enough that a 23-second script can be trusted.

On boards like these we start with the stackup nobody wants to overbuy. Two-layer FR-4, 1.6 mm class, lead-free HASL unless the first article argues for ENIG, heavier copper in the charger path so a 10 A peak does not live in a hairline trace. No impedance coupon. No buried vias. The value is registration, annular ring, and mask that matches the order note. Drill that lands in the 40-pin header and the XT30 shells is what lets the HAT seat on a Pi and still wet on the fixture. Open every PTH the assembler or the pogo needs. Tent only where the Gerber mask and the quote say the same thing. Pour enough power copper for those bulk capacitors people comment on, then stop that pour about 0.2 mm before a routed outline — 0.4 mm if the panel uses V-cut.
That last sentence is not theory. It is the same review we run when a 2-layer file hits CAM. Quote says tented, mask layer leaves windows; silkscreen sits on an SMD pad; a mounting hole never declares PTH or NPTH; copper kisses the outline. Those four mismatches are how HASL fills a barrel you wanted closed, how a pogo lands on ink instead of copper, and how a 5 V pour becomes a burr after the router. We ask the question before the panel ships, then edit the mask or the pour so the fixture sees the pad the designer drew.
Panelization is the other half of "custom" on a run this size. Five hundred HATs do not travel as loose singles; they travel as panels that have to survive HASL, flying probe, and a clean break. We saw the same mechanical fork on a 2-layer FR-4 order that measured 169 × 411.67 mm — case FR4-20260530-026. Sixty pieces, customer 1×4, V-groove, zero process edge. CAM stopped on two questions that look small on a drawing and expensive on a fixture plate: holes larger than 3 mm, and connection tabs with no stamp holes.
A drill and a contour router do not leave the same wall. Past about 3 mm the bit wanders, the hole goes oval, and a locating pin or a fat NPTH no longer matches the fixture. On that panel the customer confirmed the large non-plated holes should be precision-routed, and accepted a standard stamp-hole pattern — 0.8–1.0 mm on a 1.5–2.0 mm pitch — so the tabs would snap without micro-cracks. That is the conversation a PV Pi run needs before pogo pins ever touch copper. M2.5 HAT holes stay drilled. Anything that starts to look like a slot, a tool hole, or a fat NPTH on the tester panel gets named: drill or route. Tabs get mouse bites unless someone writes "solid tab, I will route it myself." Then board 400 matches board 1, and Matt's mux scan is measuring a resistor, not a ragged edge.

DFM checklist for a power HAT plus bed-of-nails tester
|
Check |
Why it shows up here |
Pass look |
|---|---|---|
|
Test pads ≥0.8–1.0 mm, ≥1.27 mm centres |
Pogo life over 500+ cycles |
Crown tip hits copper, not mask |
|
Copper ≥0.2 mm from routed outline (≥0.4 mm if V-cut) |
Edge connectors and probe rows |
No 5 V pour on the router path |
|
Pad-to-pad ≥7–8 mil where mask must bridge |
Dense sense and mux neighborhoods |
Bridge intact after develop |
|
Quote tenting matches the solder-mask layer |
HASL will fill an open via |
One rule in the fab notes |
|
PTH vs NPTH named; mask open on headers and XT30 |
Wetting and clear barrels |
Drill chart matches the pads |
|
Sense resistor on a two-wire pad |
10 A set point without a 10 A fixture |
Script fails a wrong value |
|
Ceramics on the BQ25756 and STM32 rails |
MPPT hunt does not look like a void |
Cap pad kisses the IC pin |
Steal the sense-resistor row first. A fixture that cannot see the part that sets 10 A will ship a polite brick or a hot one.
Ship the HAT, Keep the Fixture Honest
AutoEcology's story is a maker brief that grew a production problem and a 23-second cycle. Luke and Matt solved the interesting half. The 2-layer boards only have to be dull and correct.
If a HAT now has a purchase order attached, put the test pads on one side, name the holes, pull copper off the outline, and treat the tester PCB like the product. That is how five hundred off-grid Pis still leave the bench able to charge.
FAQ
Q1: How many test points does a Raspberry Pi power HAT need?
A1: Every rail you care about, the charge-current set resistor, programming pins, and UART. Single-sided pads, 0.8–1.0 mm, on a 1.27 mm or coarser grid.
Q2: Why ohm the current-set resistor instead of running 10 A?
A2: A full-current pass needs headroom you will not want on a 23-second station. The programming resistor is the defect that would have made that test dangerous.
Q3: Should tester vias be tented on HASL 2-layer FR-4?
A3: Pick one rule and put it in both the quote and the mask layer. Mixed files are how these orders sit in EQ.
Q4: How close can a test pad sit to the HAT outline?
A4: About 0.2 mm from a routed edge and about 0.4 mm from a V-cut.
Q5: What stackup is enough for a 10 A MPPT HAT?
A5: Two-layer FR-4, 1.6 mm, extra copper in the power path, short sense runs, ceramics on the charger pins.
Q6: How do you keep a Pico fixture honest after 500 cycles?
A6: Largest pogo the grid allows, pads open in the mask, and a contact check before a voltage check.