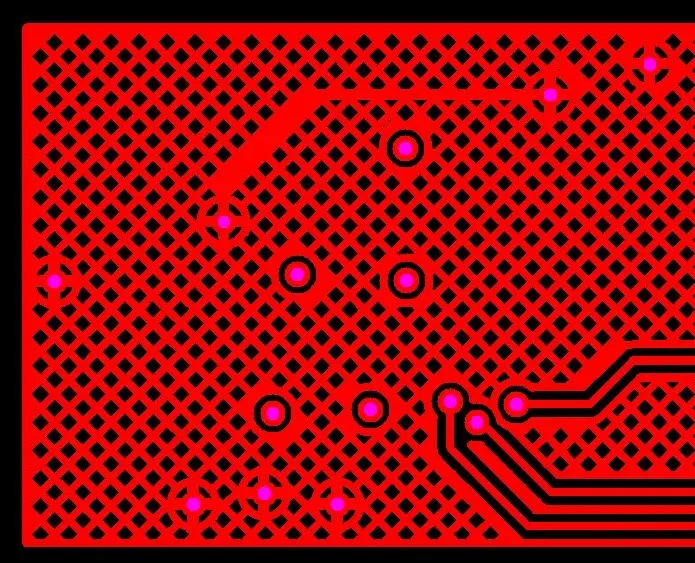






In electronic hardware development, PCB design is the critical link between schematic design and volume production. Design accuracy, compliance, and rigor directly determine product stability, manufacturability, and production yield. Many engineering rework issues are not caused by insufficient technical ability, but by deeply ingrained assumptions made during the design process.
Common examples include assuming that a design is acceptable as long as the software DRC report is clear, assuming that a conventional placement and routing approach is suitable for every application, assuming that all PCB manufacturers use the same process parameters, and assuming that standard component footprints do not require verification. These subjective assumptions often emerge as problems during prototype debugging, mass production, reliability testing, or EMC testing, resulting in board revisions, material waste, schedule delays, and EMC redesign work.
There is no universal experience-based formula for PCB design. Different power levels, signal types, operating frequencies, manufacturing processes, and mechanical requirements call for different design rules. A large number of PCB rework problems originate from the accumulation of small assumptions that were never objectively verified. The following sections summarize frequent assumption-driven errors throughout the PCB design process, their consequences, root causes, and standardized prevention methods.
1. Component Placement: Relying on Experience Instead of Application Requirements
PCB placement is the first major design step and one of the areas most vulnerable to assumption-driven mistakes. Engineers often reuse a placement template from an earlier project, reasoning that if it worked before, it can be used again. This approach may ignore the new product's power characteristics, signal behavior, mechanical constraints, and thermal requirements. Problems introduced during placement can affect routing, debugging, and production later in the process.

1.1 Assumption: A Decoupling Capacitor Only Needs to Be Near the IC
A common misconception is that placing a decoupling capacitor somewhere around an IC is sufficient to provide power filtering and suppress high-frequency interference. Capacitors are sometimes placed in any available space around the device or grouped along the edge of the board for visual consistency. In reality, decoupling performance is strongly related to electrical distance. Each additional millimeter of PCB trace can add approximately 1 nH of parasitic inductance, substantially reducing the capacitor's high-frequency decoupling effectiveness.
Engineering measurements indicate that when a 100 nF high-frequency decoupling capacitor is more than 5 mm from an IC power pin, its filtering performance can decrease significantly. At distances exceeding 10 mm, it may be largely ineffective for suppressing high-frequency power ripple. This type of error generally does not trigger a software DRC violation, making it difficult to detect. It can eventually cause random MCU resets, excessive ADC sampling noise, USB enumeration failures, and failed EMI tests.
In one Bluetooth speaker production project, the main controller's decoupling capacitors were placed too far from the device. Severe high-frequency interference caused repeated EMC test failures. The board ultimately required placement and routing changes and a complete revision, delaying the production schedule.
A standardized approach is to follow the principle of placing smaller, high-frequency capacitors as close as possible to the device pins. The 100 nF decoupling capacitor should be placed directly beside the IC power pin, with vias located close to the pads to minimize the current loop. A 10 μF bulk capacitor can be placed somewhat farther away to provide lower-frequency energy storage and filtering. Using both high- and low-frequency capacitors helps improve power stability.
1.2 Assumption: Rough Analog and Digital Partitioning Is Sufficient
Many engineers assume that simply grouping analog and digital components into separate areas constitutes adequate analog-digital isolation. In practice, high-frequency switching noise from digital circuits can couple into analog circuits through ground structures and signal traces. Rough partitioning, traces crossing between regions, and improperly divided ground planes can cause sensor drift, audio noise, and excessive voltage-measurement error.
In a typical industrial data-acquisition board, the analog and digital areas were only roughly separated. A digital clock trace crossed the analog region, and the isolation strategy was not implemented consistently. As a result, a 4–20 mA analog acquisition signal fluctuated by more than 5%, exceeding the required industrial accuracy. The ground structure, routing paths, and component placement all had to be revised.
A standardized solution is to define separate analog, digital, and power regions and maintain physical separation between them. Digital traces should not cross analog areas, and analog signals should use dedicated routing paths. Ground structures must be planned carefully, with the grounding strategy defined according to the circuit architecture rather than relying on a visually approximate partition.
1.3 Assumption: The Available Mechanical Space Is Obviously Sufficient
One of the most serious placement mistakes is assuming that there is enough mechanical clearance based only on a visual estimate. Engineers may fail to verify mechanical drawings or perform a 3D clearance check. External components such as connectors, buttons, USB receptacles, DC jacks, and potentiometers may have electrically correct pads and routing but still interfere with the enclosure, display, flex cable, or other mechanical parts.
These errors cannot normally be detected by DRC because they are mechanical rather than electrical. Common problems include incorrect header pitch, connector misalignment, component height exceeding the enclosure limit, and mounting holes interfering with traces or pads. In one consumer product project, the DC jack footprint was electrically correct, but the component housing interfered with the enclosure. The complete product could not be assembled and the PCB had to be redesigned.
Before placement, accurate mechanical DXF data should be imported. External connectors, tall components, and restricted areas must be aligned with the mechanical dimensions. After placement, a 3D preview should be used to verify component bodies, traces, holes, and enclosure interfaces rather than relying on visual estimates or previous experience.
2. Footprints and Pads: Reusing Templates Without Verifying Compatibility
Component footprints and pads form the foundation of PCB design and are a frequent source of rework. Engineers may directly use footprints from a software library, assuming that the library parameters are universally correct. However, many default footprints are generic templates and may not match the actual component. Differences in pad size, hole diameter, package dimensions, and pin assignments can lead to poor soldering, damaged components, or circuit malfunction.

2.1 Assumption: Components with the Same General Package Name Are Interchangeable
Many electronic components have similar external appearances but different package specifications. Examples include confusing SOP-8 with SOIC-8, using 0402 pads for an 0805 component, or using a 2.0 mm header footprint for a 2.54 mm header. Even footprints with similar names may differ in pin pitch, pad length, or pad width.
A typical failure occurs when a narrow-body SOP-8 device is assembled on a standard SOIC-8 footprint. Excessively wide pads can shift the leads and cause open solder joints. Similarly, a 2.0 mm pitch header cannot be inserted into holes intended for a 2.54 mm pitch header. Such errors can create widespread production defects and may require material scrapping and rework.
2.2 Assumption: Plated Through-Hole Diameters Are Universally Standard
When designing through-hole components, some engineers select conventional hole sizes such as 0.8 mm, 1.0 mm, or 1.2 mm without checking the actual lead diameter. Pin dimensions can vary between manufacturers and component series. A hole that is too small prevents insertion, while an oversized hole can reduce solder quality, allow the component to move, and weaken long-term reliability.
Mounting holes, locating holes, and mechanical holes also require appropriate tolerances. Failure to include those tolerances can prevent final assembly even when the PCB itself is electrically functional.
2.3 Assumption: Silkscreen Markings Do Not Affect Function
Silkscreen markings are important for production, debugging, and maintenance. Some engineers assume that unclear silkscreen, missing polarity marks, or disordered reference designators do not affect circuit operation. In practice, missing or ambiguous polarity markings on electrolytic capacitors, diodes, transistors, and power connectors can cause components to be installed backward, potentially damaging the board.
Reference designators placed over pads can also slow production repair and make component identification difficult, increasing labor costs. Polarity indicators and pin definitions should be clear, while silkscreen should be kept away from pads and vias.
For all critical and nonstandard components, footprint dimensions should be checked against the official datasheet. Generic templates should not be used without verification. Through-hole diameters should include approximately 0.1–0.2 mm of assembly clearance where appropriate. Polarity symbols and pin definitions must be clearly marked, and silkscreen should be arranged consistently.
3. Routing: Ignoring Electrical Characteristics and Manufacturing Rules
Routing is a core PCB design task and a major source of assumption-driven errors. Some engineers consider a design complete once all nets are connected and DRC reports no violations. This overlooks current-carrying capability, voltage drop, impedance control, differential routing, return-path integrity, and manufacturing limits. A prototype may appear to operate normally while the design fails during volume production, temperature testing, or EMC testing.
3.1 Assumption: Thin Traces Are Suitable for Every Application
A common assumption is that standard 0.1 mm or 0.15 mm traces can be used for all low-voltage routing. This fails to distinguish between power traces and signal traces and does not account for current capacity. For a fixed copper thickness, trace width directly affects current-carrying capability. With 1 oz copper, a 0.1 mm trace may carry only approximately 0.3 A under the stated design conditions. Using it for a 5 V, 2 A power path can cause heating, excessive voltage drop, insufficient voltage at the load, and eventual trace damage.
In one industrial control power-board rework case, all power paths were routed with 0.15 mm traces. Short-term prototype testing showed no obvious problem, but extended operation caused continuous heating, voltage droop, and equipment resets. The power traces had to be widened and the power loops optimized across the entire board.
3.2 Assumption: Differential Traces Only Need to Be Approximately Equal in Length
For high-speed differential interfaces such as CAN, USB, HDMI, and DDR, some engineers assume that traces are length matched if the difference is visually small. Differential signaling depends on the relative timing and electrical symmetry of the two traces. Length mismatch, impedance discontinuity, and asymmetric routing can cause reflections, crosstalk, and timing errors.
In one CAN design, the length difference between the two differential traces reached 87 mm. The target differential impedance was 100 Ω, but the measured value was only 82 Ω. The result was communication stalling, packet loss, and loss of reliable long-distance communication. In another DDR design, insufficient length matching caused excessive timing skew, resulting in random system freezes and resets.
These problems are not always visible during a visual review and may not be detected by basic software checks. High-speed differential pairs should be length matched according to the applicable design requirements, routed symmetrically and in parallel, and designed with controlled impedance.
3.3 Assumption: A Connected Ground Net Is Enough
Some designers overlook the importance of the return path and assume that the design is acceptable as long as the GND net is electrically connected. They may cut the ground plane, extend ground traces unnecessarily, or route signal traces across gaps in the reference plane.
Signal return current tends to follow the path with the lowest impedance. A fragmented ground plane or an excessively long return path increases parasitic inductance and high-frequency interference. This can raise circuit noise, reduce immunity, and degrade EMC performance. Ground planes should remain continuous wherever possible, and high-speed signal traces should not cross plane splits or gaps in their reference path.
4. Stackup and Impedance Design: Default Parameters Do Not Represent Every Fabricator
In multilayer PCB design, stackup structure, dielectric thickness, copper thickness, and dielectric constant are key parameters for impedance calculation. These values are frequently overlooked because engineers use default stackup data, dielectric constants, or copper weights in their design software without confirming the actual fabricator's process parameters.
Passing DRC or obtaining a satisfactory impedance simulation result does not guarantee that the manufactured PCB will meet the same target. Prepreg thickness, core parameters, and dielectric constants can vary between PCB manufacturers. If the manufacturer's stackup template is not obtained in advance and the impedance model is not calibrated to the actual process, high-speed traces may have excessive impedance deviation and produce timing or functional problems.
For multilayer boards, the design team should obtain the manufacturer's approved stackup before routing. The thickness of each core and prepreg layer, copper thickness, and dielectric constant should be defined and then imported into the design software for impedance calculation and rule setup. Default software parameters should not be treated as production data.
5. DFM and DFT: Passing Electrical Rules Does Not Guarantee Production Readiness
Design for manufacturability connects PCB design with volume production. Many rework problems result from focusing only on circuit connectivity while assuming that a design satisfying software rules can automatically be manufactured. Fabrication limits, soldering processes, solder-mask requirements, and production yield must also be considered.
5.1 Assumption: Trace and Via Rules Are Sufficient Without Checking Solder-Mask Bridges
Solder-mask bridges are a common production concern. If adjacent pads are too close or solder-mask openings are too dense, the manufacturer may not be able to maintain the required mask web. This can lead to solder bridging, insufficient soldering, or short circuits.
A design may satisfy basic copper clearance rules while still violating the manufacturer's minimum solder-mask bridge capability. The board may then be placed on hold for correction, delaying production. Pad spacing and solder-mask openings should therefore be reviewed against the fabricator's process rules.
5.2 Assumption: The Manufacturer Will Automatically Select Special Processes
Special requirements such as via plugging, immersion-gold finishing, heavy copper, single-sided processing, controlled impedance, or restrictions on panelization do not automatically appear in the design files. They must be clearly specified in the fabrication documentation.
If a via requires plugging but the requirement is not documented, solder may collect in the via and create hidden defects or shorts. If a board intended for single-sided processing is opened on both sides, assembly may be affected. If impedance control is required but not identified, production parameters may not be set appropriately. Special process requirements must be explicitly documented and confirmed with the manufacturer.
5.3 Assumption: Prototype Debugging Can Replace Production Test Access
Some engineers assume that flying wires are sufficient for prototype testing and fail to reserve test points. This approach may work for a small number of prototypes but does not support automated production testing.
If key power rails, signals, and networks lack accessible test points, volume production may not be able to use ICT or ATE effectively. Manual inspection is slower and may fail to detect intermittent or hidden faults. Test-point planning should therefore be included during PCB design rather than added after the board is released.
6. Summary of Common PCB Design Assumptions
| Category | Typical Assumption | Rework Consequence | Root Cause | Prevention | Risk |
|---|---|---|---|---|---|
| Component placement | A decoupling capacitor only needs to be near the IC. | Excessive high-frequency power noise, random MCU resets, failed EMC testing, and high sampling noise. | Parasitic inductance and high-frequency electrical distance are ignored. | Place the 100 nF capacitor directly beside the power pin, place vias close to the pads, and combine local and bulk capacitors. | Very high |
| Approximate analog-digital partitioning is sufficient. | Analog sampling drift, audio noise, inadequate measurement accuracy, and poor immunity. | Digital-noise coupling, crossing traces, and improper ground-plane partitioning are overlooked. | Separate analog, digital, and power regions; prevent digital traces from crossing analog areas; and define the grounding strategy carefully. | High | |
| Mechanical space is obviously sufficient and does not require 3D verification. | Component-to-enclosure interference, assembly failure, connector misalignment, and complete board revision. | Mechanical drawings are not checked and no 3D verification process is used. | Import accurate DXF data, align components to mechanical dimensions, and perform mandatory 3D clearance verification. | Medium to high | |
| Footprints and pads | Generic software footprints can be used without checking the component datasheet. | Open solder joints, component shift, assembly failure, mass soldering defects, and material scrapping. | Default library parameters are assumed to be universal. | Verify critical footprints against the datasheet and create accurate footprints for nonstandard components. | Very high |
| Through-hole diameters are standardized and require no assembly tolerance. | Leads cannot be inserted, solder joints are unreliable, components move, and contact degrades over time. | Lead-size variation between manufacturers and the need for tolerance are ignored. | Set the hole diameter approximately 0.1–0.2 mm larger than the lead diameter where appropriate and verify hole positioning. | High | |
| Unclear silkscreen and missing polarity marks do not affect circuit function. | Components are installed backward, boards may be damaged, and production or repair becomes difficult. | The production and maintenance role of silkscreen is underestimated. | Clearly mark polarity and pin definitions, keep silkscreen away from pads and vias, and use consistent labeling. | High | |
| Routing | Thin traces are suitable for all applications, with no need to calculate current or voltage drop. | Power-trace heating, voltage drop, system resets, and burned traces. | The relationship between trace width, copper thickness, and current capacity is ignored. | Calculate power-trace width according to current requirements, increase width for high-current paths, and shorten power loops. | High |
| Differential traces only need to be approximately equal in length. | Communication errors, packet loss, timing problems, DDR crashes, and impedance nonconformance. | Differential signaling principles and the importance of length and impedance matching are underestimated. | Match high-speed differential pairs according to their requirements, control impedance deviation, and route the pair symmetrically. | Medium to high | |
| A connected ground net is sufficient; the return path does not need to be continuous. | Excessive circuit noise, EMC radiation, and weak immunity. | Return-path effects are ignored and the ground plane is cut arbitrarily. | Maintain a continuous reference plane, avoid routing across plane splits, and optimize the return path. | Very high | |
| Stackup and impedance | Default software stackup parameters are compliant and do not need to be confirmed with the fabricator. | Impedance nonconformance, abnormal high-speed transmission, and unstable volume-production performance. | Simulation parameters are confused with actual manufacturing parameters. | Obtain the fabricator's stackup template before design and calibrate dielectric, copper-thickness, and impedance parameters. | Medium |
| DFM and production process | A clear DRC report means the board is ready for volume production, with no need to check solder-mask bridges. | Fabrication holds, solder bridging, shorts, poor soldering, and low production yield. | Fabrication limits are ignored and the software DRC does not include every solder-mask process rule. | Follow the manufacturer's minimum solder-mask bridge requirements and optimize pad spacing. | High |
| The manufacturer will automatically select and implement special processes. | Process nonconformance, solder trapped in vias, uncontrolled impedance, and failure to meet product requirements. | Special process requirements are not documented. | Clearly specify via plugging, heavy copper, impedance control, single-sided processing, and other special requirements. | High | |
| Prototype flying-wire tests eliminate the need for test points. | Automated production testing is impossible, hidden faults are difficult to identify, and field failure rates increase. | Prototype debugging is prioritized while production testability is overlooked. | Reserve test points for key power rails, signals, and networks to support ICT or ATE testing. | Medium to high |
7. Conclusion: Replace Assumptions with a Standardized Design Process
Across the complete PCB design process, the root cause of assumption-driven errors is usually the same: experience takes precedence over standards, subjective judgment replaces objective verification, and prototype thinking overlooks production requirements. Engineers may become overly dependent on previous projects and repeat established habits without considering differences in product requirements, application conditions, or manufacturing processes.
Software DRC can identify basic problems such as shorts, opens, and certain width or clearance violations. It cannot automatically identify every manufacturing constraint, electrical-performance issue, mechanical interference, impedance problem, or volume-production reliability risk. A qualified PCB design must satisfy six requirements simultaneously: circuit functionality, electrical performance, mechanical compatibility, manufacturing process requirements, production reliability, and applicable compliance requirements.
To reduce rework, PCB development should follow a standardized and traceable process. Placement should be verified against mechanical drawings rather than judged by eye. Footprints should be calibrated against datasheets rather than copied directly from generic libraries. Routing should be based on current, impedance, timing, and return-path calculations rather than experience alone. Special manufacturing requirements should be explicitly documented, and the design should address DFM and DFT requirements in addition to prototype functionality.
The core value of PCB design is not routing speed or visual neatness, but the rigor used to eliminate hidden risks. Every unverified assumption can become a future rework trigger, while every carefully checked design detail contributes to stable volume production. Respecting design rules, reducing dependence on unsupported assumptions, and implementing verification throughout the workflow are essential to achieving reliable first-pass PCB designs with minimal rework.